UIs for Orchestrators
After the User Interface template was created and shared by an UI Developer you can now integrate the UI to a specific backend application as UI Orchestrator.
This step-by-step guide explains how an UI Orchestrator can attach, configure and provide an UI for a specific backend application:
Attach UI template to Backend Application
Depending on how the UI template you want to use was provided you have to to different steps.
If the UI template was already uploaded and released by the UI Developer you just need to attach it to your backend application (Case 1).
If it was provided as ZIP package you are also able to deploy this UI template to other systems (Case 2).
Case 1: UI template is already released by UI Developer
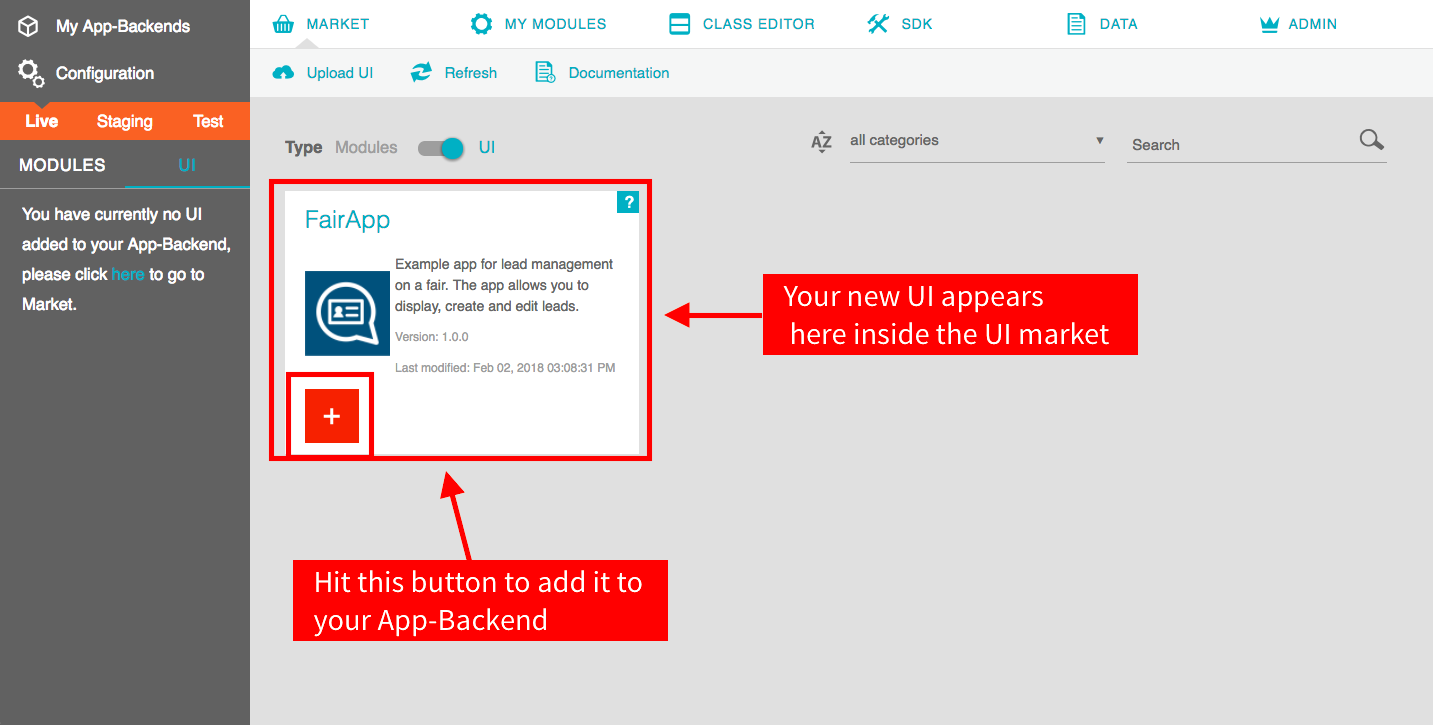
In order to attach an UI template created and released by an UI Developer you just need to open the UI Market via Dashboard and hit the plus-button.
Keep in mind that this only works, if the needed modules are active within your backend application.
Case 2: UI template was provided as ZIP by UI Developer
If the UI Developer provides his UI template as ZIP package and you want to deploy it to another system, you first need to upload it to your backend application before you can attach it:
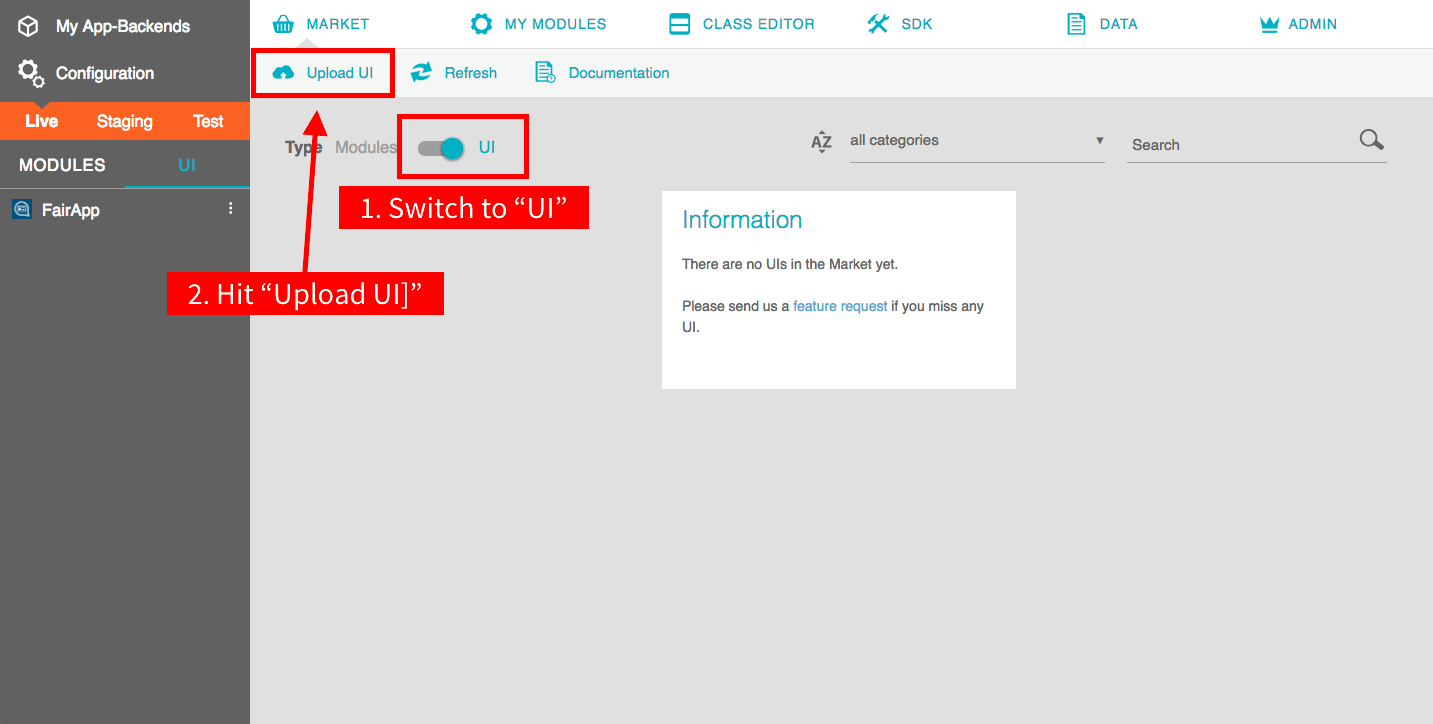
1.) Switch the type within the ApiOmat Market to [UI] and click [Upload UI]:
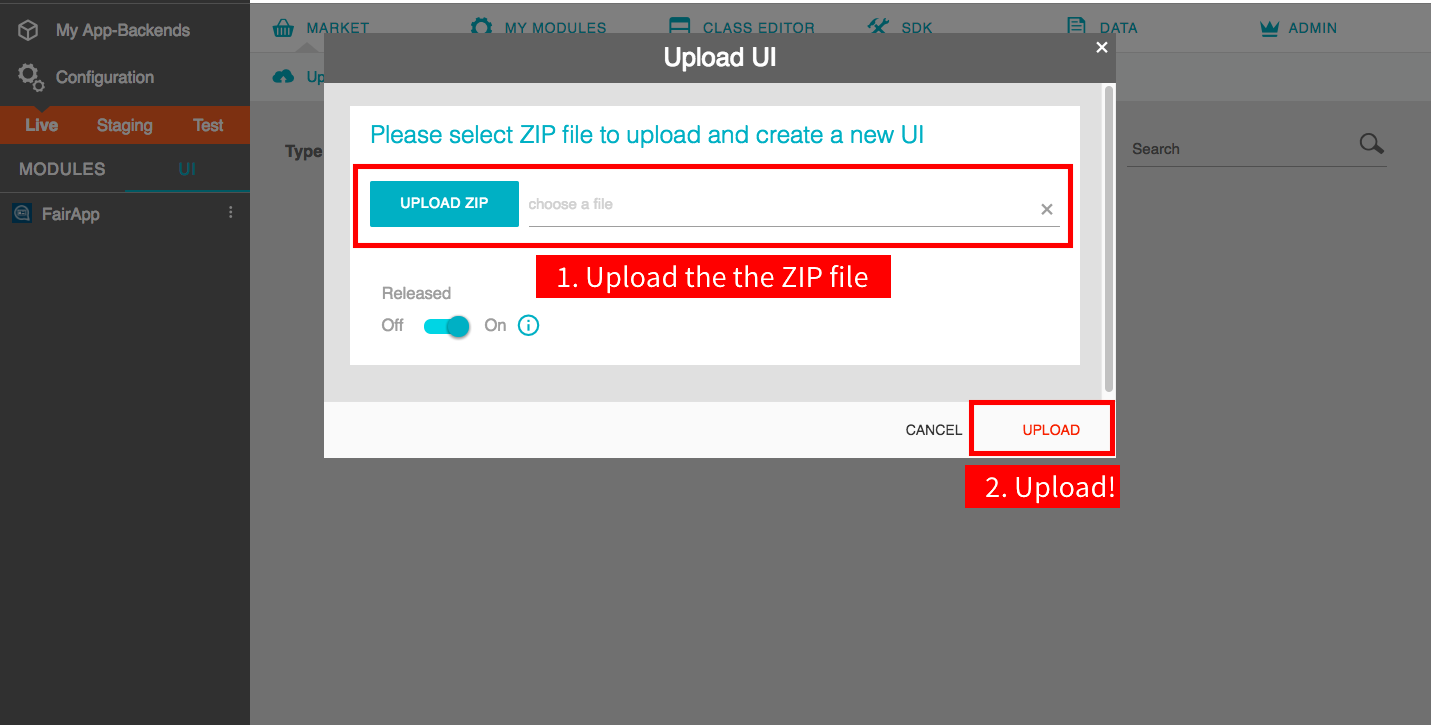
Choose the provided UI ZIP package within the next dialog and upload it:
The UI ZIP package should automatically be attached to your current backend application after successful UI upload (if not, do the step from case 1).
Configure UI in Backend Application
The UI Developer may defined some UI configuration values within his UI template (see detailled information on UIs for Developer > UserInterface Configurations).
As UI Orchestrator you are able to set those custom UI configuration values within your backend application.
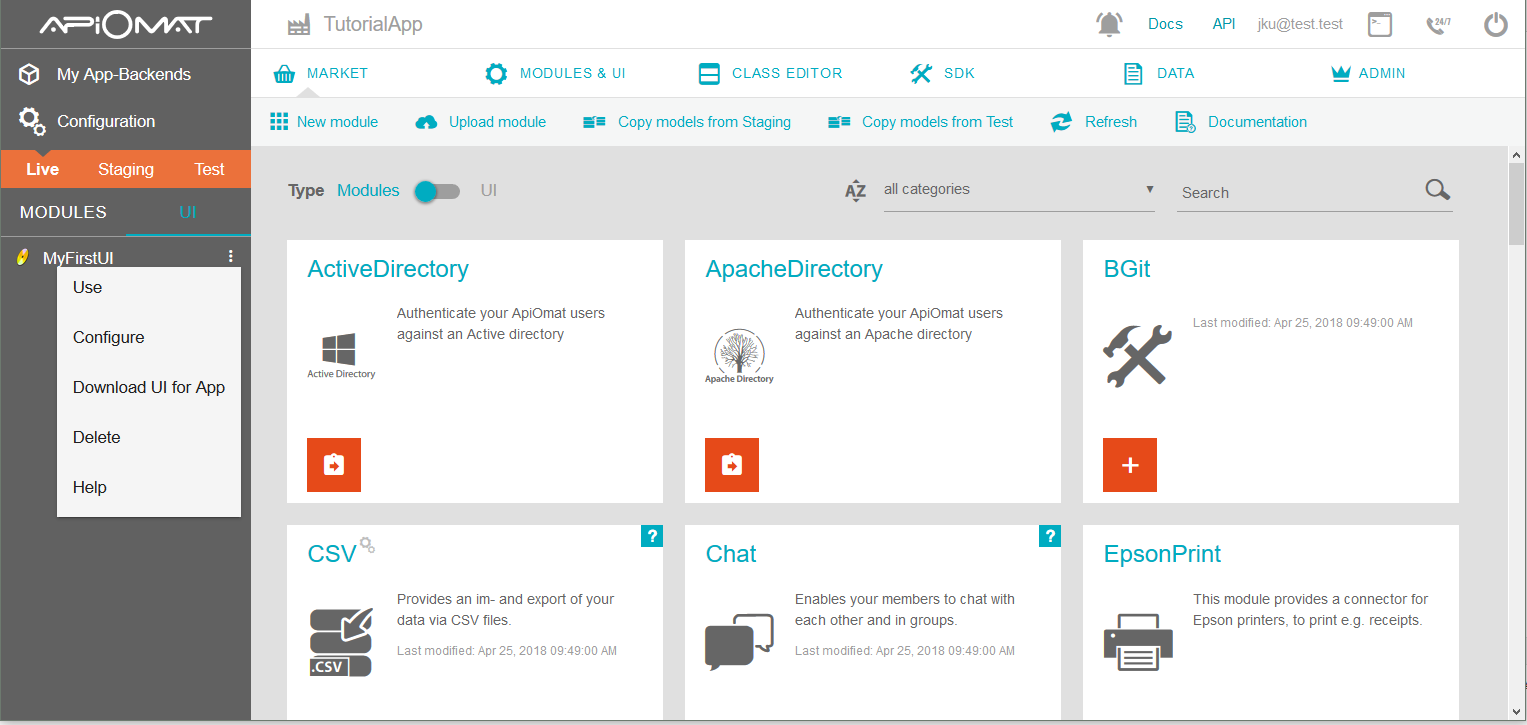
1.) Go to your Dashboard UI navigation bar on the left side to locate the attached UI you want to configure
2.) Open the UI configuration dialog by pressing on the three menu dots beside the UI entry and then [configure]
3.) Fill in the configuration values you want to set and confirm by pressing [Save]
Provide Backend specific UI
The backend specific UI that is generated from backend application data and from UI template can be retrieved by calling the following REST end point:
curl -X GET --header 'Accept: application/octet-stream' --header 'X-apiomat-system: LIVE' --header 'If-None-Match: false' --header 'X-apiomat-apikey: 3235046049793526820' --header 'Authorization: Basic <INSERT_AUTH_STRING>' 'http://localhost:8080/yambas/rest/customers/<ACCOUNT_NAME/apps/<APP_NAME>/ui/<UI_NAME>/v/<UI_VERSION>?usedSystem=<SYSTEM>'Visit Apidocs and search for the REST end point that creates and returns the user interface zip for the given application to see more details.
To download the backend specific UI from Dashboard you need to open the menu of the UI you want to download in navigation bar and hit [Download UI for App]: