Backbone.js Quickstart
In this tutorial you will learn how to:
-
set up a backend with the custom class “Task”
-
deploy a backend
-
create a simple project with the generated Backbone.js based SDK
-
set up the connection to the backend and create a user
-
take a look at the data in your backend
-
create tasks and store them within the backend
-
query data from the backend
1. Log into your account. If you don't have an account, contact the administrator of the ApiOmat instance from your company.
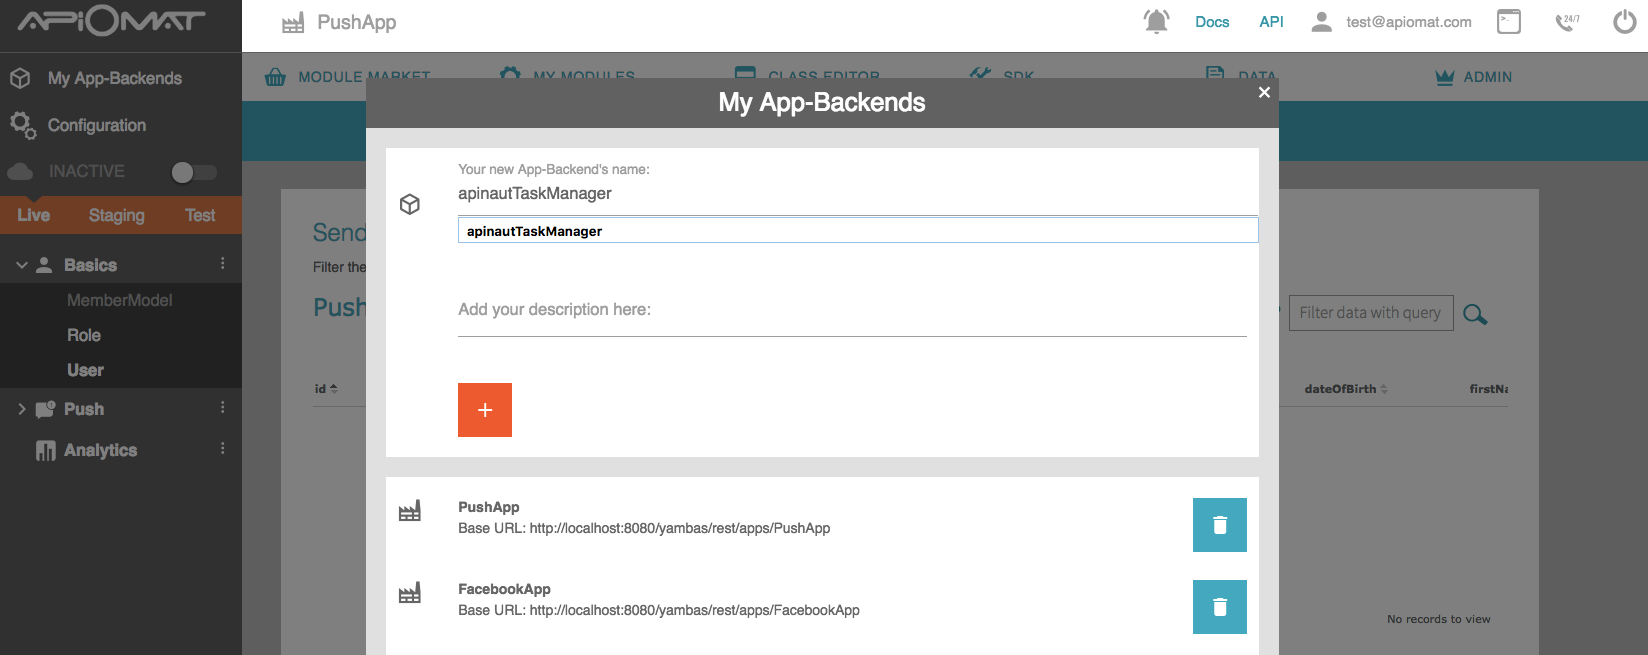
2. Now enter a unique name for your application e.g. “YourNameTaskManager”. Since it is possible to share applications, their names in the system must be unique.
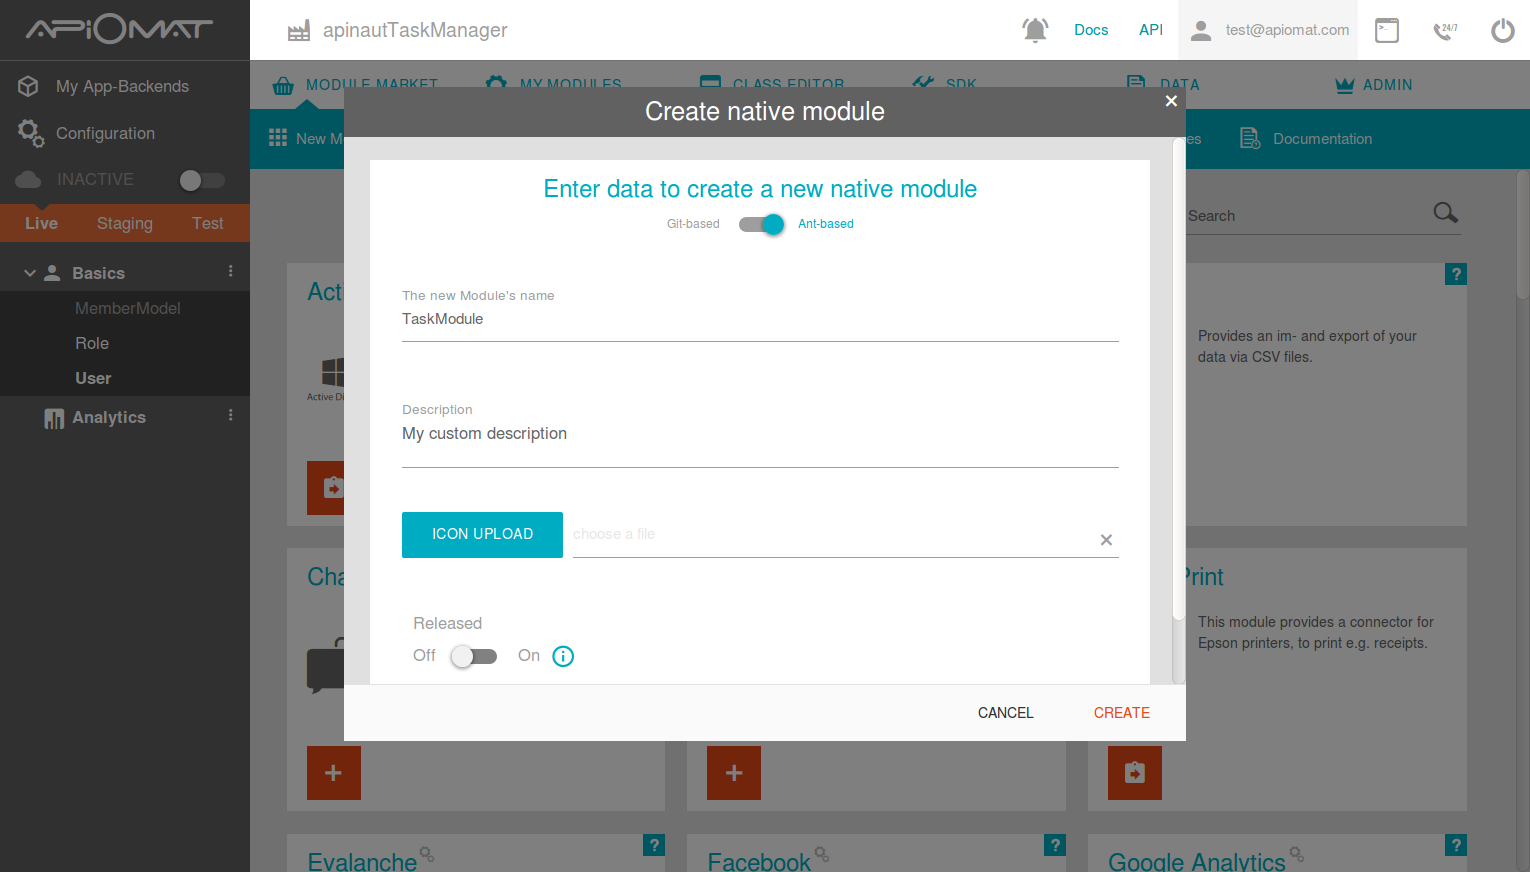
3. Create a new module by going to the Module Market and clicking on "New Module" in the submenu. Choose a name and description and click "CREATE".
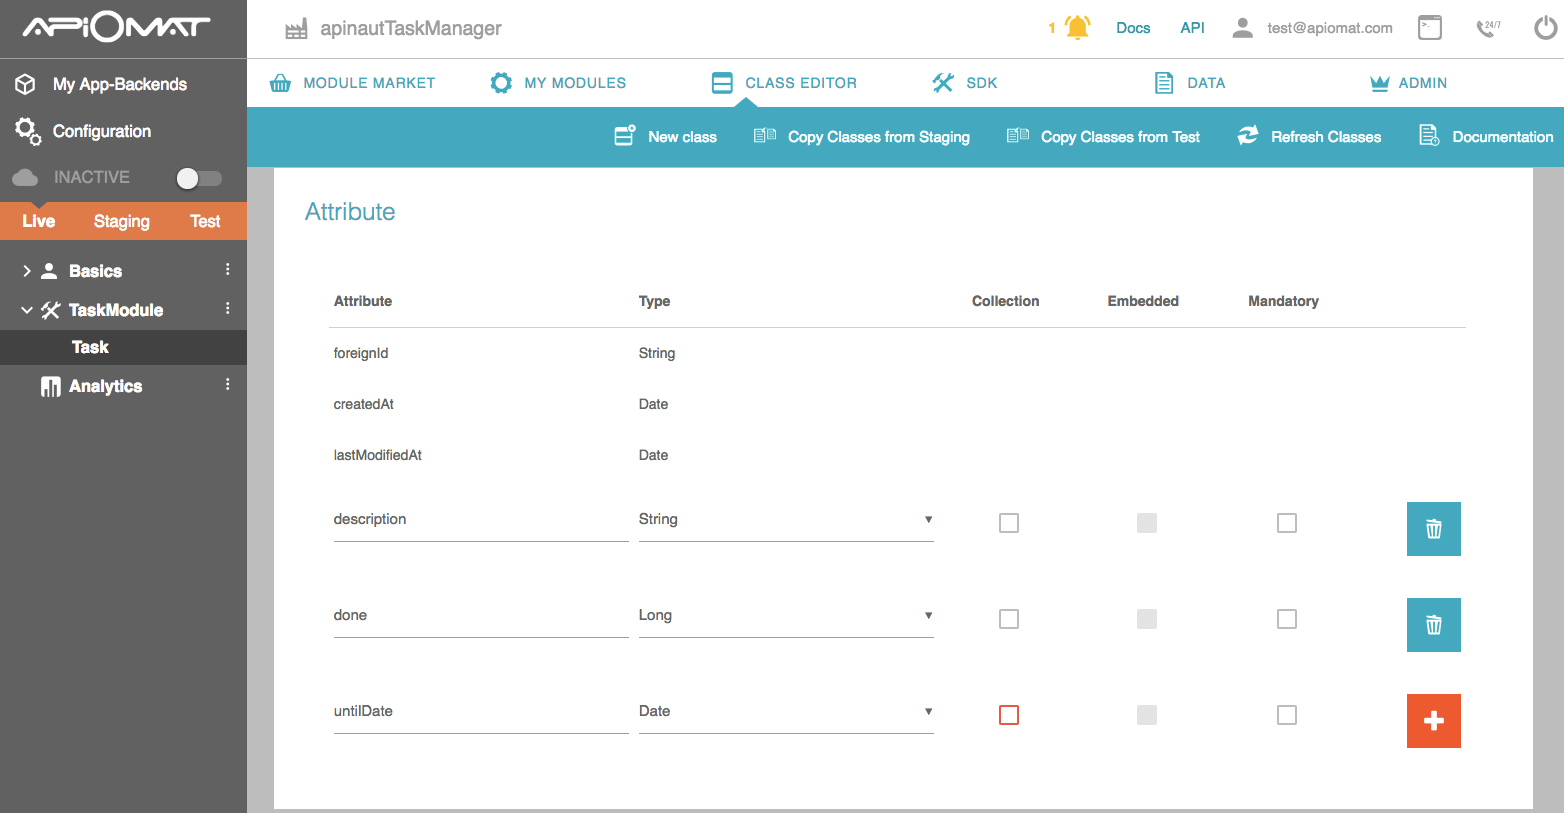
4. Now, after you have succesfully created your application (we are also going to call it "backend" within this document) and a new module, go to the „Class Editor“- Tab to create a class in our backend. You will be asked for a class name after clicking New class. Just name the first class "Task". Scroll down to the attributes and add a String “description”, a Long “done” and a Date “untilDate”.
5. Now deploy your backend by clicking the Deploy button.
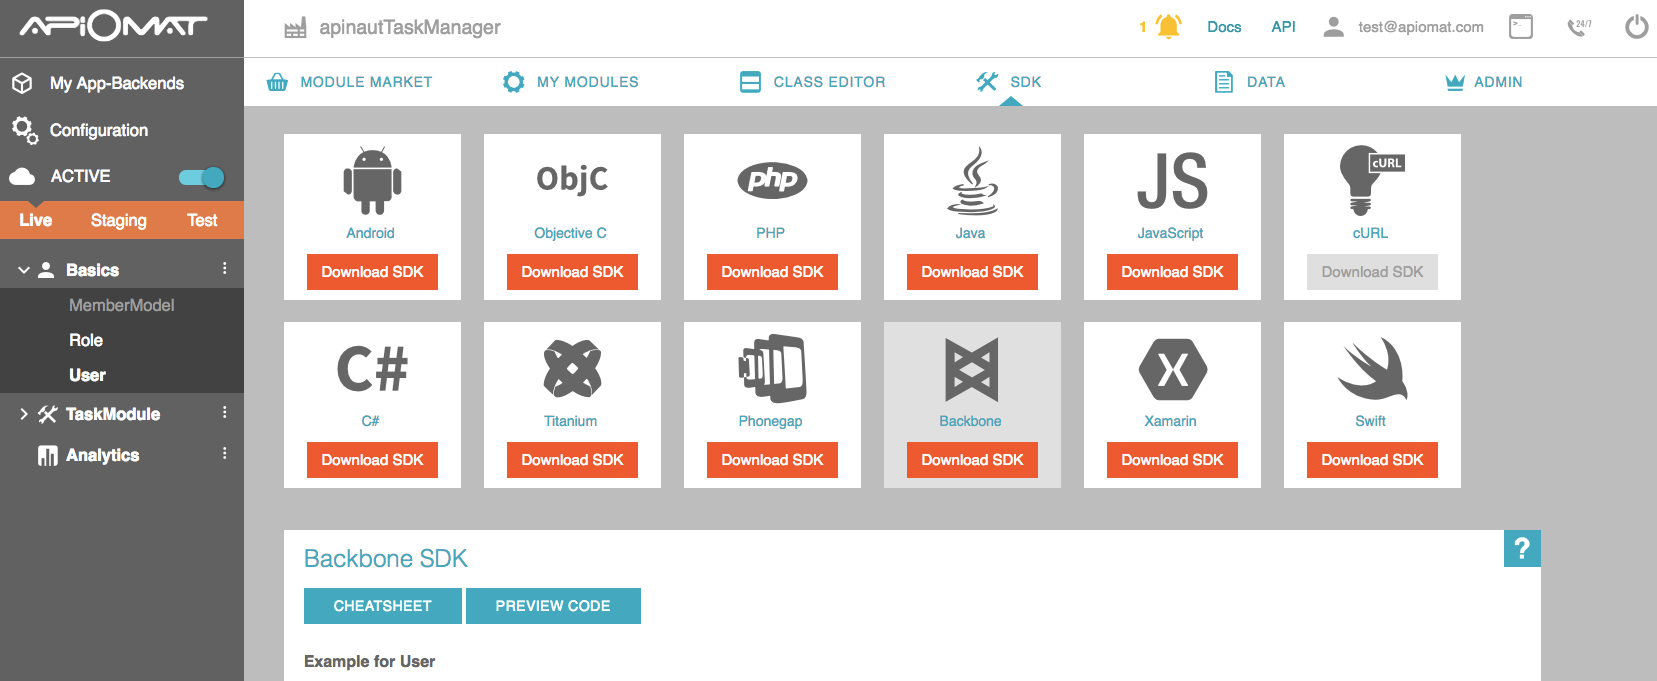
6. Go to SDK tab and download the Backbone.js SDK by clicking the Download SDK button. You will get a zip file with your generated classes and all necessary libraries.
7. Go to your favourite IDE and create a new JavaScript project. First, create a file called index.html and insert the code below:
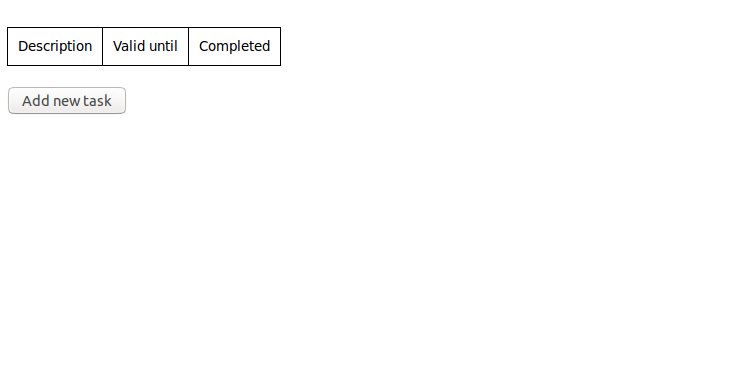
<!DOCTYPE html PUBLIC "-//W3C//DTD HTML 4.01 Transitional//EN" "http://www.w3.org/TR/html4/loose.dtd"><html> <head> <meta http-equiv="Content-Type" content="text/html; charset=UTF-8" /> <style> #status { display: inline-block; } #tasks { border-collapse: collapse; margin-top: 20px; margin-bottom: 20px; } #tasks td, #tasks th { border: 1px solid black; font-family: sans-serif; font-size: 10pt; font-weight: normal; padding: 10px; } </style> <script> function signup() { } function addNewTask() { } function addToTable(task) { } function loadTasks() { } </script> <title>Apiomat backbone Test</title> </head> <body onload="signup()"> <div id="status"></div> <table id="tasks"> <tr> <th>Description</th> <th>Valid until</th> <th>Completed</th> </tr> </table> <input type="button" id="addTask" onclick="addNewTask()" value="Add new task" /> </body></html>
The empty javascript functions at the end of the file will be defined within the next steps.
If you open your index.html in a browser, you should see an empty table and a button Add new task above.
8. Unzip the downloaded SDK and add only the files package.json and apiomat.js (found under com/apiomat) to your project structure. In case there's already a package.json, only add the listed dependencies to your own file. Afterwards open a terminal and navigate to your project's folder and run
npm installTherefore Node.js needs to be installed. In case you do not want to use npm (the package manager that comes along with Node.js), you can add the following dependencies manually on your own:
-
jQuery FileUpload Plugin (only the files vendor/jquery.ui.widget.js and jquery.fileupload.js are needed)
Just add the files to your project and change the paths in the following code box according to the files' location.
9. Add the apiomat.js to your index page by adding the following line to your index.html into the head tag:
<script type="text/javascript" charset="utf-8" src="node_modules/jquery/dist/jquery.min.js"></script><script type="text/javascript" charset="utf-8" src="node_modules/underscore/underscore-min.js"></script><script type="text/javascript" charset="utf-8" src="node_modules/backbone/backbone-min.js"></script><script type="text/javascript" charset="utf-8" src="node_modules/blueimp-file-upload/js/vendor/jquery.ui.widget.js"></script><script type="text/javascript" charset="utf-8" src="node_modules/blueimp-file-upload/js/jquery.fileupload.js"></script><script type="text/javascript" charset="utf-8" src="node_modules/jquery-binarytransport/jquery.binarytransport.js"></script> <script type="text/javascript" charset="utf-8" src="apiomat.js"></script>
10. Now we are ready to go. We’ll configure the authentication service and the user within the function signup. Please note that we have to create an apiomat object as shown in the first line.
Add the user credentials by replacing <username> and <password> by your own.
Please note that we're going to call the signup function at the onload event of the html page.
var apiomat = new Apiomat();function signup() { var userName = "myuserNam4235e"; var password = "myPassword"; var user = apiomat.User({userName, password}); user.set("userName", userName); user.set("password", password); apiomat.authenticationService().configureWithCredentials(userName, password); apiomat.Users().fetch({ search: "userName==\"" + userName + "\"", success: function(model, response, options) { if(model.length != 0) { $("#status").text("Succefully logged in"); loadTasks(); } else { user.save({ success: function(model, response, options) { $("#status").text("No user there. Will create new one..."); }, error: function(model, response, options) { //error while saving user } }); } }, error: function(model, response, options) { $("#status").text("No user there. Will create new one..."); user.save({ success: function(model, response, options) { //user was successfully saved }, error: function(model, response, options) { //error while saving user } }); } });}
11. Now your backend and your connection are working. Run the application and have a look in the data tab of your dashboard to see the created user.
12. Okay, let’s go further. Now we will add the logic for the addTask button. By clicking the button, we’re saving a new task on the server. If the request was successful, it will also add the task to the top of our html table by calling the function addToTable
Note that we added an onclick event for the button which calls addNewTask().
<!DOCTYPE html PUBLIC "-//W3C//DTD HTML 4.01 Transitional//EN" "http://www.w3.org/TR/html4/loose.dtd"><html> <head> <meta http-equiv="Content-Type" content="text/html; charset=UTF-8" /> <style> #status { display: inline-block; } #tasks { border-collapse: collapse; margin-top: 20px; margin-bottom: 20px; } #tasks td, #tasks th { border: 1px solid black; font-family: sans-serif; font-size: 10pt; font-weight: normal; padding: 10px; } </style> <script type="text/javascript" charset="utf-8" src="node_modules/jquery/dist/jquery.min.js"></script> <script type="text/javascript" charset="utf-8" src="node_modules/underscore/underscore-min.js"></script> <script type="text/javascript" charset="utf-8" src="node_modules/backbone/backbone-min.js"></script> <script type="text/javascript" charset="utf-8" src="node_modules/blueimp-file-upload/js/vendor/jquery.ui.widget.js"></script> <script type="text/javascript" charset="utf-8" src="node_modules/blueimp-file-upload/js/jquery.fileupload.js"></script> <script type="text/javascript" charset="utf-8" src="node_modules/jquery-binarytransport/jquery.binarytransport.js"></script> <script type="text/javascript" charset="utf-8" src="apiomat.js"></script> <script> var apiomat = new Apiomat(); function signup() { var userName = "myuserNam4235e"; var password = "myPassword"; var user = apiomat.User({userName, password}); user.set("userName", userName); user.set("password", password); apiomat.authenticationService().configureWithCredentials(userName, password); apiomat.Users().fetch({ search: "userName==\"" + userName + "\"", success: function(model, response, options) { if(model.length != 0) { $("#status").text("Succefully logged in"); loadTasks(); } else { user.save({ success: function(model, response, options) { $("#status").text("No user there. Will create new one..."); }, error: function(model, response, options) { //error while saving user } }); } }, error: function(model, response, options) { $("#status").text("No user there. Will create new one..."); user.save({ success: function(model, response, options) { //user was successfully saved loadTasks(); }, error: function(model, response, options) { //error while saving user } }); } }); } function addNewTask() { /* create a new task object */ var task = Apiomat.Task(); task.set("description", "A new task"); task.set("done", 0); /* save the task object and on callback add to html table */ task.save({ success: function(model, response, options) { //user was successfully saved }, error: function(model, response, options) { //error while saving user } }); } function addToTable(task) { var cellFirst = $('<td></td>'); var cellSecond = $('<td></td>'); var cellThird = $('<td></td>'); var cb = $('<input />') $("#tasks tr:last").after('<tr></tr>'); $("#tasks tr:last").append(cellFirst); $("#tasks tr:last").append(cellSecond); $("#tasks tr:last").append(cellThird); cb.attr("type", "checkbox"); cb.attr("name", "isDone_" + task.get("id")); cb.attr("value", ""); cb.attr("checked", task.get("done") === 0 ? false: true); cellFirst.text(task.get("description")); cellSecond.append(cb); cellThird.text(task.getUntilDate() !== undefined ? task.getUntilDate() : 'not completed yet'); } function loadTasks() { } </script> </head> <body onload="signup()"> <div id="status" style="border: 1px red solid;"></div> <input type="button" id="addTask" onclick="addNewTask()" value="Add new task" /> <table id="tasks"> <tr> <th>Description</th> <th>Valid until</th> <th>Completed</th> </tr> </table> </body></html>
13. If you've added the lines above, you’ll have new items in your table and on the server. But how do we get a list of task objects back from server to show this list after every successful login? You can get a list of objects by calling the function apiomat.Tasks().fetch() To find out how we do this within the function loadTasks(), check out the code snippet below. Add this snippet into the body of this function. We call this function in line 48 and 66 after the user was successfully saved or loaded.
function loadTasks() { apiomat.Tasks().fetch({ success: function(model, response, options) { _.each(model.models, function(element, index, list) { addToTable(element); }); }, error: function(model, response, options) { if(options.error) { status.text("Can't load list: "+ options.error.statusCode + " --> " + options.error.message); } else { status.text("An unknown error occurred"); } } });}
14. If you refresh your index.html, you will see a bunch of tasks in your list view (if you clicked on the add new task several button before).
15. Finally, we want to use a query to get back all non-done tasks. For that let’s modify the loadTasks() function. Replace the body of this function by entering the following lines of code:
function loadTasks() { apiomat.Tasks().fetch({ search: "done==0", success: function(model, response, options) { _.each(model.models, function(element, index, list) { addToTable(element); }); }, error: function(model, response, options) { if(options.error) { status.text("Can't load list: "+ options.error.statusCode + " --> " + options.error.message); } else { status.text("An unknown error occurred"); } } });}
16. In your dashboard, change the value of field done of a Task to 1 in the data-editor tab. If you refresh your site one more time, you won’t see this task anymore.