Android Tutorial Push
This toturial will walk through how to build an Android app with the ability to receive push notifications. This entails creating a new Android app, enabling the Firebase Cloud Messaging, preparing ApiOmat as well as setting up a basic layout and some code.
Creating a new Android App
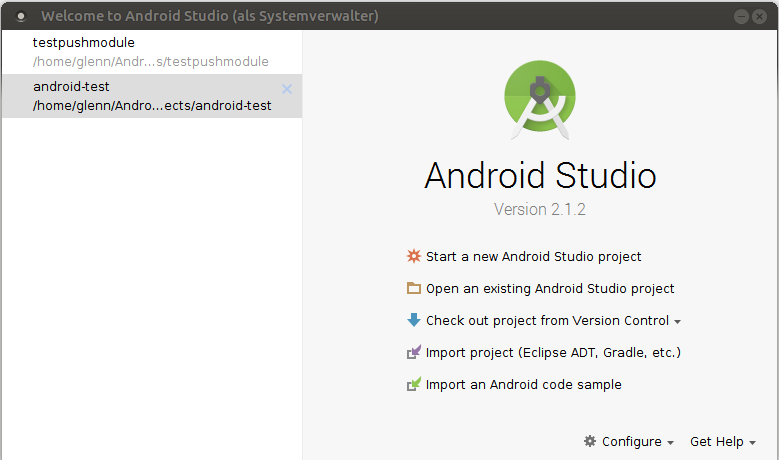
Open your IDE. We recommend using Android Studio, as that is what we will be using for this tutorial.
Select Start A new Android Studio Project or if you want to enhance an existing project, choose Open an existing Android Studio Project, as shown in the figure below.
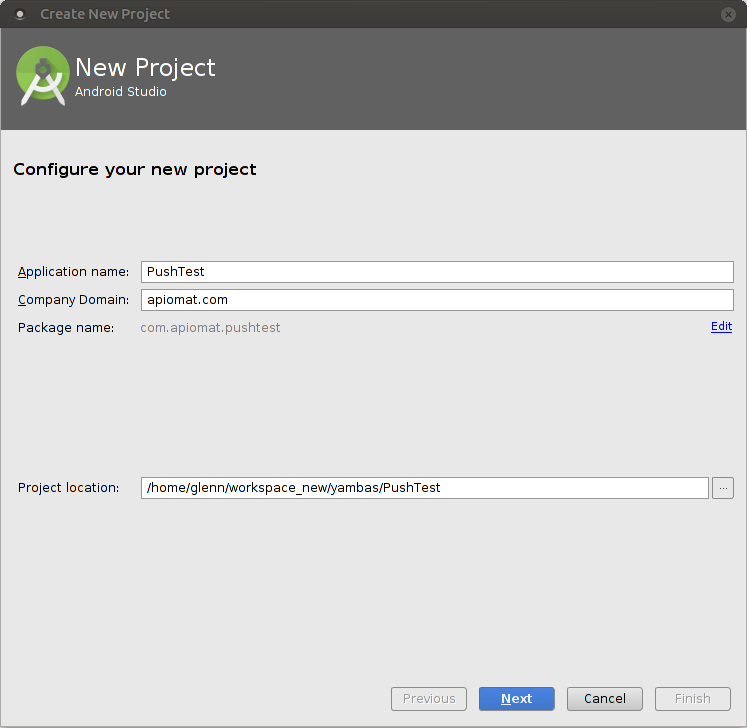
If you've decided to create a new project, you will have to setup a few basics, which will be covered in the next 4 screens. If you are using an existing project you can skip right to the step Enable FCM for your app. First you will enter your app's name and a company domain. You will need this information later.
Next, you'll have to pick the android devices and the minimum API levels you are targeting with your app. Please note that you'll need to choose at least API level 16 to be able to use Google's FCM.

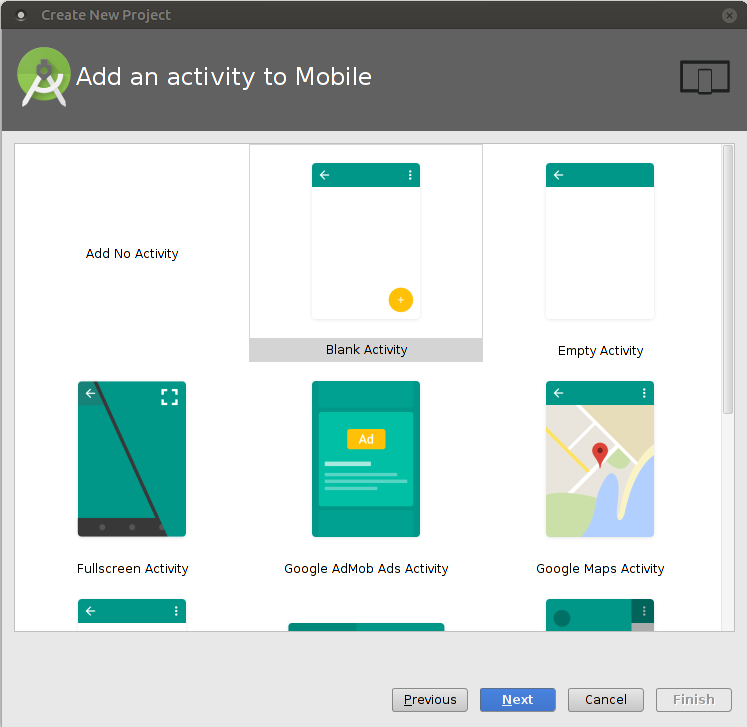
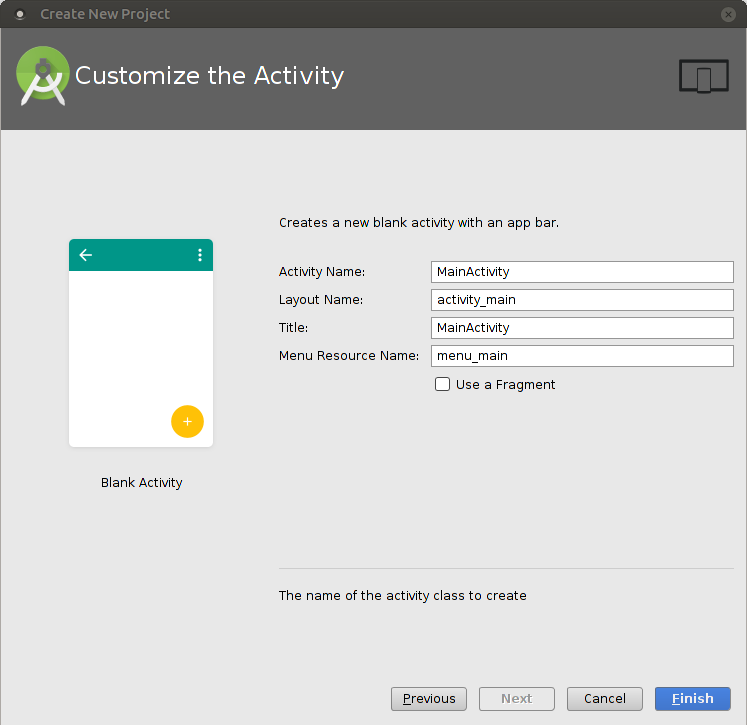
Next, decide what kind of activity your app initially should contain. For this tutorial, select the Blank Activity.
Next, set your activity's name, and respectively your activity's title and the layout's name. The name will not effect this tutorial, so we will just leave it as the default as it plays a subordinate role for our use case. Keep the defaults and finish setting up the project by clicking the finish button.
To send push messages to an Android device you have to use the Firebase Cloud Messaging service, requiring you to obtain a server API key. The next part of the tutorial will walk you through signing up for FCM.
Enable FCM for your app
Please note that a Google account is required in order to enable the FCM
-
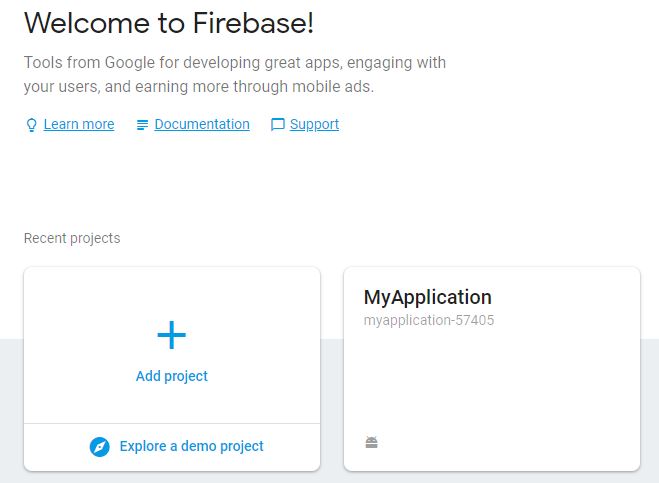
Go to the Firebase console.
-
Click Add project, then select or enter a project name.
-
If you have an existing Google project associated with your app, select the project.
-
If you don't have an existing project, add a new project.
-
Follow the remaining setup steps in the Firebase console, then click Create project (or Add Firebase , if you're using an existing Google project).
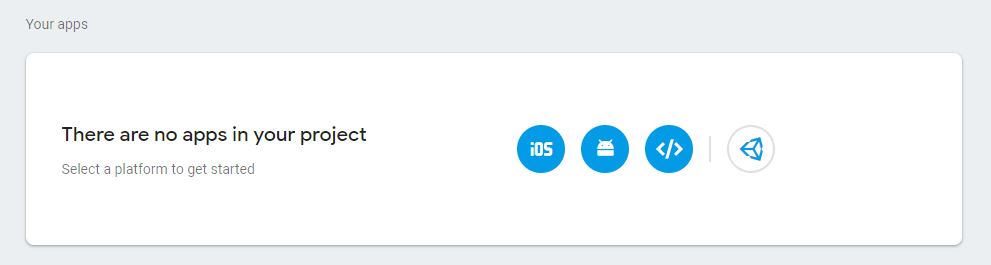
Now that you have a project, you can add your Android app to it:
-
Go on Project Overview and click on the Android symbol and follow the setup steps. If you're importing an existing Google project, this may happen automatically and you can just download the config file .
-
When prompted, enter your app's package name. It's important to enter the package name your app is using. This can only be set when you add the app to your Firebase project.
-
Add the Firebase Android configuration file to your app:
-
Click Download google-services.json to obtain your Firebase Android config file (google-services.json).
You can download your Firebase Android config file again at any time.
-
Move your config file into the same directory as your root-level build.gradle file.
-
For more information have a look at the Firebase documentation.
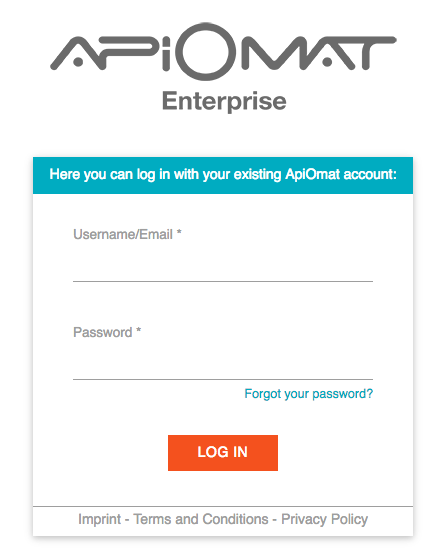
Setting up the Backend
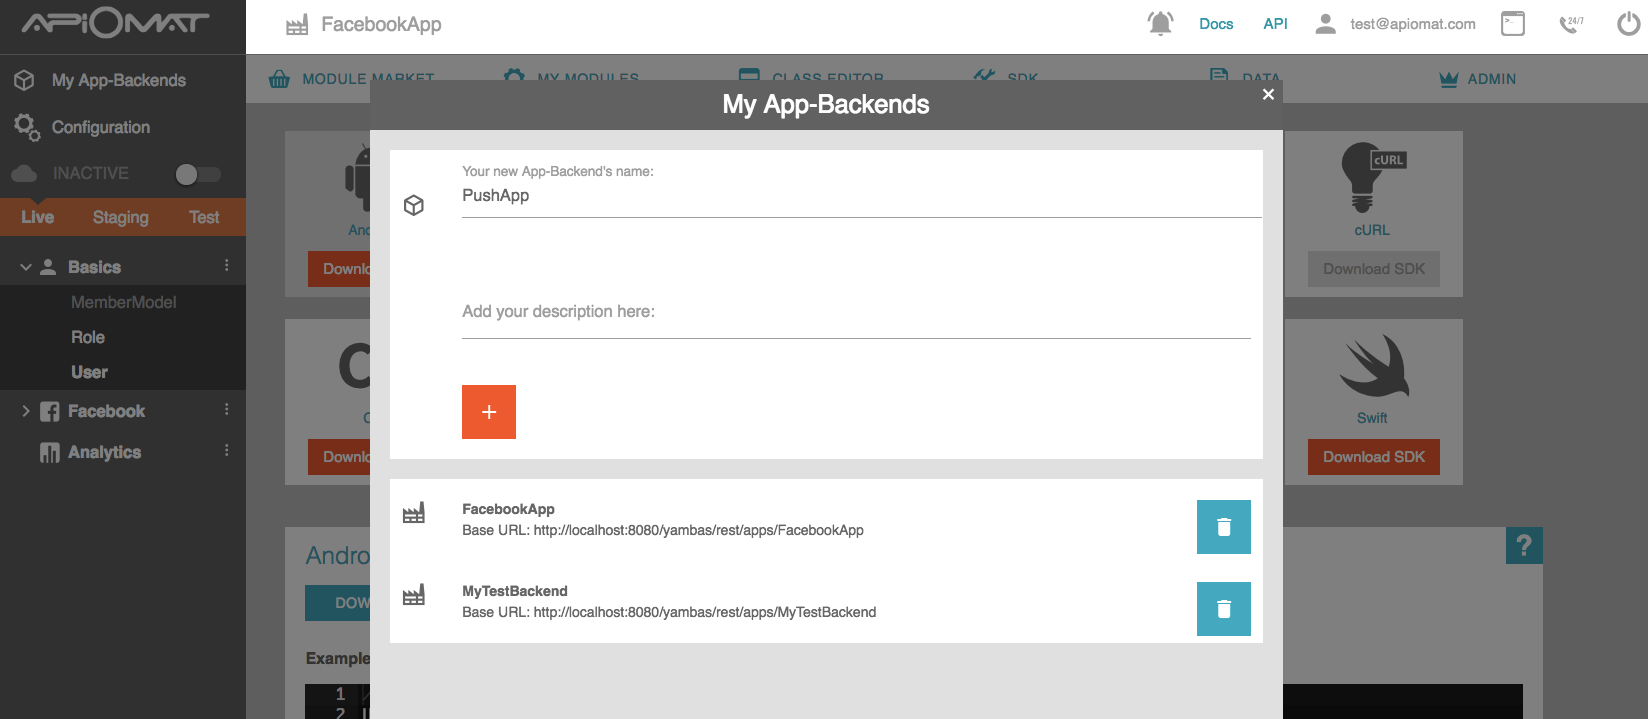
2. If you haven‘t created an app yet, you will be asked to give your first app a name and to give a short description. In our example the app is called “PushApp”. For your app, though, you should use a unique name.
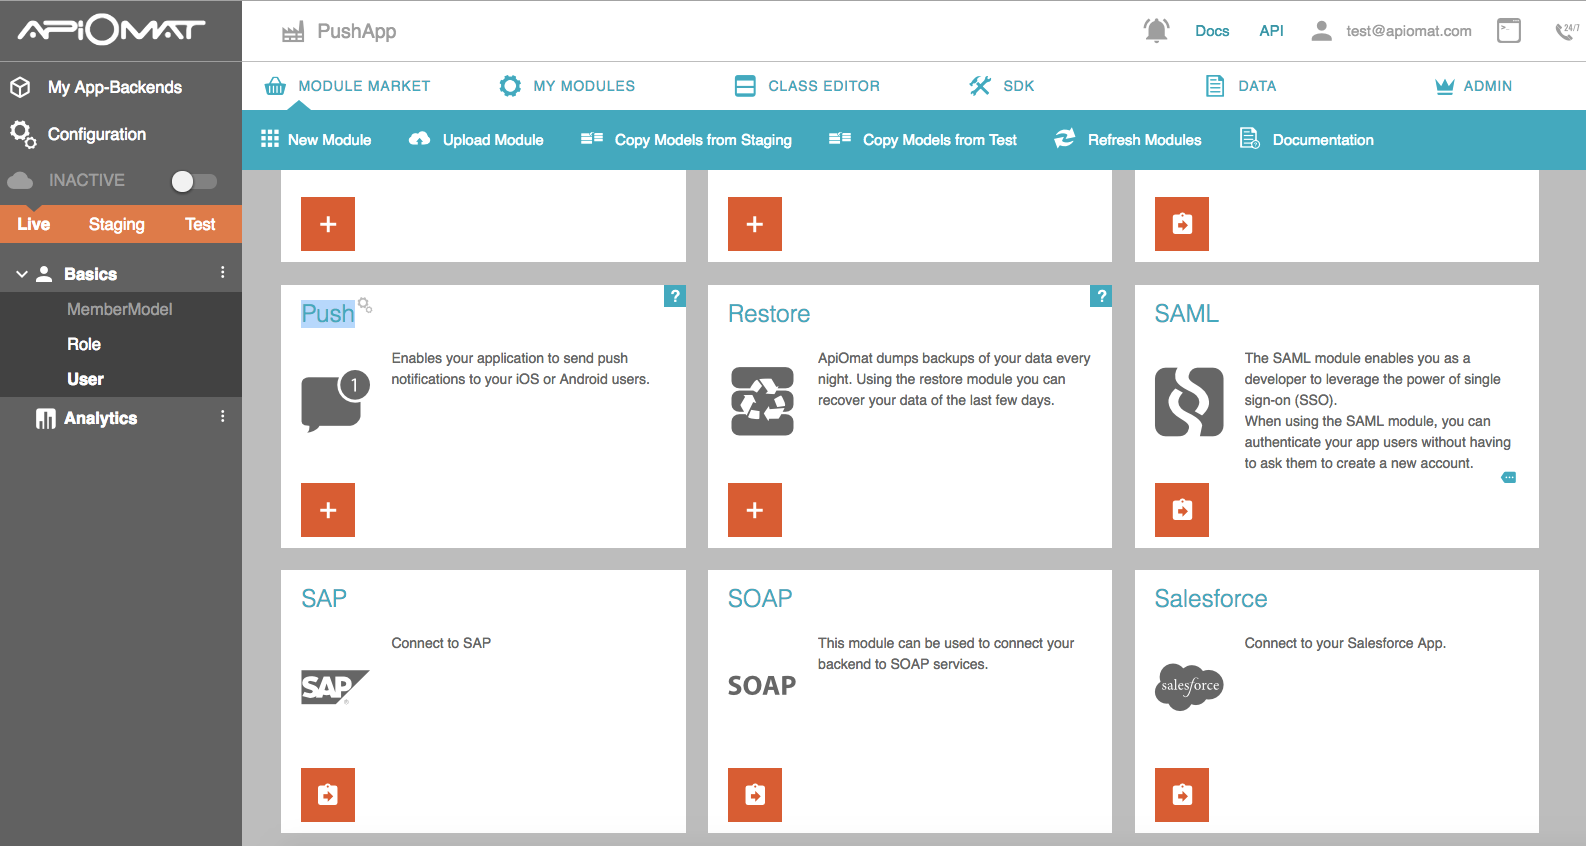
3. Now you see the ApiOmat Dashbaord. Start on the Module Market with all the available modules you can add to your app. Scroll down and select the Push Module and click "+" to add the module.
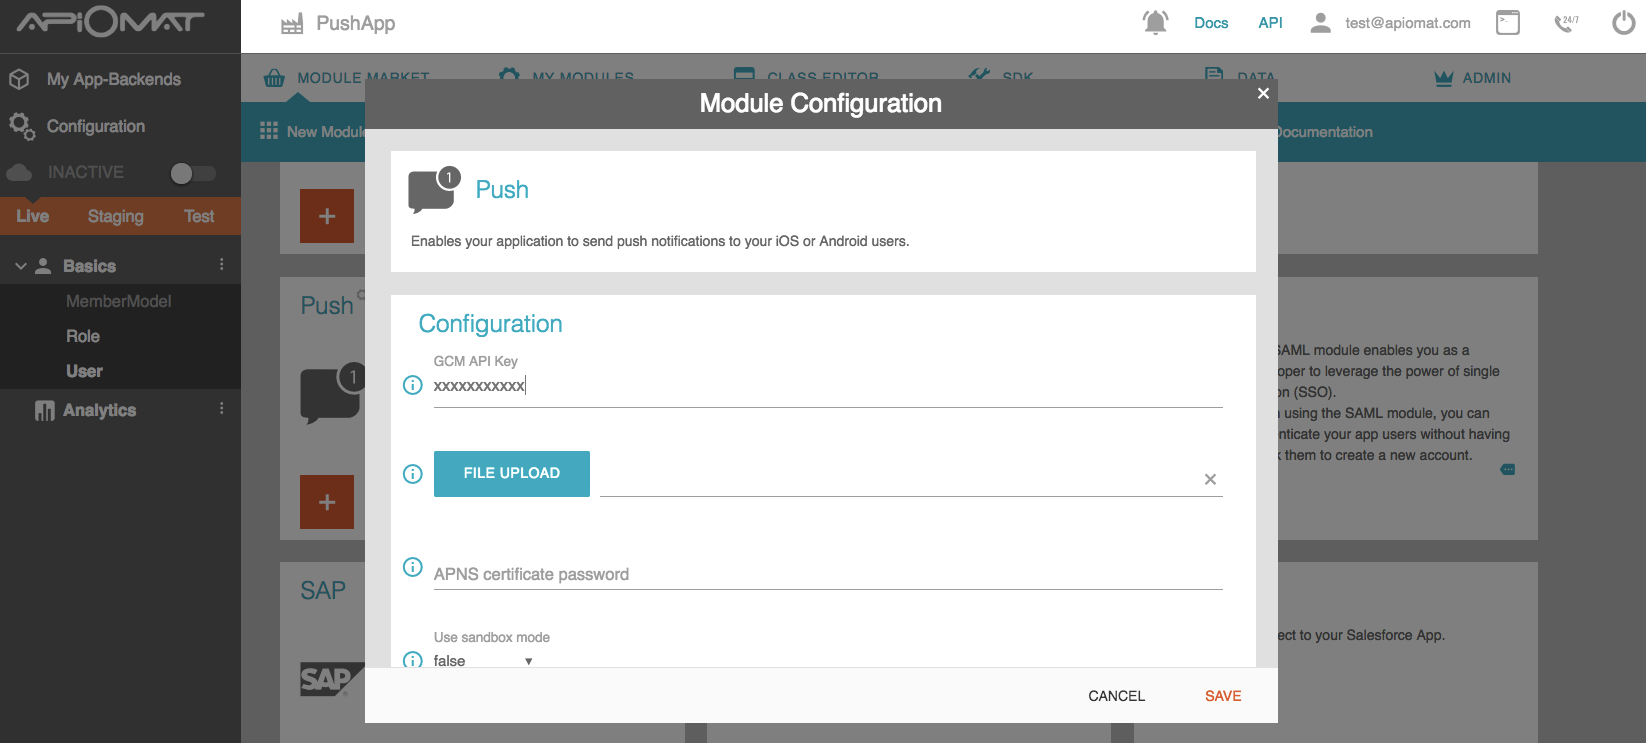
4. A pop-up will appear where we can configure the Push module.
-
Copy your server key from Firebase
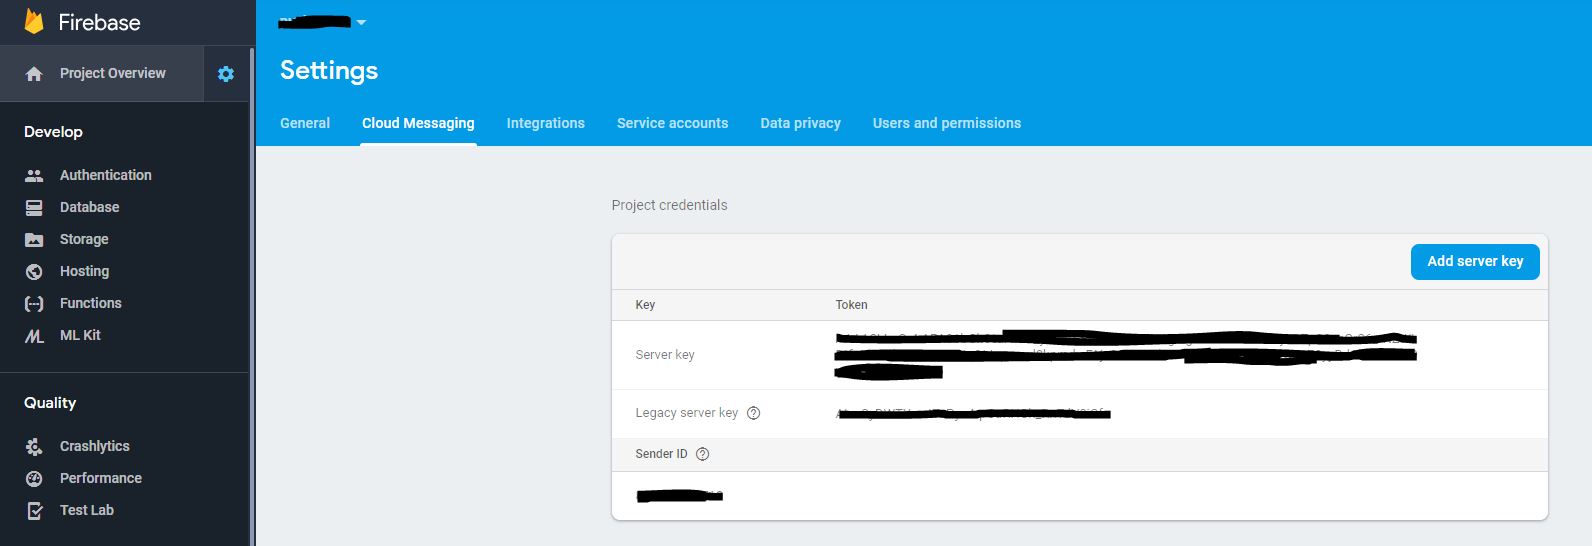
5. Insert your FCM API server key and confirm with “OK”.
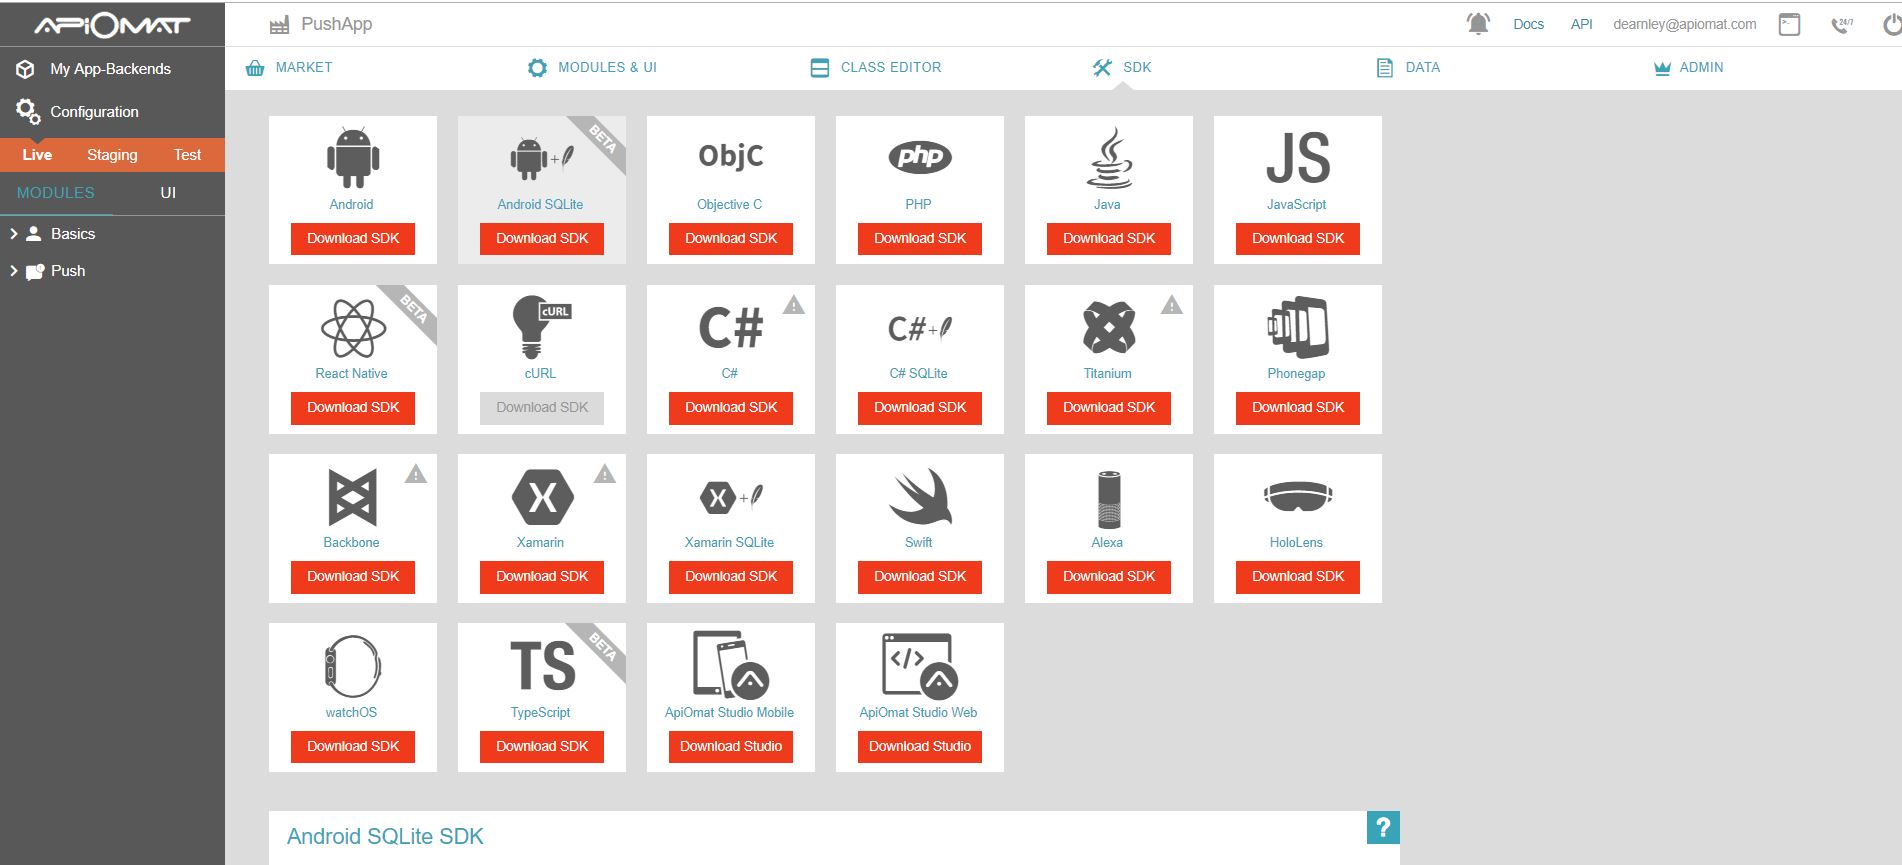
6. Click on the SDK tab on the menu at the top of the screen. This will take you to an overview of the ApiOmat SDKs, which you can download by clicking "DOWNLOAD SDK".
7. For this tutorial you will need the SDK for Android. To download, simply click the button “Download SDK”. This downloaded .ZIP file contains all required classes and resources. Unpack the .ZIP file and save it somewhere on your hard disk.
-
We recommend the Android SQLite SDK
8. Open the folder containing the unpacked .ZIP file.
9. Copy both of the folders into the “src” folder (source) of your app. Now we can get started on the frontend!
Configure your App
Now you need the configuration file which you downloaded while Enabling FCM for our app. Simply copy the file into the app-Folder of your app-project. As this file is intended to be parsed by the Google Services plugin for Gradle, we have to install this plugin first. You can do this by adding a dependency into your gradle files.
First, add rules to your root-level build.gradle file, to include the google-services plugin and the Google's Maven repository: XML
buildscript { // ... dependencies { // ... classpath 'com.google.gms:google-services:4.2.0' // google-services plugin }}allprojects { // ... repositories { google() // Google's Maven repository //include the following when using the Android SQLite SDK maven { url "https://www.jitpack.io" } // ... }}
Then, in your module Gradle file (usually the app/build.gradle ), add the apply plugin line at the bottom of the file to enable the Gradle plugin: XML
apply plugin: 'com.android.application'android { // ...}dependencies { // ... implementation 'com.google.firebase:firebase-messaging:17.3.4'// include the following when using the Android SQLite SDK annotationProcessor "com.github.Raizlabs.DBFlow:dbflow-processor:4.2.4" implementation "com.github.Raizlabs.DBFlow:dbflow-core:4.2.4" implementation "com.github.Raizlabs.DBFlow:dbflow:4.2.4" implementation 'com.fasterxml.jackson.core:jackson-core:2.9.2' implementation 'com.fasterxml.jackson.core:jackson-annotations:2.9.2' implementation 'com.fasterxml.jackson.core:jackson-databind:2.9.2' implementation 'com.jakewharton:disklrucache:2.0.2' // Getting a "Could not find" error? Make sure you have // added the Google maven respository to your root build.gradle}// ADD THIS AT THE BOTTOMapply plugin: 'com.google.gms.google-services'
For more information have a look at the
Firebase documentation.
Creating the Layout
Next you need to put together a simple layout in order to be able to trigger the FCM registration.
activity_main.xmlXML
<?xml version="1.0" encoding="utf-8"?><android.support.constraint.ConstraintLayout xmlns:android="http://schemas.android.com/apk/res/android" xmlns:tools="http://schemas.android.com/tools" xmlns:app="http://schemas.android.com/apk/res-auto" android:layout_width="match_parent" android:layout_height="match_parent" tools:context=".MainActivity" android:id="@+id/constraintLayout"> <Button android:text="Show Token" android:layout_width="258dp" android:layout_height="wrap_content" app:layout_constraintStart_toStartOf="parent" android:layout_marginLeft="8dp" android:layout_marginStart="8dp" app:layout_constraintEnd_toEndOf="parent" android:layout_marginEnd="8dp" android:layout_marginRight="8dp" android:layout_marginTop="96dp" app:layout_constraintTop_toTopOf="parent" android:id="@+id/btn_token" app:layout_constraintHorizontal_bias="0.496"/> <TextView android:layout_width="316dp" android:layout_height="346dp" android:gravity="center" android:id="@+id/txt_message" app:layout_constraintStart_toStartOf="parent" android:layout_marginLeft="8dp" android:layout_marginStart="8dp" app:layout_constraintEnd_toEndOf="parent" android:layout_marginEnd="8dp" android:layout_marginRight="8dp" android:layout_marginBottom="8dp" app:layout_constraintBottom_toBottomOf="parent" android:layout_marginTop="8dp" app:layout_constraintTop_toBottomOf="@+id/btn_token"/></android.support.constraint.ConstraintLayout>Writing Code
First, you need to handle the FCM registration. Instantiate the service if no registration token was found. Create a new ApiOmat user with this token. Finally, save this user.
FirebasePushReceiverService.java
Java
import android.content.Intent;import android.support.v4.content.LocalBroadcastManager;import android.util.Log;import com.apiomat.frontend.ApiomatRequestException;import com.apiomat.frontend.Datastore;import com.apiomat.frontend.basics.User;import com.apiomat.frontend.callbacks.AOMEmptyCallback;import com.google.firebase.messaging.FirebaseMessagingService;import com.google.firebase.messaging.RemoteMessage;import org.json.JSONObject;import java.util.Map;public class FirebasePushReceiverService extends FirebaseMessagingService{ private static final String TAG = "FBPushReceiverService"; @Override public void onMessageReceived( final RemoteMessage remoteMessage ) { Log.d( "dataChat", remoteMessage.getData( ).toString( ) ); Map<String, String> params = remoteMessage.getData( ); JSONObject object = new JSONObject( params ); Log.d( "JSON_OBJECT", object.toString( ) ); Intent intent = new Intent( "NOTIFICATION_LOCAL_BROADCAST" ); intent.putExtra( "data", object.toString( ) ); LocalBroadcastManager.getInstance( this ).sendBroadcast( intent ); } @Override public void onNewToken( String token ) { Log.d( TAG, "Refreshed token: " + token ); final User user = new User( "myUser", "myPassword" ); user.setRegistrationId( token ); Datastore.configureWithCredentials( user ); user.saveAsync( false, new AOMEmptyCallback( ) { @Override public void isDone( boolean wasLoadedFromStorage, ApiomatRequestException exception ) { if ( exception == null ) { Log.d( TAG, "Registration successful" ); } else { Log.d( TAG, "Error: " + exception.toString( ) ); } } } ); }}
Last but not least, you need to extend the main activity as shown below.
MainActivity.javaJava
import android.content.BroadcastReceiver;import android.content.Context;import android.content.Intent;import android.content.IntentFilter;import android.os.Bundle;import android.support.annotation.NonNull;import android.support.v4.content.LocalBroadcastManager;import android.support.v7.app.AppCompatActivity;import android.util.Log;import android.view.View;import android.widget.Button;import android.widget.TextView;import com.apiomat.frontend.basics.User;import com.google.android.gms.tasks.OnCompleteListener;import com.google.android.gms.tasks.Task;import com.google.firebase.iid.FirebaseInstanceId;import com.google.firebase.iid.InstanceIdResult;public class MainActivity extends AppCompatActivity{ public User user; TextView textview; @Override protected void onCreate( Bundle savedInstanceState ) { super.onCreate( savedInstanceState ); setContentView( R.layout.activity_main ); textview = findViewById( R.id.txt_message); final Button btnToken = findViewById( R.id.btn_token ); btnToken.setOnClickListener( new View.OnClickListener( ) { @Override public void onClick( View v ) { FirebaseInstanceId.getInstance( ).getInstanceId( ) .addOnCompleteListener( new OnCompleteListener<InstanceIdResult>( ) { @Override public void onComplete( @NonNull Task<InstanceIdResult> task ) { final String token = task.getResult( ).getToken( ); textview.setText( token ); Log.d( "Token: ", token ); } } ); } } ); final String intentMessage = getIntent( ).getStringExtra( "FireBaseNotification" ); if ( intentMessage != null ) { textview.setText( intentMessage ); } } @Override protected void onResume( ) { super.onResume( ); LocalBroadcastManager.getInstance( this ) .registerReceiver( receiver, new IntentFilter( "NOTIFICATION_LOCAL_BROADCAST" ) ); } @Override protected void onPause( ) { super.onPause( ); LocalBroadcastManager.getInstance( this ).unregisterReceiver( receiver ); } private BroadcastReceiver receiver = new BroadcastReceiver( ) { @Override public void onReceive( Context context, Intent intent ) { // intent will holding data final String data = intent.getStringExtra( "data" ); if ( data != null ) { textview.setText( data ); } } };}Edit your app manifest
Add the following to your app's manifest:
-
A service that extends FirebaseMessagingService. This is required if you want to do any message handling beyond receiving notifications on apps in the background. To receive notifications in foregrounded apps, to receive data payload, to send upstream messages, and so on, you must extend this service.
<service android:name=".FirebasePushReceiverService"> <intent-filter> <action android:name="com.google.firebase.MESSAGING_EVENT" /> </intent-filter></service>-
(Optional) Within the application component, metadata elements to set a default notification icon and color. Android uses these values whenever incoming messages do not explicitly set icon or color.
<!-- Set custom default icon. This is used when no icon is set for incoming notification messages. See README(https://goo.gl/l4GJaQ) for more. --><meta-data android:name="com.google.firebase.messaging.default_notification_icon" android:resource="@drawable/ic_stat_ic_notification" /><!-- Set color used with incoming notification messages. This is used when no color is set for the incoming notification message. See README(https://goo.gl/6BKBk7) for more. --><meta-data android:name="com.google.firebase.messaging.default_notification_color" android:resource="@color/colorAccent" />-
(Optional) From Android 8.0 (API level 26) and higher, notification channels are supported and recommended. FCM provides a default notification channel with basic settings. If you prefer to create and use your own default channel, set default_notification_channel_id to the ID of your notification channel object as shown; FCM will use this value whenever incoming messages do not explicitly set a notification channel. To learn more, see Manage notification channels.
<meta-data android:name="com.google.firebase.messaging.default_notification_channel_id" android:value="@string/default_notification_channel_id" />
For more information have a look at the
Firebase documentation.
Let’s go!
To test our app, send the push message from the ApiOmat dashboard.
1. Start the app on your Android device.
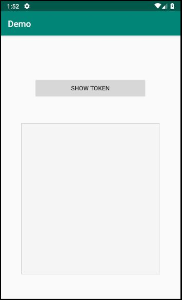
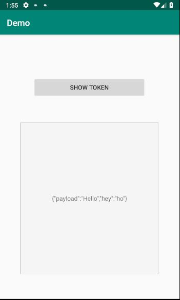
2. Press the button “Show Token”. Your FCM token will be shown in the textview.
3. Open the dashboard of ApiOmat.
4. Click the tab "My Modules" and then the button “Push”.
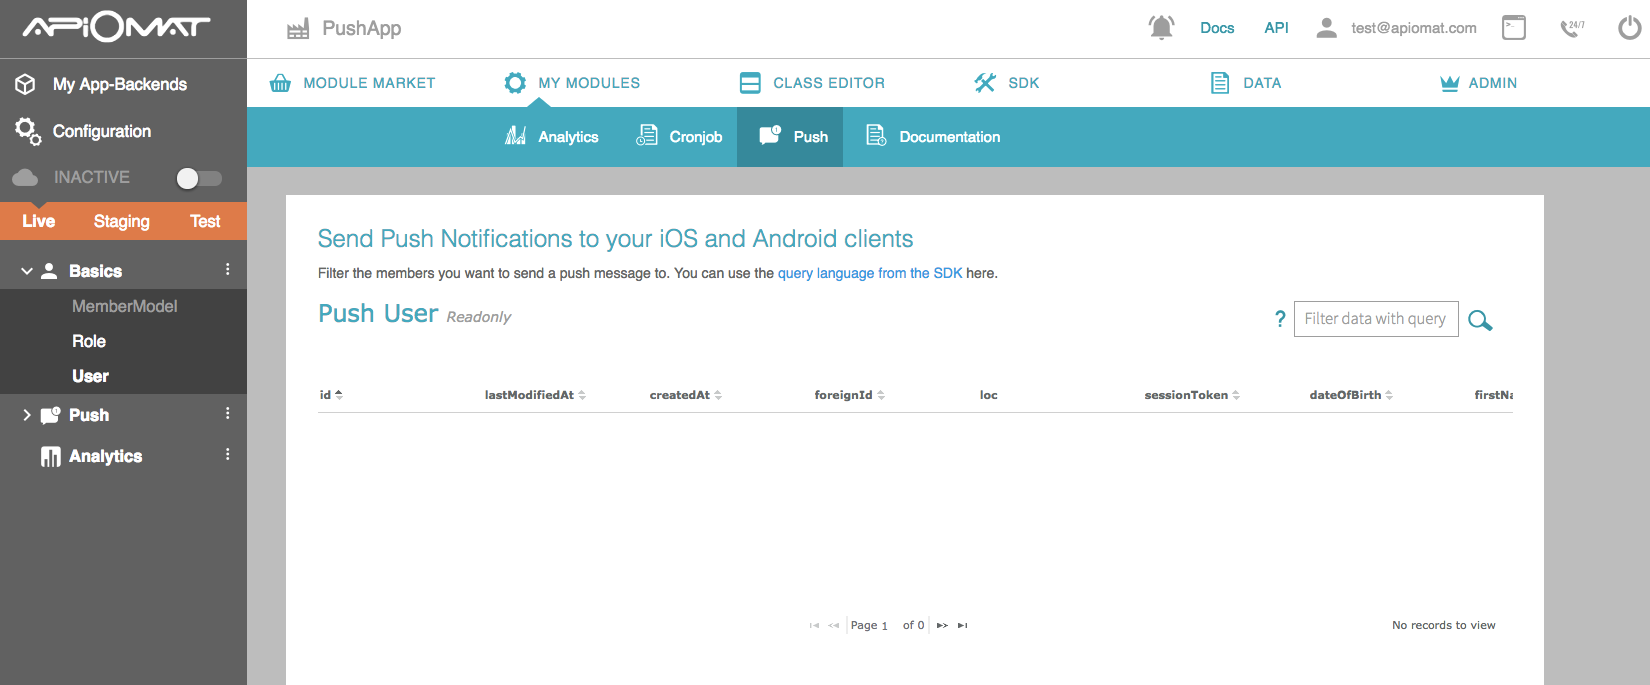
5. Click “Send”.
6. Check out your Android app. The text field should contain the push message you entered. In our case your notification message was "Hello!" and your additional data was "ho".