Embedded Objects
Linking strategies
ApiOmat offers the possibility to link related data models together. In the class editor simply set the type of an attribute to a class of another model. This creates a reference from model x1 of type X to a model y1 of type Y (whereas X may equal Y) internally.
If the class is non-transient, it looks like this in our MongoDB:
db.X.find().pretty(){ "_id" : ObjectId("5506deb48add5ac24d460add"), "lastModified" : 6756576576123, "y1" : { "ref" : ObjectId("4567898767687687227") }}
This linking strategy is called a reference and is the default behaviour in ApiOmat. It fits use cases where references between two objects may have an n-to-m connection. Using the example above, this allows to reference y1 to another x2. This will prevent data duplication in the database, because many instances of X may use y1.
The drawback of this referencing technique is sometimes performance: If a model x1 is queried from ApiOmat, all references have to be pulled in separate requests. This can usually be optimized using caching and offline synchronization in SDKs, but at least for initial data loading, many requests may be necessary.
For all cases where a 1-to-n connection between objects is enough, ApiOmat offers a linking strategy called embedded objects. In contrast to references, y1 would be stored within x1, making it only accessible via x1.
If the class is non-transient, it looks like this in our MongoDB:
db.X.find().pretty(){ "_id" : ObjectId("5506deb48add5ac24d460add"), "lastModified" : 6756576576123 "y1" : { "_id" : ObjectId("5506deb48add5ac24d460add"), "params" : "my text", "lastModified" : 6756576576576 }}Now, if x1 is queried from ApiOmat, it will automatically return y1 in a single request via a single DB query. Likewise, adding a x2 with a y2 will require a single POST request. The drawback here is that it is not possible to return y1 alone; it is only accessible via x1. As a rule of thumb, one should use embedded objects for objects that are dependent on the parent object (and therefore have no use outside the parent object), and are not shared between objects.
Using Embedded Objects
Definition
In ApiOmat, attributes can be marked as embedded object when their type refers to an other class. For example, if the class "Customer" has a field named "address" which refers to the class "Address", it can be marked as embedded. The address of the customer is then stored directly inside the customer, leading to very fast query results when searching for customers in a defined city.
If you are creating a native module with the code-first approach (data modeling with writing Java classes), you can mark an attribute as embedded directly in the source code.
public class MyUser extends AbstractClientDataModel implements IModel<MyUser> { private String text; @EmbeddedObject private Address address; ... @EmbeddedObject private List<Phone> phonenumbers; ...}Creating & Retrieving
When creating an embedded object with a REST call, use a nested JSON object (or array in case the reference attribute is a collection) and ensure you set the correct @type for both the embedded and surrounding object(s):
{ "@type": "MyModule$MyUser", "address": { "@type": "MyModule$Address", "city": "Leipzig", "houseno": "10", "postalCode": "04109", "street": "Hainstrasse" }, "phonenumbers": [ { "@type": "MyModule$Phone", "phonenumber": "+1 123456789" }, { "@type": "MyModule$Phone", "phonenumber": "+1 1234888777" } ], "customerNumber": 4711}
Updating
When updating via REST, you can only send the parts of the data which have changed. Please be aware that you have to provide the ID of the embedded object when updating, to ensure the matching element in the database is found especially when working with lists of embedded objects:
{ "@type": "MyModule$MyUser", "address": { "@type": "MyModule$Address", "id": "554a064deffce7a516836ae0", "houseno": "4" }}If you want to add a new entry during an update, omit the ID:
{ "@type": "MyModule$MyUser", "phonenumbers": [ { "@type": "MyModule$Phone", "phonenumber": "+49 123456789" } ]}That way, a new field is created with an ID automatically generated in the database. Please be aware, that only one insert per update can be done.
Deleting
To delete parts of an embedded object, send the X-apiomat-fullupdate=true header with the request and leave out the parts which should be deleted in the JSON. Using our previous example, a full update with the content
would delete the previously added phone number from the customer. Ensure that you do not forget providing the ID of the remaining data!
{ "@type": "MyModule$MyUser", "address": { "@type": "MyModule$Address", "id": "554a064deffce7a516111ae0", "city": "Leipzig", "houseno": "4", "postalCode": "04109", "street": "Hainstrasse" }, "phonenumbers": [ { "@type": "MyModule$Phone", "id": "554a064deffce7a516221ae1", "phonenumber": "+1 123456789" }, { "@type": "MyModule$Phone", "id": "554a064daafce7a516111ae6", "phonenumber": "+1 1234888777" } ], "customerNumber": 4711}
Always use the REST endpoint for the surrounding object rather than the one for the embedded one. In this example, all manipulations have to be done against the Customer, not against the Address. Because of the way the database structures the data internally, it is not possible to access the embedded objects directly.
Querying Embedded Objects
You can use the same query language for embedded objects as you can for references. To query a user with a specific address use:
address.street == "Penny Lane 13"You can also query for references which contain an embedded object. So if there was another data model named "application" that has a list of references on your MyUser class, then a query would look like the following:
users.address.street == "Penny Lane 13"
The only combination which is not possible is to add a reference to an embedded object. The underlying database is limited in the way performant queries can be executed, and thus this combination cannot be supported.
Dashboard usage
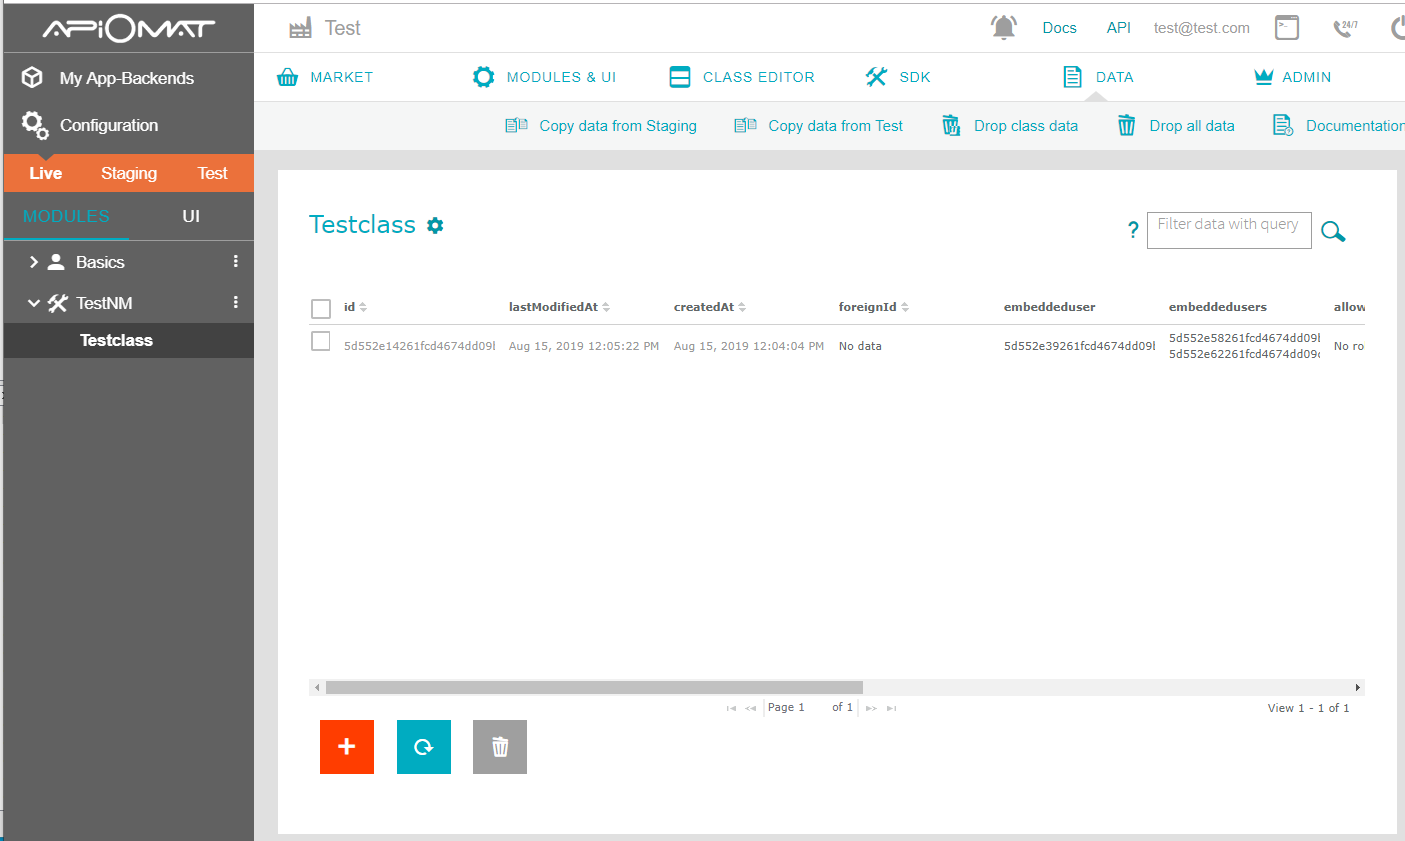
To use embedded objects, you have to set property "embeddedObjectsSupport" to true in apiomat.yaml dashboard section. Then you can configure attributes as embedded as it is done with "embeddeduser" and "embeddedusers" in the following screenshot:

In the data editor the IDs of the embedded objects will be displayed in the specific attribute columns:
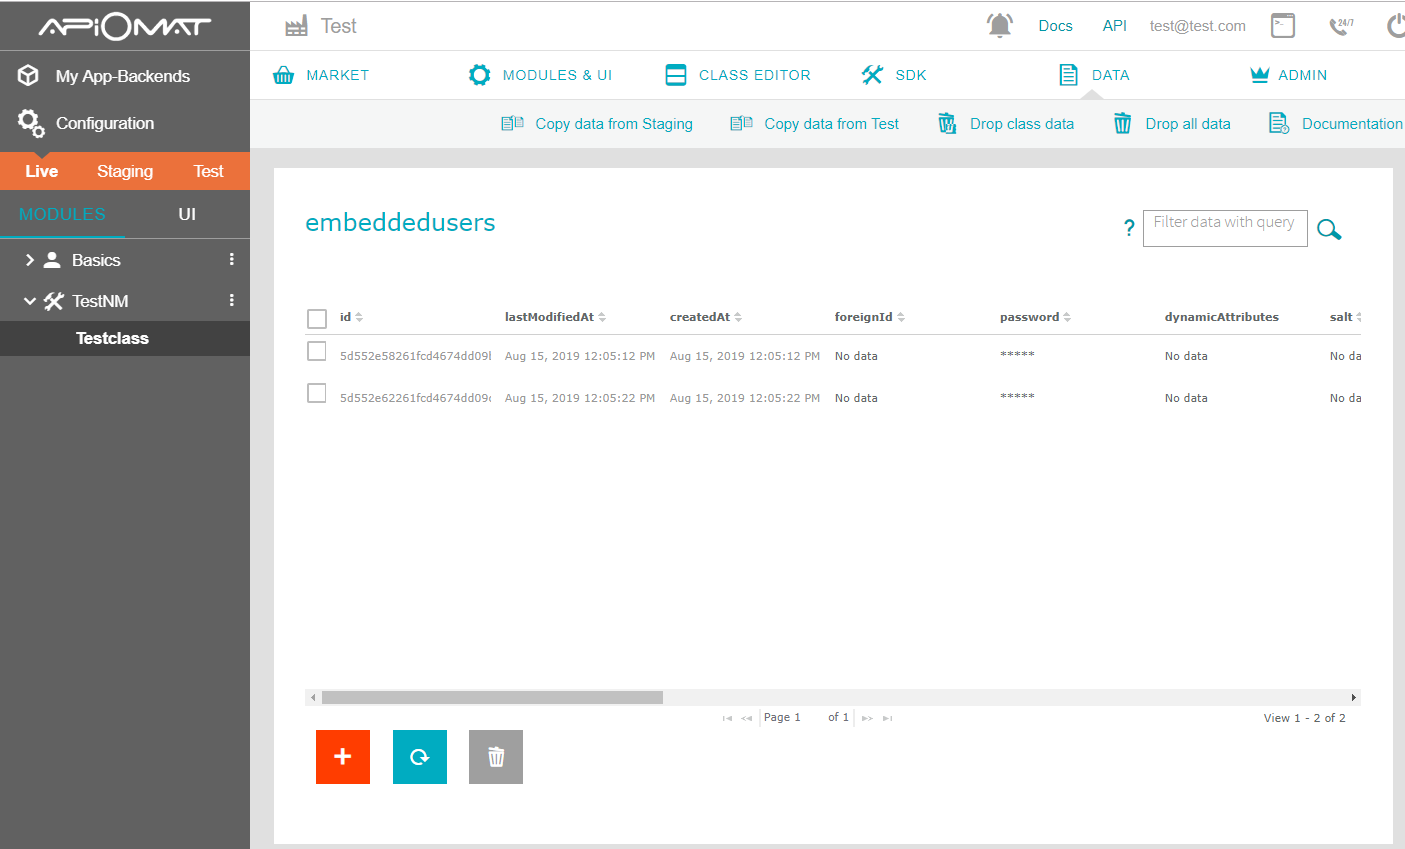
When clicking on one of those cells, the data editor changes the class to the embedded object class of the attribute and shows all objects which are contained in the attribute of the previous chosen object:
SDK Support
For details about the SDK support of embedded objects please see the SDK Reference.
Usage in Native Module code
For details about how to use embedded objects in Native Module code please see Accessing Data.
CSV/XML Export and Import
Embedded objects can also be used with CSV or XML Export/Import. Embedded data is stored like references as separate files, but to mark these files as embedded data, the files name end with ".embedded". That is, if your data model consists of a "Customer" who has several embedded "Address" types, the CSV export would write a file "Customer.csv" and "Address.embedded.csv" containing all data.
It is best to export embedded objects so that you can see how an import should be set up.