C# Quickstart
This tutorial will help you set up a running example app.
The cheat sheet can be found here.
The C# SDK Documentation can be found here .
Introduction
In this tutorial you will learn to:
-
Set up a backend with a custom class “Todo”.
-
Deploy the backend
-
Create a simple Windows Phone App project with the generated SDK
-
Set up the connection to the backend and create a User
-
Have a look at the data in your backend
-
Create Todo objects in C# and store them in the backend
-
Query data from the backend
Preparation
1. Log into your account. If you don't have an account, contact the administrator of the ApiOmat instance from your company.
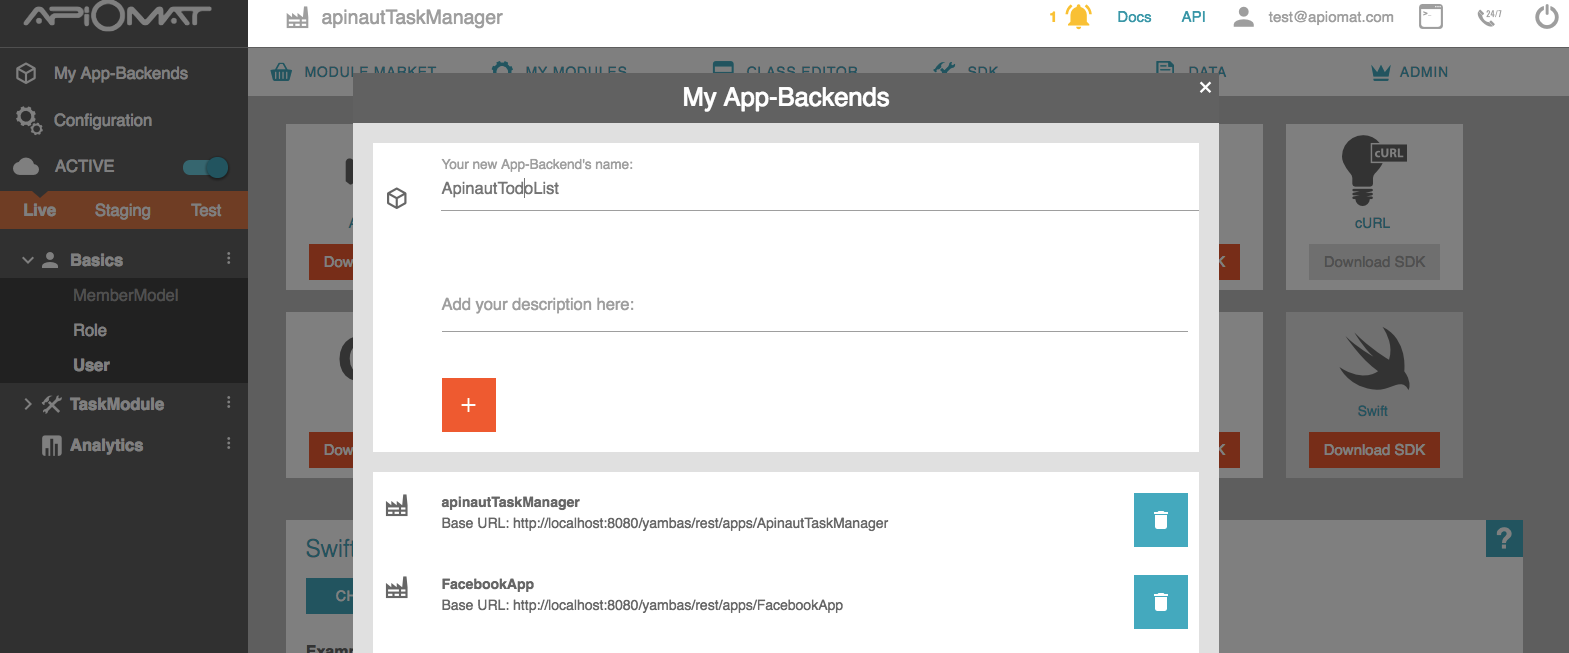
2. Now enter a unique name for your application e.g. “YourNameTodoList”.
Since we plan to give developers the opportunity to share projects, application names must be unique in the system. You do not need any of the predefined modules in this tutorial.
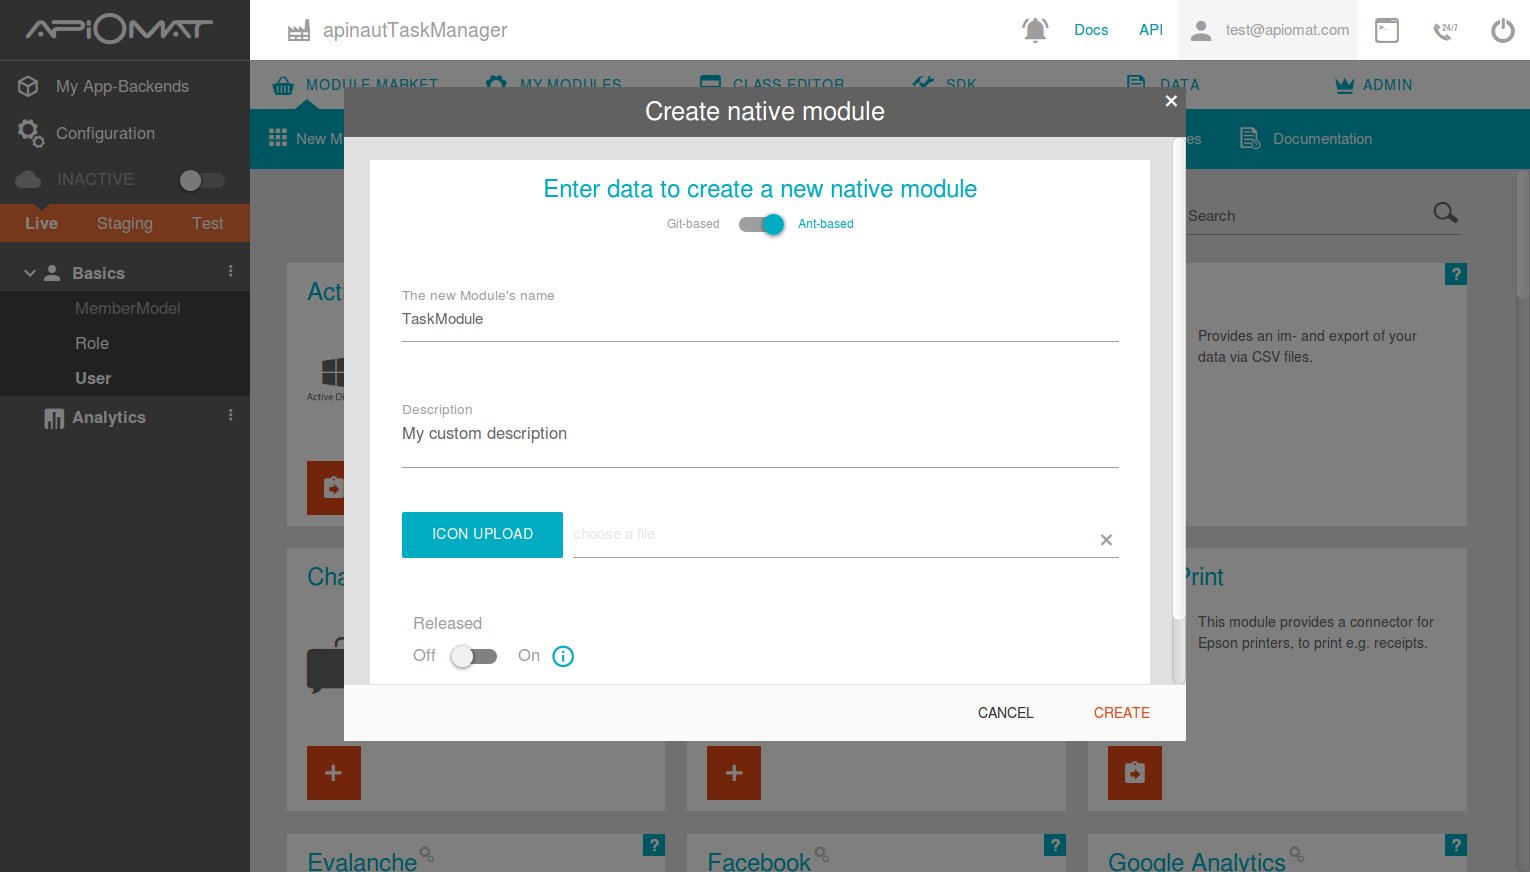
3. Create a new module by going to the Module Market and clicking on "New Module" in the submenu. Choose a name and description and click "CREATE".
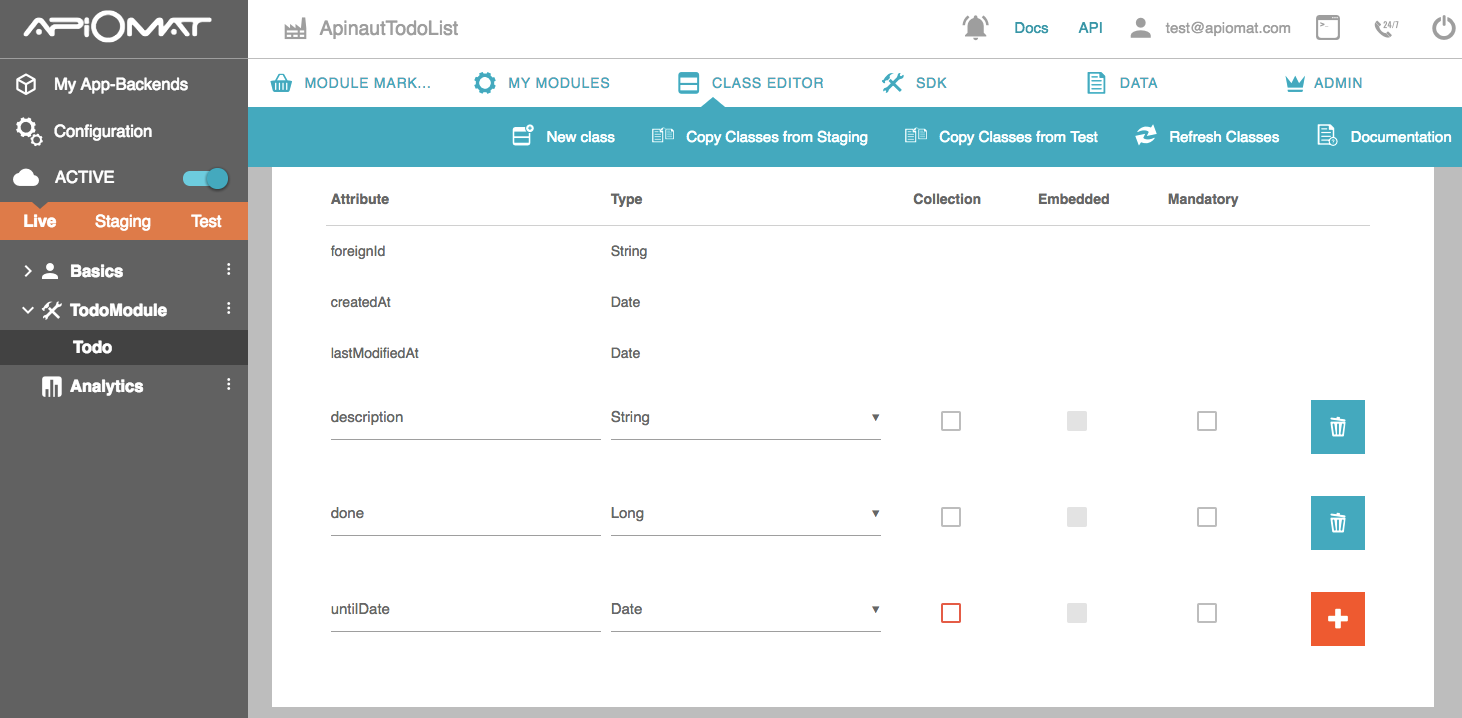
4. Go to the “Class Editor”-Tab to create a class in our backend. You will be asked for a class name after entering the tab. Call the first class “Todo”. Scroll down to the attributes and add a String “description”, a Number “done” and a Date “untilDate”.
5. Deploy your Backend by pressing the “Deploy”-Button.
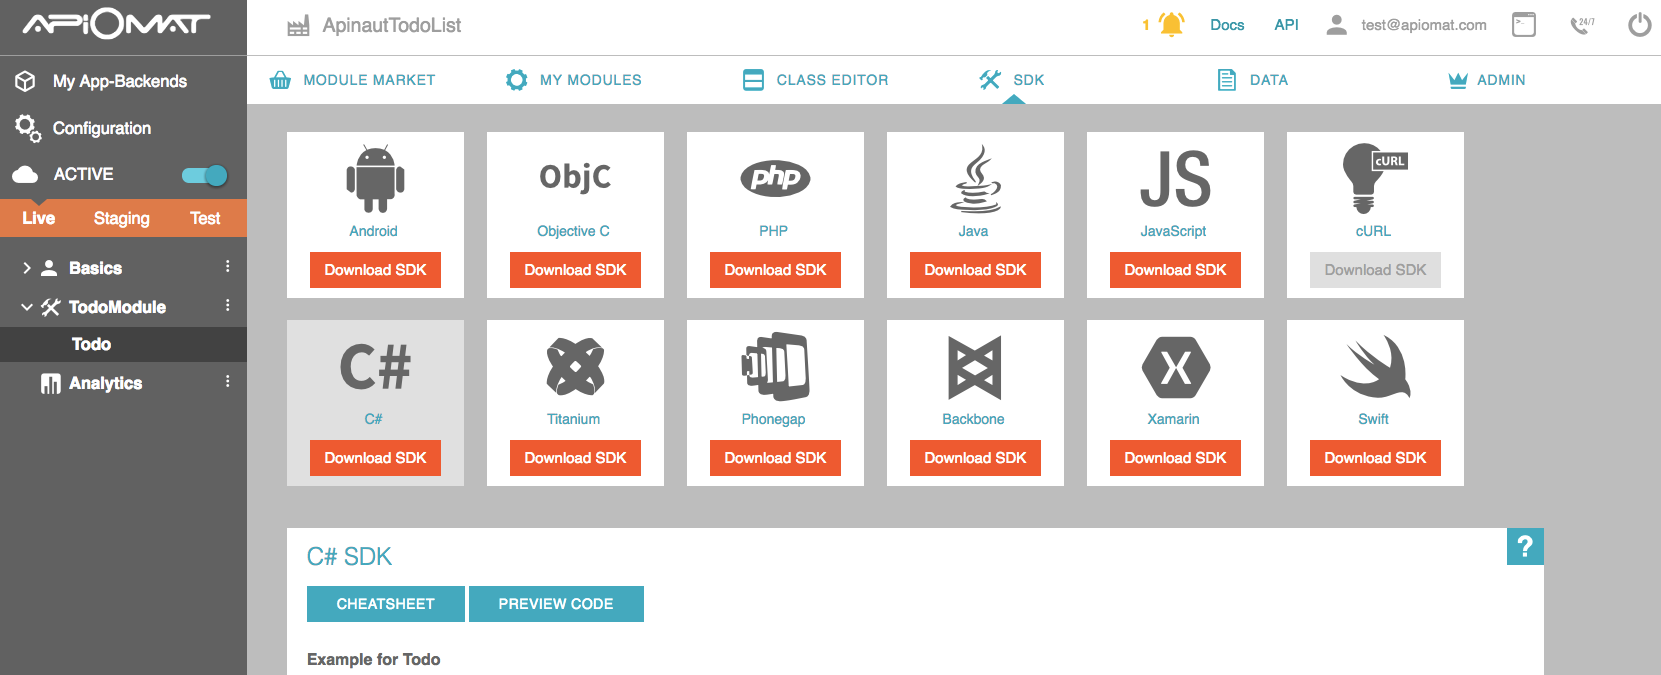
6. Go to SDK Tab and download the C# library by pressing “Download SDK” button. You will get a zip file with your generated classes and all necessary libraries.
7. Start Visual Studio and create a new solution with a Windows Phone App project (in the New Project Wizard select Templates -> Visual C# -> Store Apps -> Windows Phone Apps -> Blank App (Windows Phone)). You should be able to run the still empty project on an emulator or a connected Windows Phone 8 device.
8. Create another project – this time a Portable Class Library. In the project properties you can define the PCL targets / profile. Choose at least Windows Phone 8.1 as target, but you can additionally choose Windows Store, .NET 4.5 as target and even Xamarin if you have installed its add-ins.
You cannot add Windows Phone 8.0 as target, because the System.Linq.Parallel namespace, which is used by the SDK, is not supported on that platform.
This means you can't use PCL Profile 259. Instead we recommend that you use PCL Profile 111. If your IDE doesn't show the profile number in the properties, you can open the .csproj file of the PCL project and see (and change) the profile there.
9. If your IDE generated a Class1.cs file, delete it. Then copy the folder “Com” from the downloaded SDK into the project (just drag and drop from the explorer). When you press F6 now, there will be compiled errors because some third-party libraries are missing. Right-click on References (in the Portable Class Library project) and select “Manage NuGet Packages…”. Then choose “online” and “nuget.org”.
Now you have to add the following NuGet-Packages to your PCL:
-
Portable.BouncyCastle Version:1.8.1 (only needed when using the old C# SDK and not the new C# SQLite SDK)
-
sqlite-net-pcl
-
C#-SQLite / Xamarin-SQLite SDK requires version 1.5.166-beta with the following used dependency:
-
SQLitePCLRaw.bundle_green 1.1.11
-
-
Newer versions of the packages probably work as well, but we ran our tests with the versions mentioned above and thus only support them.
If you use the SDK as PCL project, you also have to install the NuGet Packages Xam.Plugin.Connectivity and SQLite Net PCL in the specific target projects. On some Windows targets (e.g. Windows 8 store app or Windows Phone 8.1 app), the SQLite-net PCL also requires you to reference the Microsoft Visual C++ Runtime Package for Windows (will throw System.TypeInitializationException from SQlitePCL.raw if required and missing).
When building your target project, the Xam.Plugin.Connectivity may complain about a duplicate "Plugin.Connectivity.pdb" on your build-path. You will have to delete the file either from folder [MyProjectFolder]/packages/Xam.Plugin.Connectivity.[Version]/lib/portable-[targets] or from MyProjectFolder/packages/Xam.Plugin.Connectivity.[Version]/lib/[target] (whereas "MyProjectFolder" is the main folder of your solution, "Version the installed version number of the package, "targets" the different supported targets for this library, as of writing "net45+wp80+wp81+wpa81+win8+MonoAndroid10+MonoTouch10+Xamarin.iOS10+UAP10" and "target" your specific target for the project, e.g. win8).
When using MonoDevelop you might have to change the target framework to 4.5 in the project options if it’s set to 4.0 by default. When using Linux, you’ll also need Mono 3.0 or later, which might not be available through the official software repositories of some distributions.
When using Monodevelop in a Linux environment, you need to reference the mentioned libraries to both the library project containing the SDK and the very project itself. You also have to select the "Local Copy" option in preference dialog of each referenced library.
For "Universal Windows Platform" (UWP/UAP) apps, we tested our SDK in a "Universal Windows" library instead of a legacy Portable Class Library. We used the above mentioned NuGet dependencies and developed the test app on Windows 10 Fall Creators Update (Windows version 1709 build 16299.64) with Visual Studio 2017 (version 15.4.4), Windows SDK 10.0.16299.15 and targeted the app to Windows build 16299 (Fall Creators Update). If you encounter errors with another configuration, please contact our support.
Now all projects should compile successfully.
10. The two separate projects compile successfully, but they have to be brought together. The Windows Phone App project needs a reference to the SDK project. To do that, you can open the Add Reference Wizard for the Windows Phone App project and then select “solution” and then the SDK project.
The preparation is now finished and you can now start with the actual development of the app.
Development
The example app we’re going to create now won’t be ready for use in production. Its only purpose is to show how to use the SDK. For example, we won’t implement a login screen, but rather a hard coded login at app startup with credentials of an example user.
1. Let’s login the user when the main screen gets shown.
For that event there’s an event handler. It’s called OnNavigatedTo. It’s defined in the class “Page”, which is a base class of the class “PhoneApplicationPage”, which is a base class of the main page, which is where you add your code. So you can just override it. Open MainPage.xaml.cs, which is the code-behind of MainPage.xaml. Create a separate method for the sign up / login and call that method from within the OnNavigatedTo event handler. You have to mark OnNavigatedTo as asynchronous to do that:
C#
protected override async void OnNavigatedTo(NavigationEventArgs e){ await LoginOrSignUpAsync();}private async Task LoginOrSignUpAsync(){ User user = new User() { UserName = "MyUser1", Password = "secret" }; Datastore.ConfigureWithCredentials(user); bool userExists = false; try { await user.LoadMeAsync(); userExists = true; } catch (ApiomatRequestException ex) { if (ex.Status == Status.UNAUTHORIZED) { userExists = false; } else { throw ex; } } if (!userExists) { await user.SaveAsync(); }}
The code above tries to load the user and if the user doesn’t exist yet, the user just gets saved / signed up. Also, the Datastore gets configured with the users’s credentials. This is essential so that all following requests to the backend are sent with the credentials.
You’ll also need the following using directives so that the User and Datastore classes are known to this class and so you can use Task as return value:
C#
using System.Threading.Tasks;using Com.Apiomat.Frontend;using Com.Apiomat.Frontend.Basics;
11. Hit F6 to see if the code compiles. If it does, run the app in the emulator or on your device.
If everything runs correctly, the connection to your backend is now working. Have a look at the Data-Tab of your Dashboard to see the created user in your Backend.

12. Now let’s get to the UI! Open MainPage.xaml.
The template already contains a LayoutRoot Grid and a title panel within it. Keep them where they are. You’ll also see a ContentPanel. That’s where we’ll put our XAML:
C#
<Grid x:Name="ContentPanel" Grid.Row="1" Margin="12,0,12,0"> <StackPanel> <TextBox x:Name="InputBox" HorizontalAlignment="Stretch" VerticalAlignment="Top" /> <Button Content="Add Todo" HorizontalAlignment="Stretch" VerticalAlignment="Top" Click="Button_Click"/> <ListBox x:Name="TodoBox"/> </StackPanel></Grid>
It’s a text box, a button and a list box. Right now nothing would happen if you clicked the button, so …
13. … let’s add some logic to it.
We want something to happen when we click the button. In the XAML there is already an event handler mentioned: “Button_Click”. This event handler now needs to be defined in the code-behind of the MainPage.xaml, which, as mentioned earlier, is MainPage.xaml.cs. Open that file.
First add the using directive with the namespace of your main module. That’s the name of your app + “Main”. For example: “TestAppMain”. You can see it in the SDK project in the Visual Studio solution and you’ll find it with the help of IntelliSense when typing “using Com.Apiomat.Frontend.”.
C#
using Com.Apiomat.Frontend.;
Finally add the logic:
C#
private async void Button_Click(object sender, RoutedEventArgs e){ Todo t = new Todo() { Description = InputBox.Text, Done = 0, UntilDate = null }; await t.SaveAsync(); TodoBox.Items.Add(t);}
On every click of the button this reads the text box (named “Inputbox”), creates a Todo with that text, saves it and then assigns its description to the list box on the GUI.
Try it out – hit F5.
You can go to the Data-Tab in the dashboard, select the “Todo” class in the left panel and see all the todos that were created.
14. Currently, when you launch the app, the list box is empty, although you might have saved some todos before. To change that we’ll add a method to load todos as soon as the MainPage view gets displayed. As mentioned earlier, the OnNavigatedTo method handles that event. Create a separate method to populate the todo list and call that method from within the OnNavigatedTo method:
C#
protected override async void OnNavigatedTo(NavigationEventArgs e){ await LoginOrSignUpAsync(); await PopulateTodoListAsync();}private async Task PopulateTodoListAsync(){ IList todoList = await Todo.GetTodosAsync("done==0"); foreach (Todo t in todoList) { TodoBox.Items.Add(t.Description); }}
This code loads all of the uncompleted Todos every time the MainPage is launched. Currently that’s all todos you have saved so far.
Close the app and launch it again. The list box should fill up with your todos.
15. Now, to show you how the query works and how powerful the dashboard is: Go to the Data-Tab and to the todos. Now set some “done”-Attributes to 1.
Close the app and launch it again. Now the todos that you marked as done get filtered out and you only see a subset of all todos.
Final words
For a real app, there would be more work to do of course. You’d need a login screen for example. Also, you’d use proper MVVM with data binding in the XAML. But now you got the general idea of how to use the ApiOmat C# SDK.