Adding a Log-in Screen
In this section, we'll build the log-in screen that authenticates users with the ApiOmat backend. Users can be authentication with additional systems such as Active Directory or LDAP, but we will cover using basic ApiOmat authentication.
Every ApiOmat Studio project should include the following (web) services by default:
-
ApiOmat Base Connector
-
ApiOmat Connector
Should the ApiOmat Connector or Base Connect be missing from your project, you can add them by clicking on the "Data Block..." button and then on AOMService or AOMBase.
The image below is what we'll make our log-in screen look like.
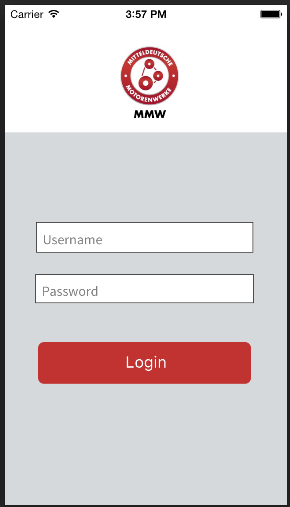
Setting up the login gate
Now to use ApiOmat authentication, we will also have to add the AOMLoginService from the Data Block menu as well as a Log-in Gate from the Visual Block menu. The GIF below shows you how to add the two elements to your project.
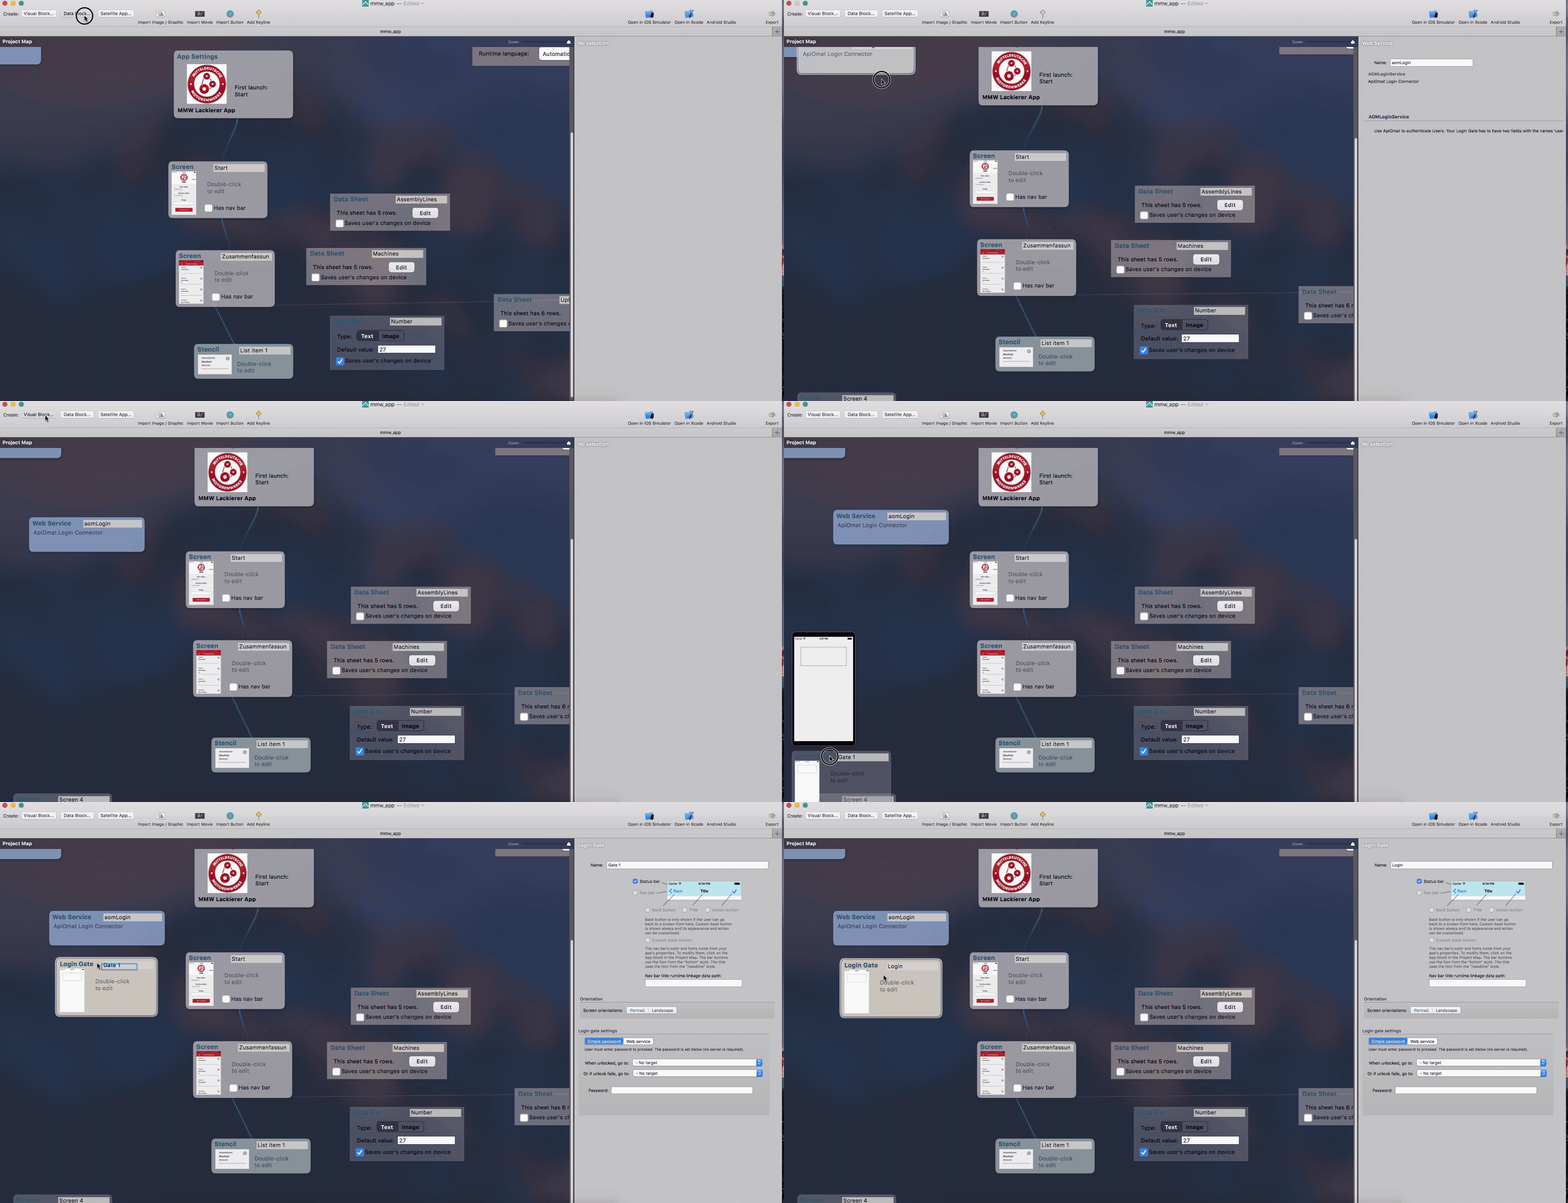
Building the login screen
Once we've added the AOMLoginService and the Login Gate to our project, it's time to build our login screen. Enter the screen editor by double clicking on the Login Gate.
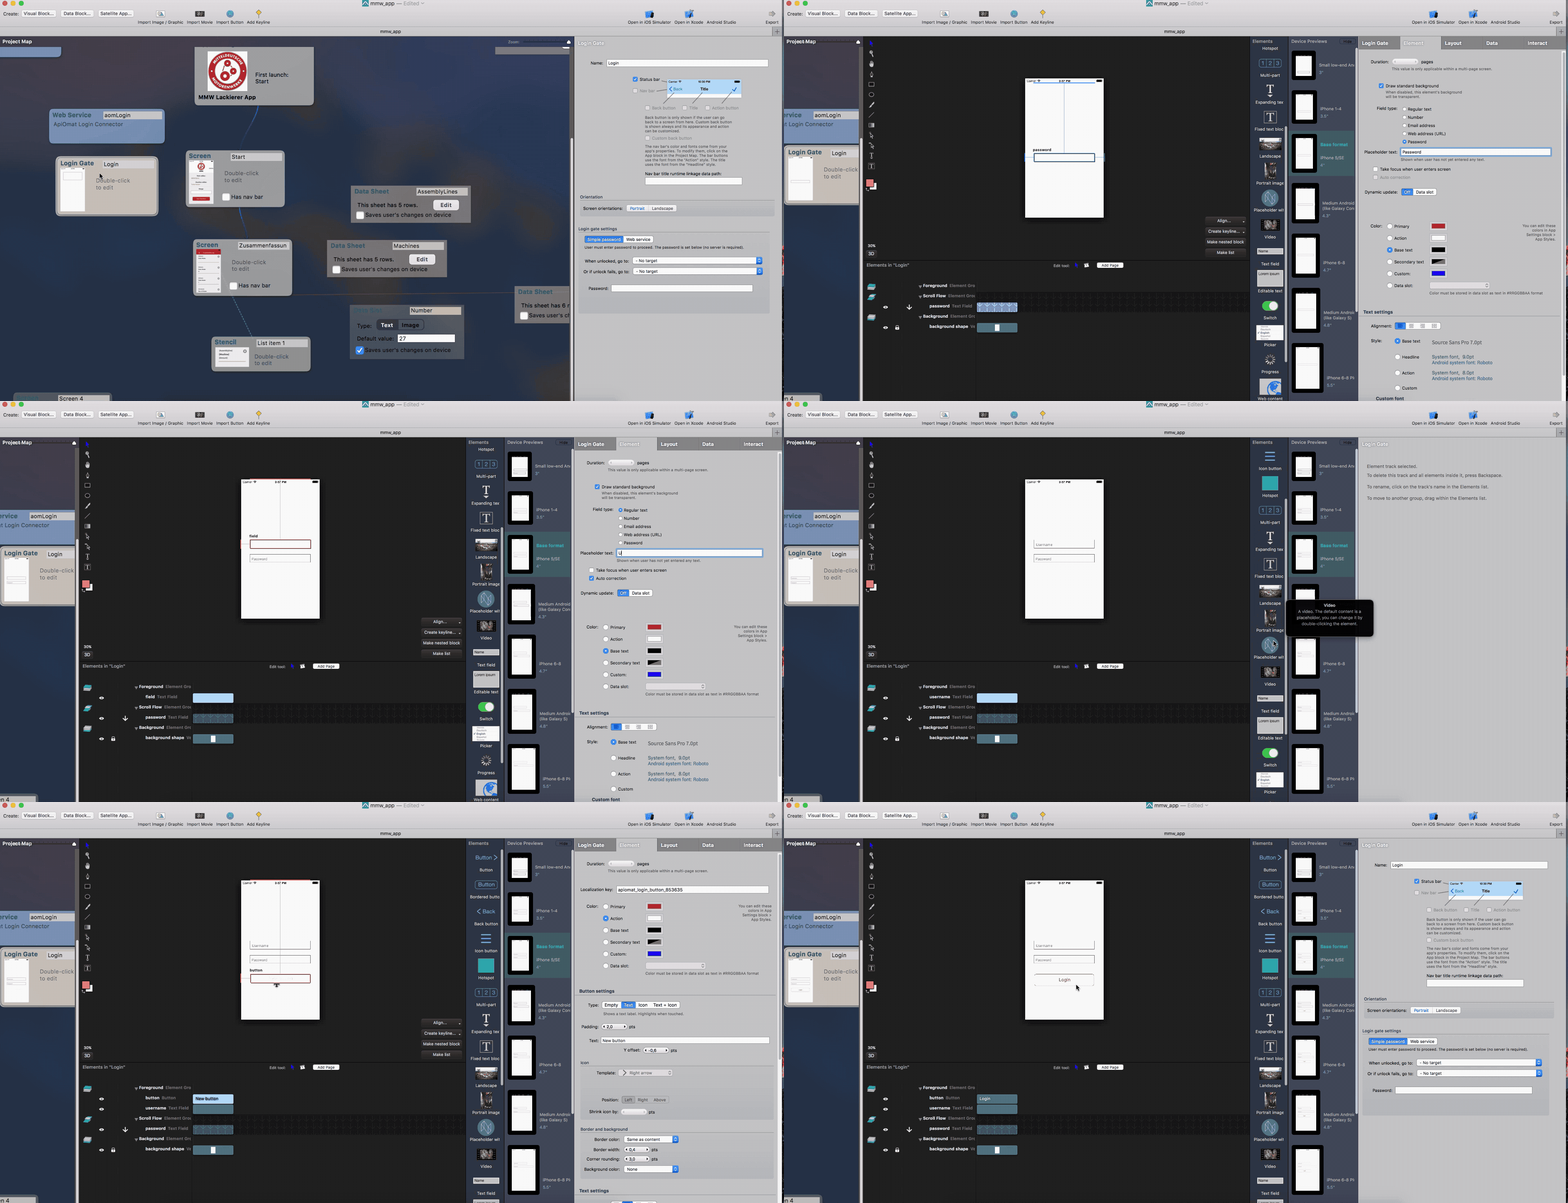
The Login Gate is a white screen by default that comes with a password text field. We'll have to change the size and position of the password text field to fit our desired design. Next, add a text field and add the placeholder text "username" and then add a button with the text "log in". The following GIF shows you how to set up a basic login screen.
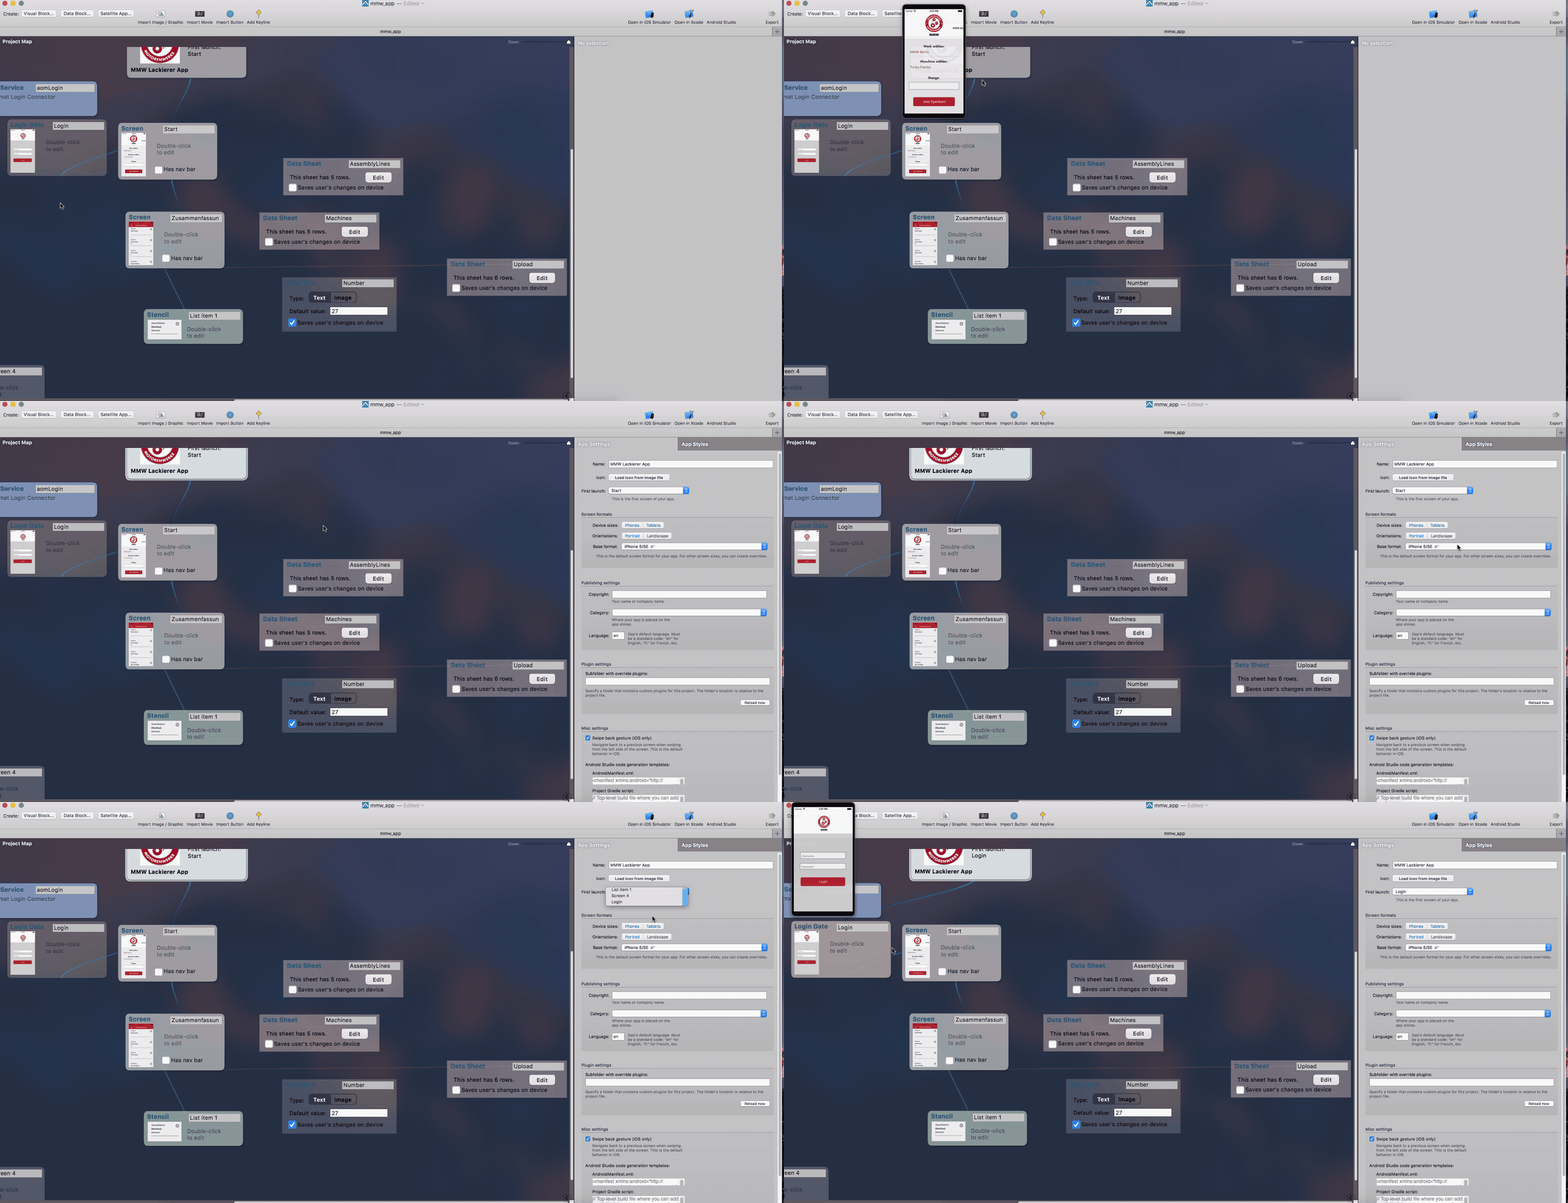
Setting the login screen as the default
Now that we've created the login screen, we can set it to be the launch screen by clicking on the App Settings box in our project map and then selecting login screen from the First Launch drop down menu. The GIF below shows you how to do so.
Adding interaction to the log in button
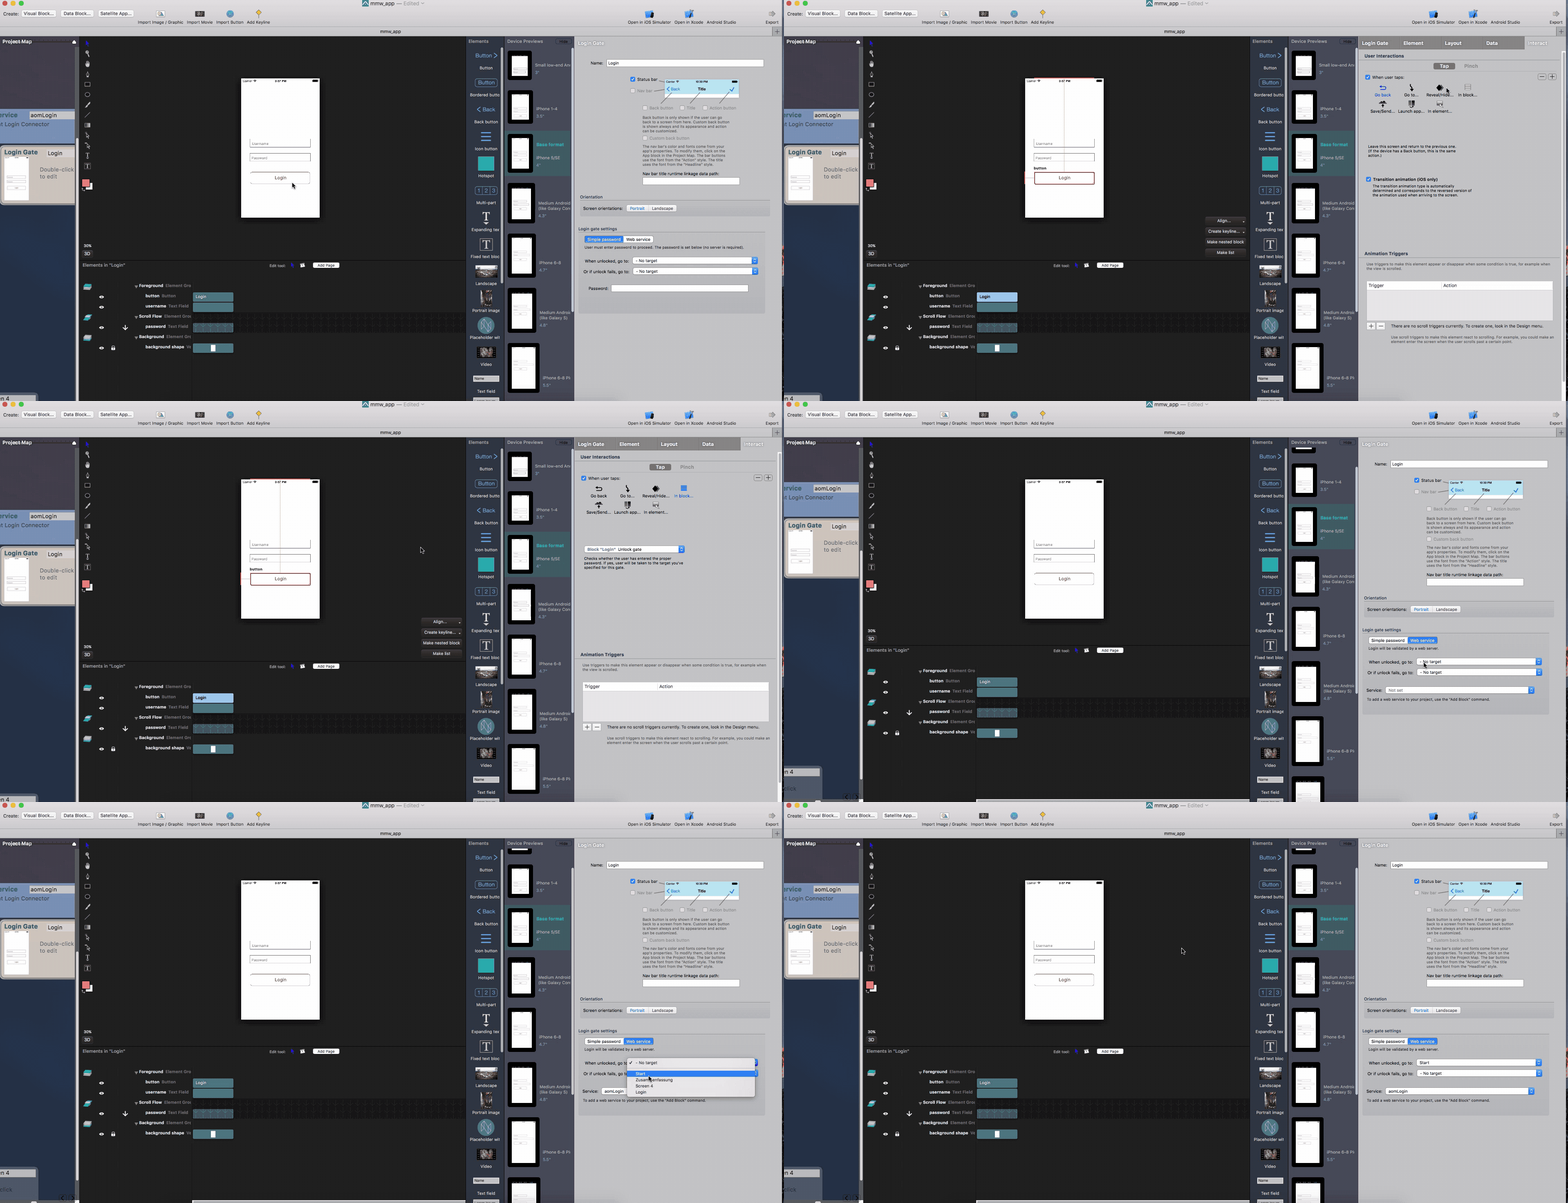
Now that we've built the login screen and set it as our launch screen, we have to add the interactions to the log in button that we created. To do so click on the button in the screen editor, as shown below, and navigate to the interact tab. First, select the when user taps check box and select in block. A drop down menu will appear, here we select "login unlock gate". Once we've done that, click onto the screen editor to return to the login gate settings, select web service under the login gate settings. Now we have to decide what happens when the log in is successful with the drop down menu "When unlocked, go to". Select the start screen and users will automatically be taken to that screen upon logging in.
Styling the login screen
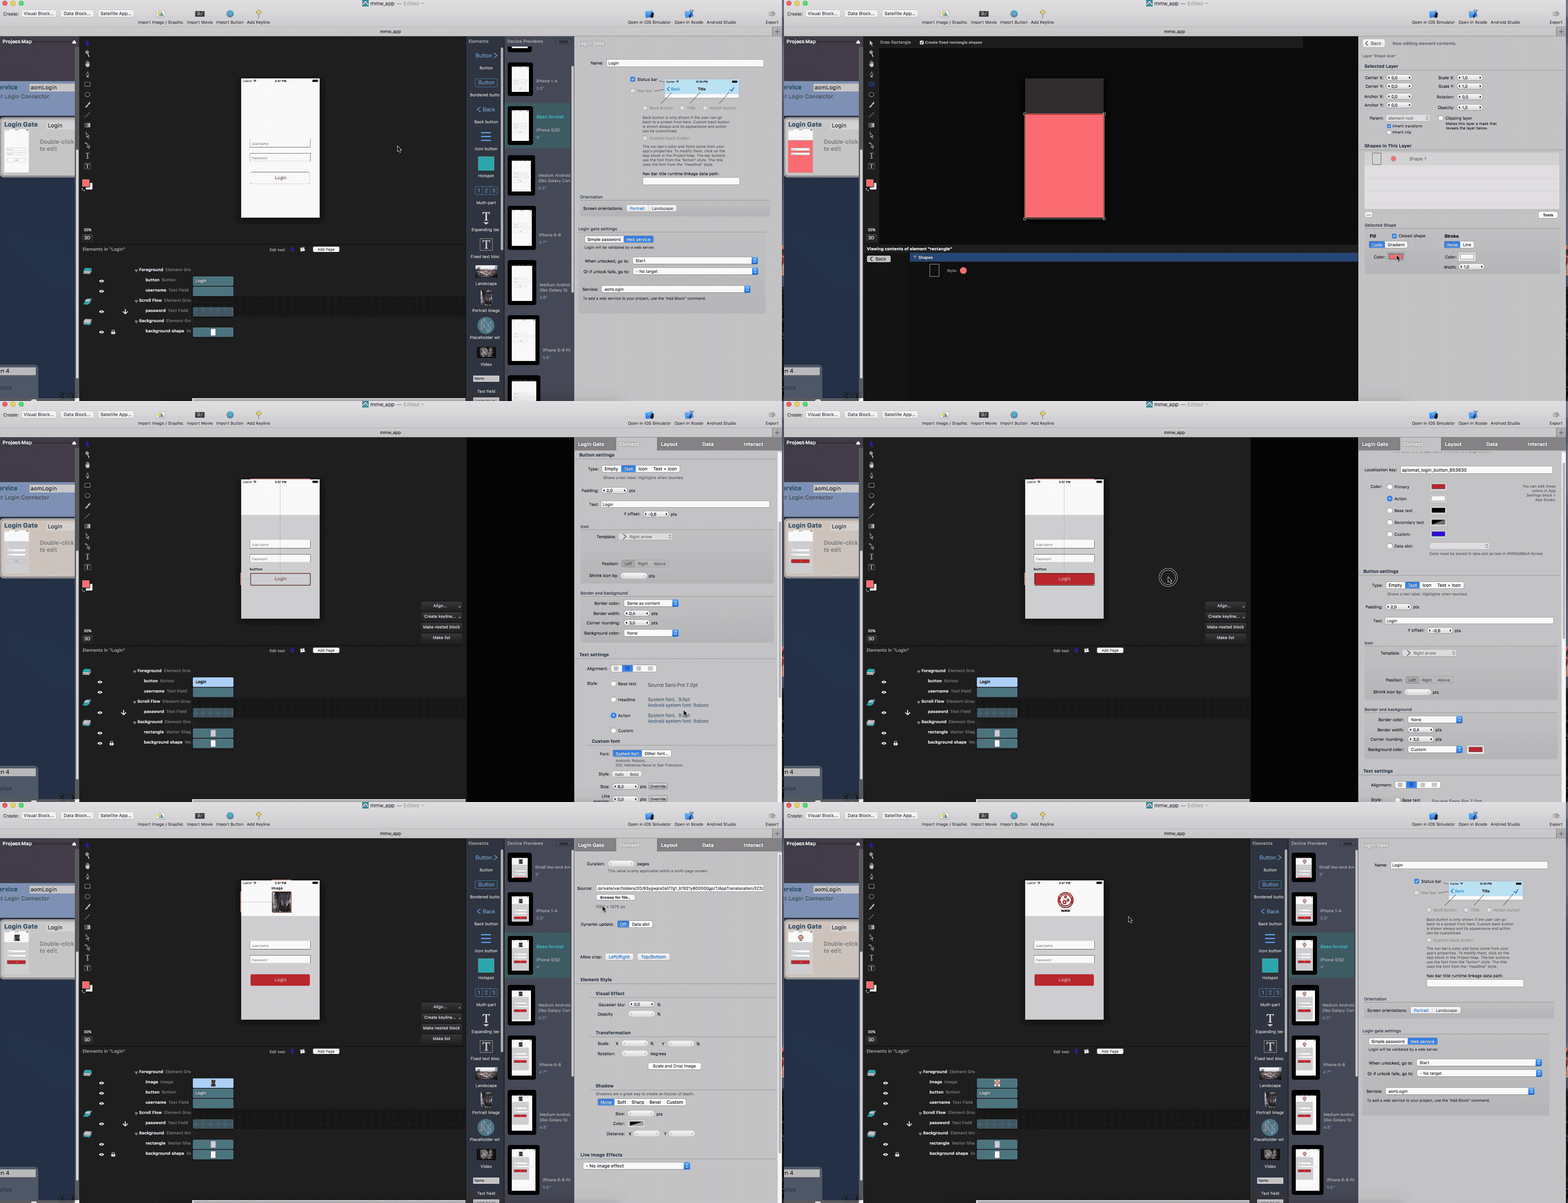
Finally, we'll stylize the login gate to match the rest of our app. The GIF Below shows how you can do that.
Adding users
If you added the log-in screen and launched your app, you will not be able to sign in, because there are no users. To do this we can do one of two things: 1. create users in the ApiOmat backend or 2. Create a sign up screen. We've covered all the necessary topics you need to create your own sign-up screen, so we will only cover how to create a user (or any data) in the ApiOmat backend.
Log-in to the ApiOmat Dashboard where we created the ApiOmat backend. Once you are there click on the "DATA" tab. Now select the data model we want to use for our new object, in this case we want to create a user account, so click on User under the Basic Module on the left-hand side of the screen.
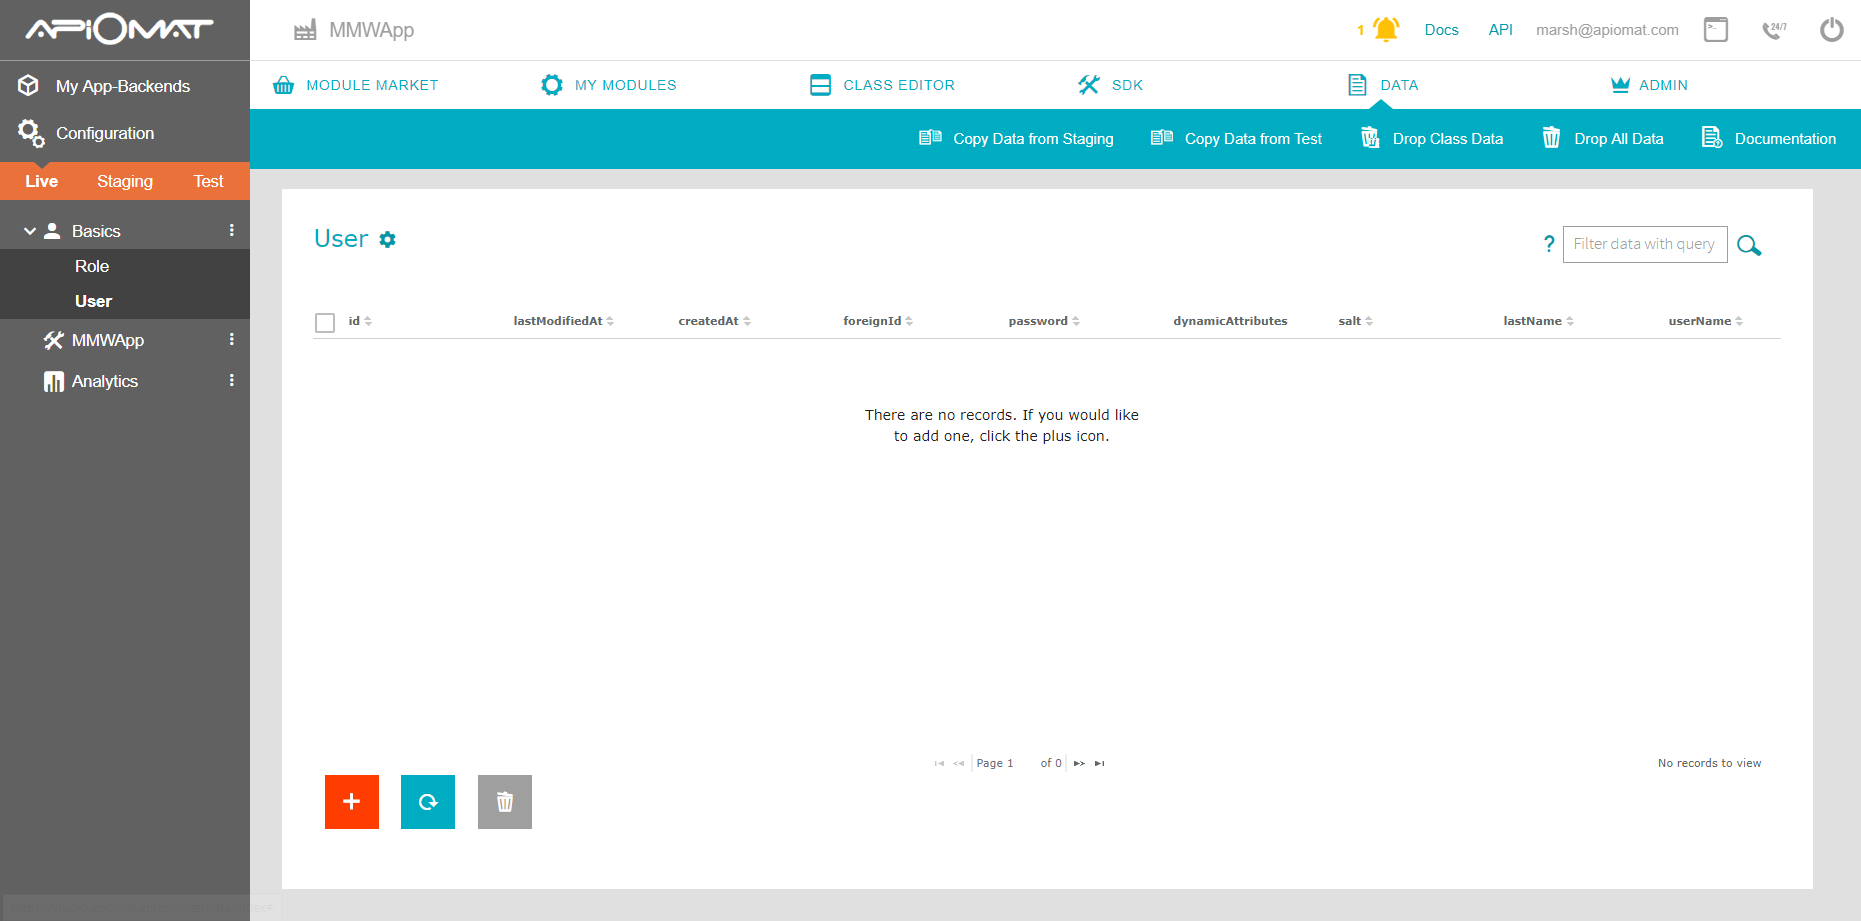
Now you can see a list of all the users that are in your app, and it is probably a blank screen as shown in the image below. Click on the red plus button to create a new users. You will have to enter a username, as this is a required attribute of the user data model.
Once your created a user, it should look like the image below:
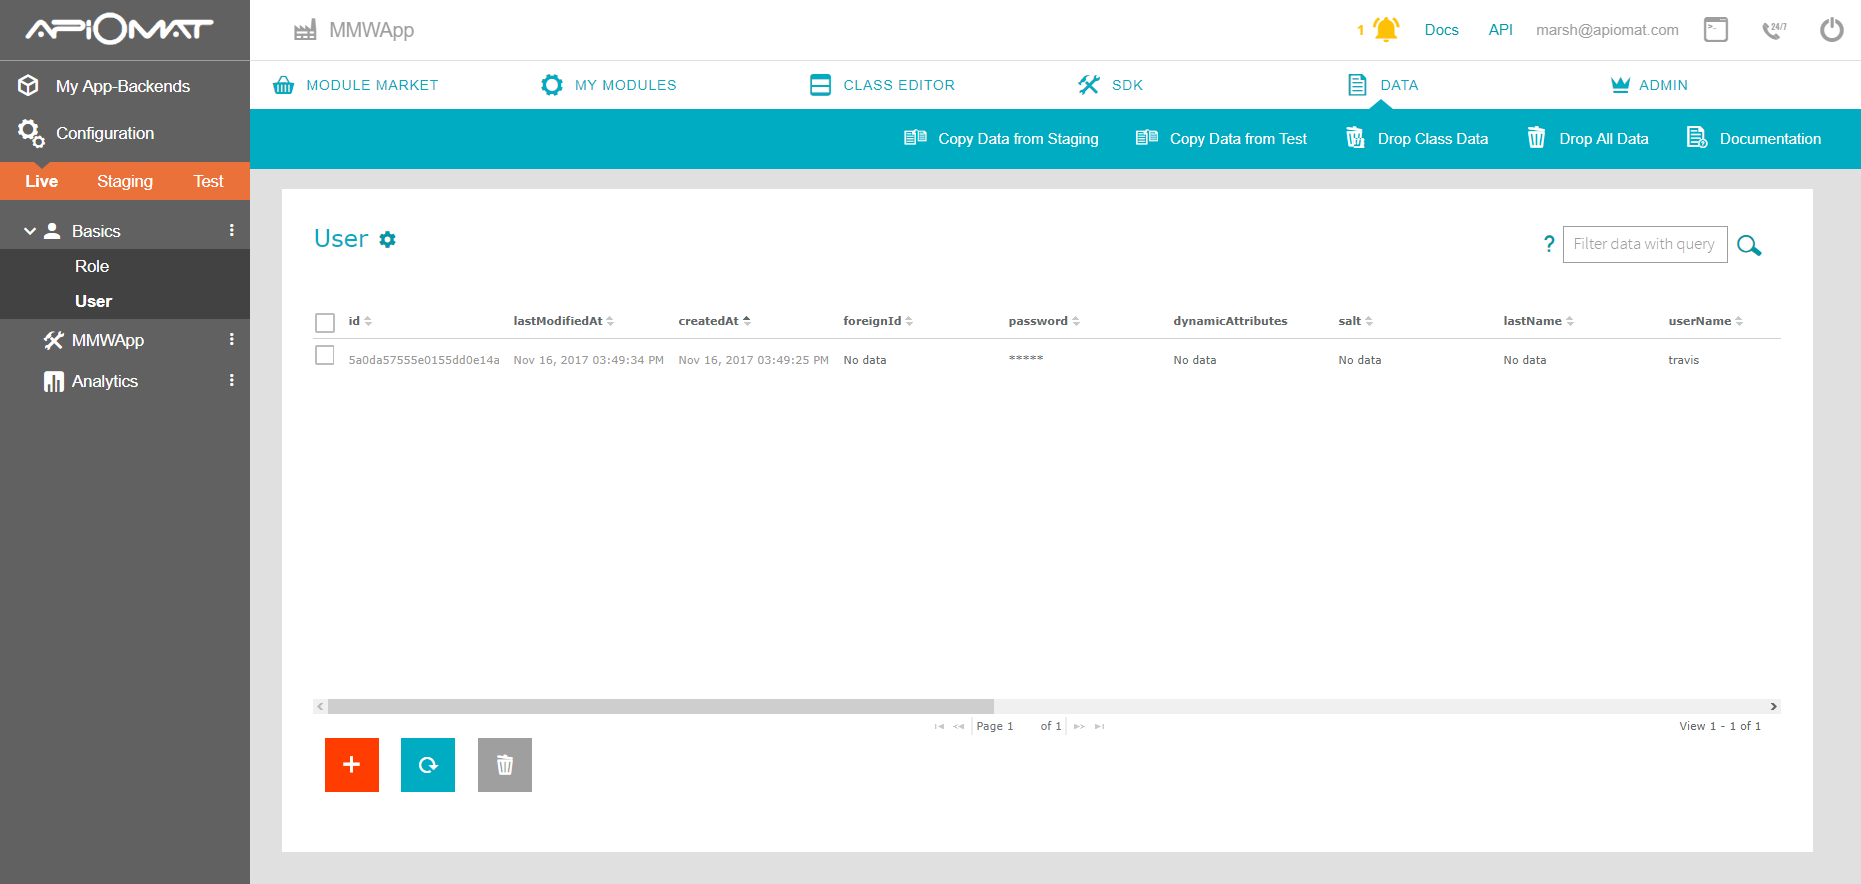
In the image, we can see that I created the user "travis". By simply clicking on the password, we can change the user's password here.