Connecting our App to the Backend
To save and retrieve data from ApiOmat, we need to connect our ApiOmat Studio project to the ApiOmat Backend. The connection is simple and once its in place, we can connect elements of our app to specific types of data located in the ApiOmat backend.
Using data sheets
To connect our app to the backend, we'll use the ApiOmat Studio Data Sheets.
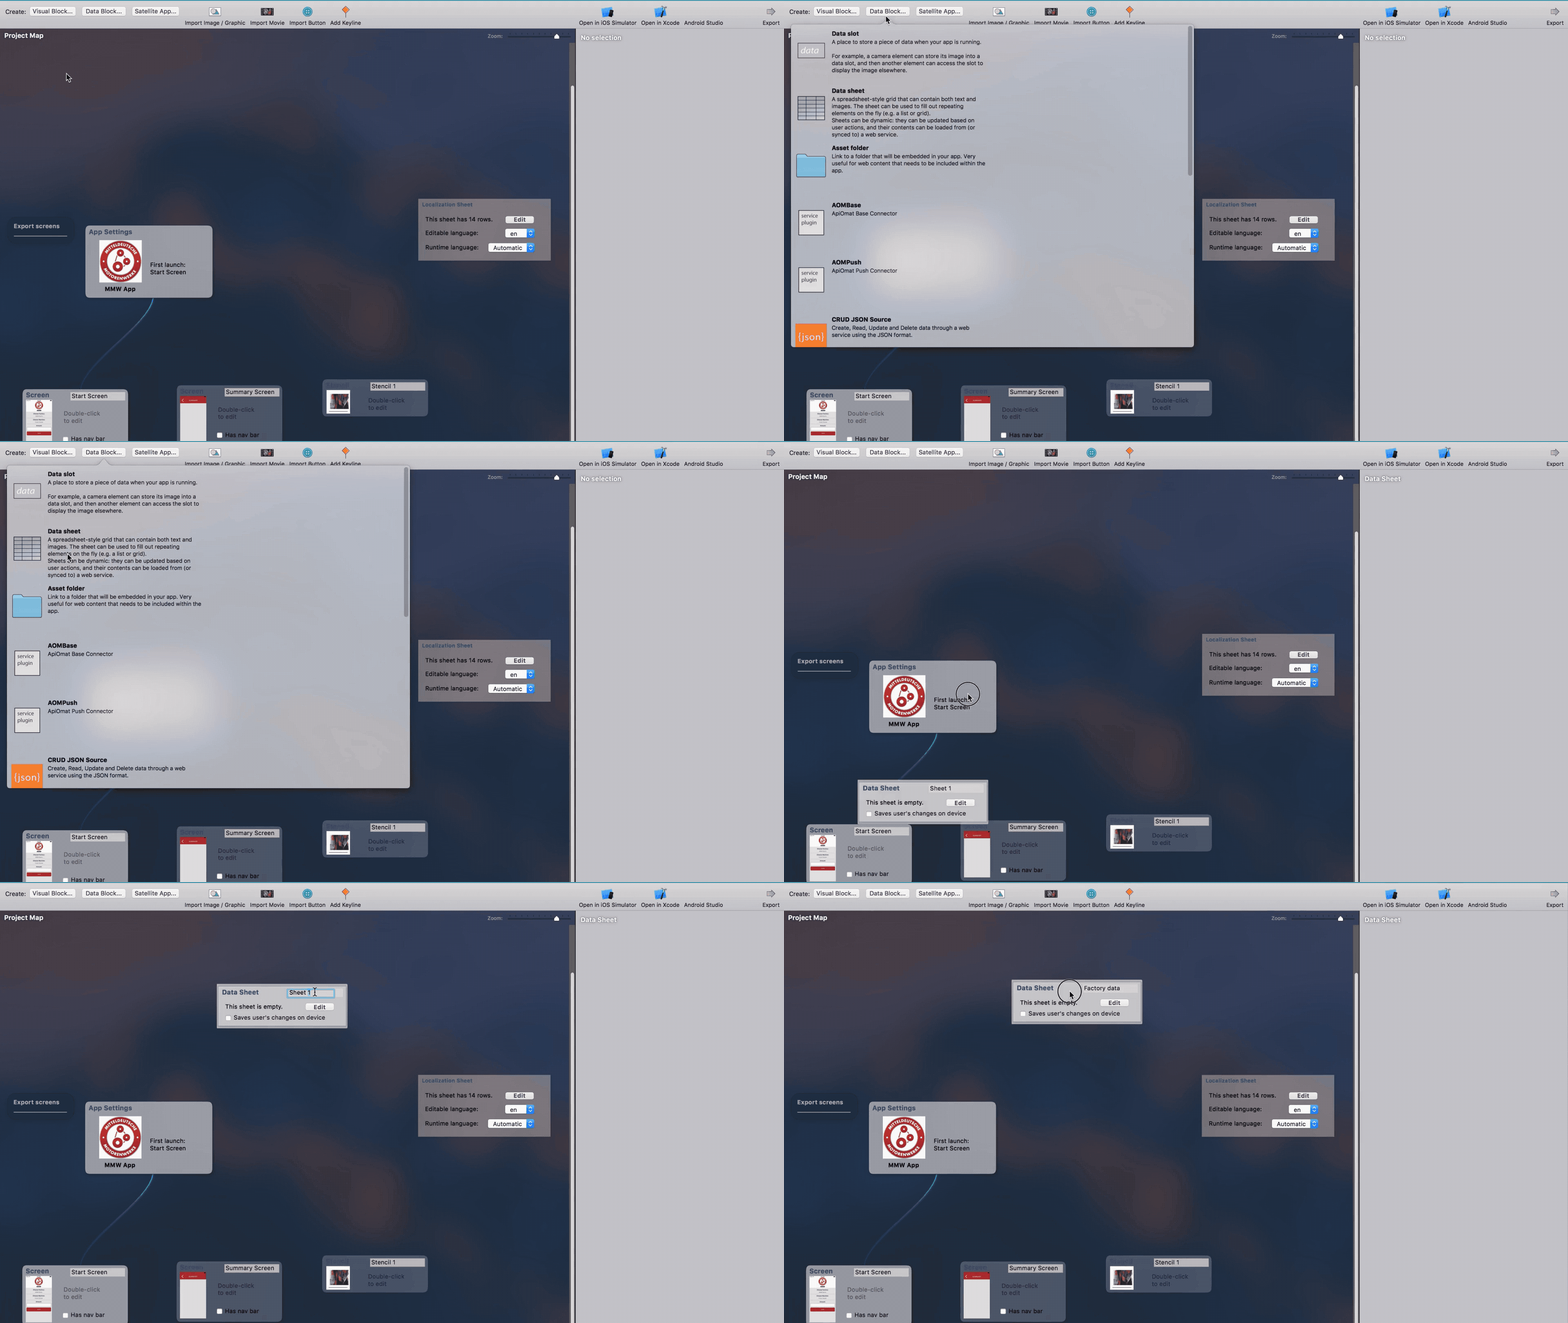
Currently, we have to create a data sheet for each of the data models in the ApiOmat backend. Each data sheet has to have the exact name of the data models that are in the ApiOmat backend. You can add a data sheet to your project map by clicking on the "Data Block..." button and selecting data sheet. Do this for all of the classes in the ApiOmat backend. For this tutorial, we need three data sheets: Factory, Machine and Summary.

Configuring the data sheet
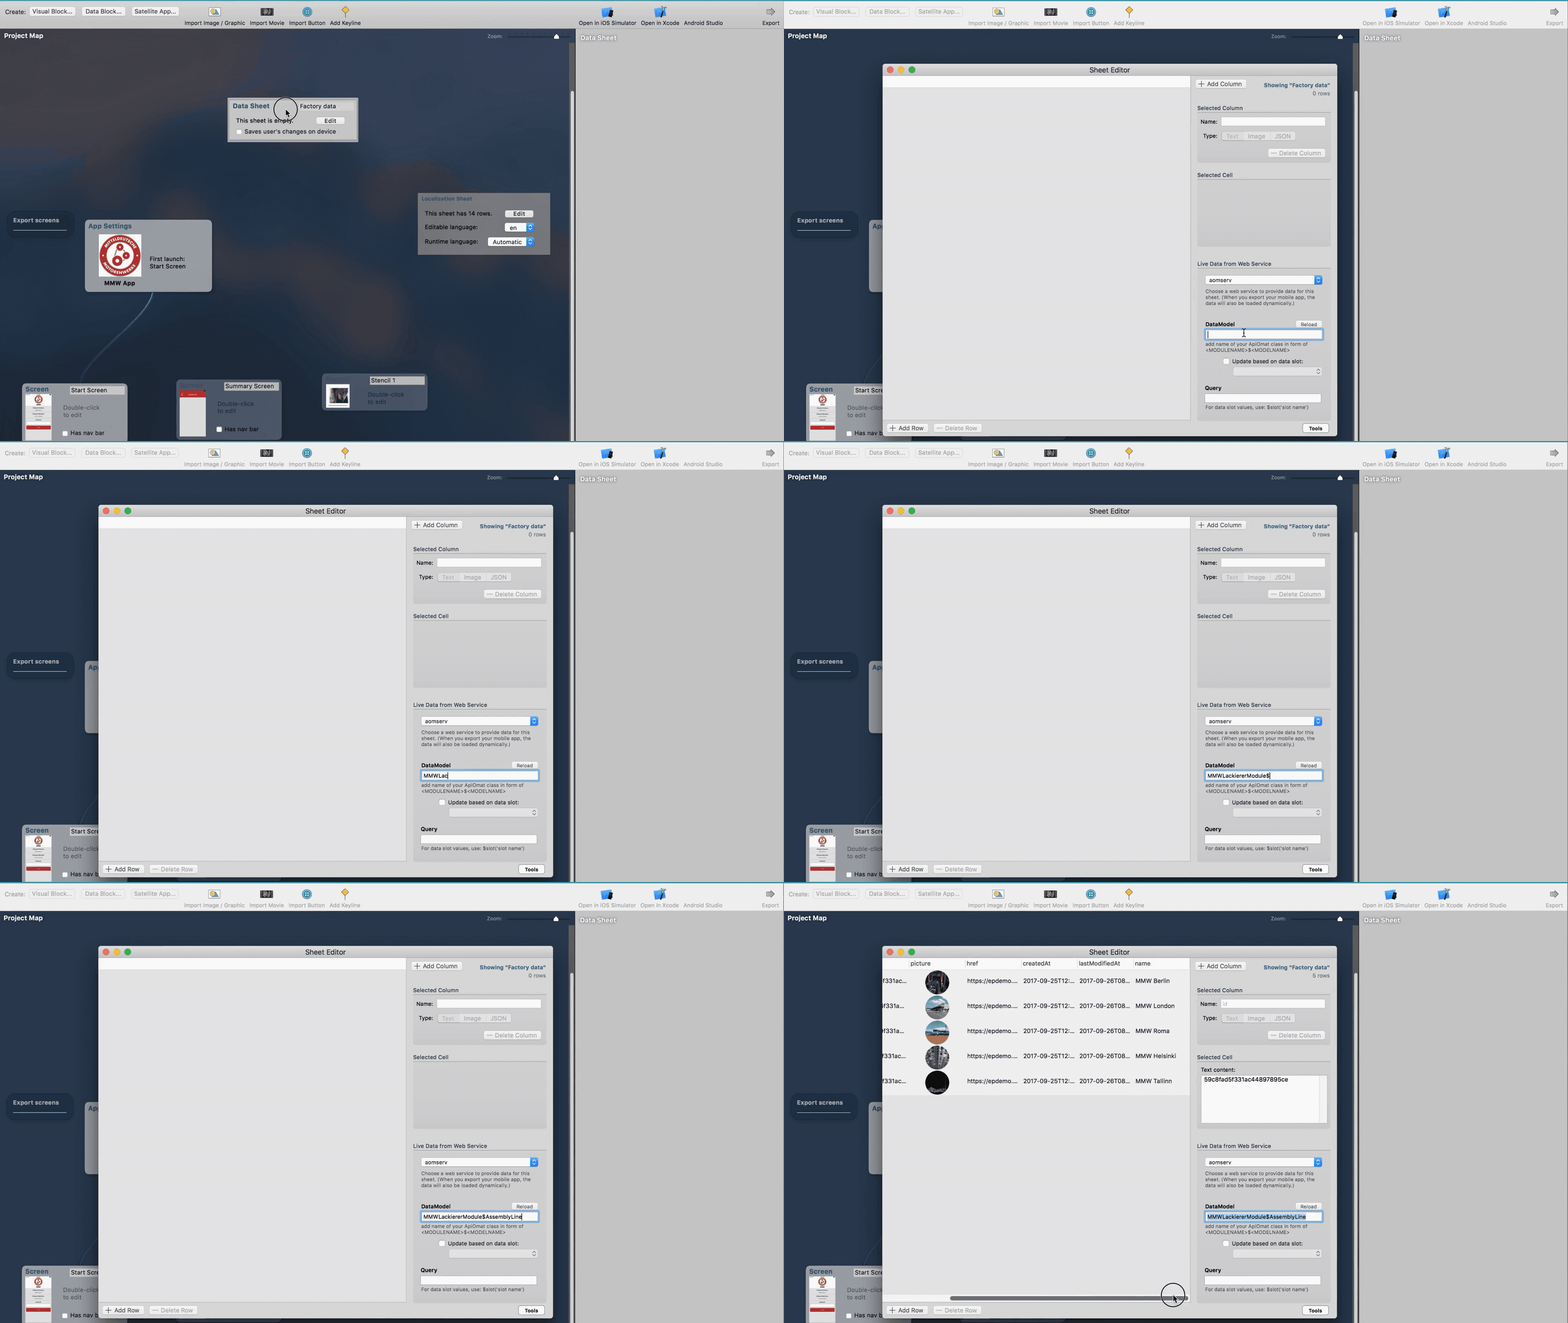
To configure a data sheet, we double click on the data sheet block in the project map to open the Sheet Editor. To connect a data sheet to our ApiOmat backend, use the first drop down menu under Live Data from Web Service and select aomserv as shown in the GIF below.

After selecting aomserv as our web service, we have provide a service path. The service path is defined by entering the the ApiOmat Backend Module name, a dollar sign and the data model that we want to use in the data sheet.
For example, to create the data sheet for the Summary, we will write "MMWApp$Summary" (without quotation marks). Since the data models AssemblyLine and Machine also belong to the MMWApp module, we defined the service paths for AssemblyLine and Machine by writing either MMW$AssemblyLine or MMWApp$Machine
If you configured the data sheet correctly, any data that is stored in the ApiOmat backend belonging to the data module you define will be displayed as in the GIF above.
Configuring stencil data
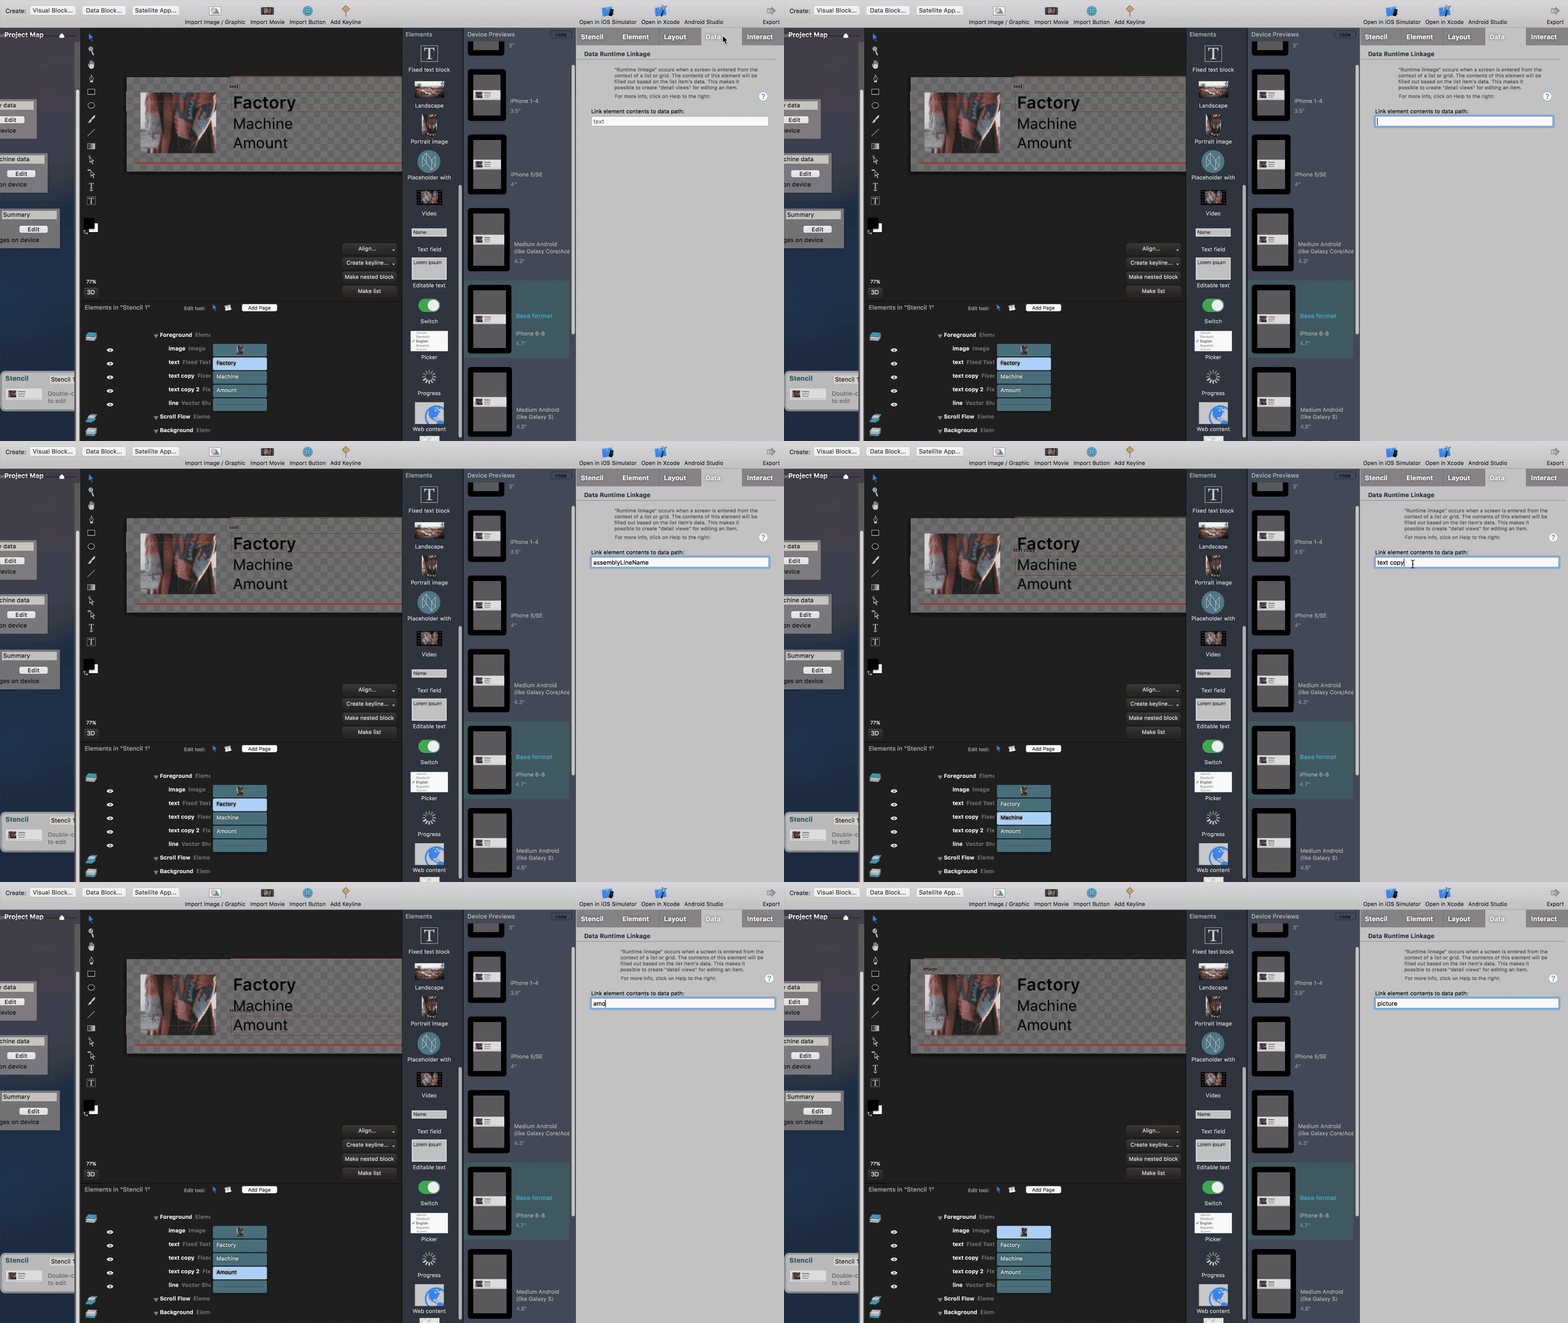
Once we have a data sheet, we need to configure our stencil so it knows what data to display. We do so by clicking on each element in the stencil, clicking on the data tab and entering the attribute from the data sheet that we would like to display.
We want to display information from the Summary data model for the stencil we created. So to display the name of the factory, we have to enter the attribute exactly as it is defined in the ApiOmat backend. In this case, we named it "assemblyLineName". We do the same for machine, amount and picture, as shown in the GIF below.

Creating a list
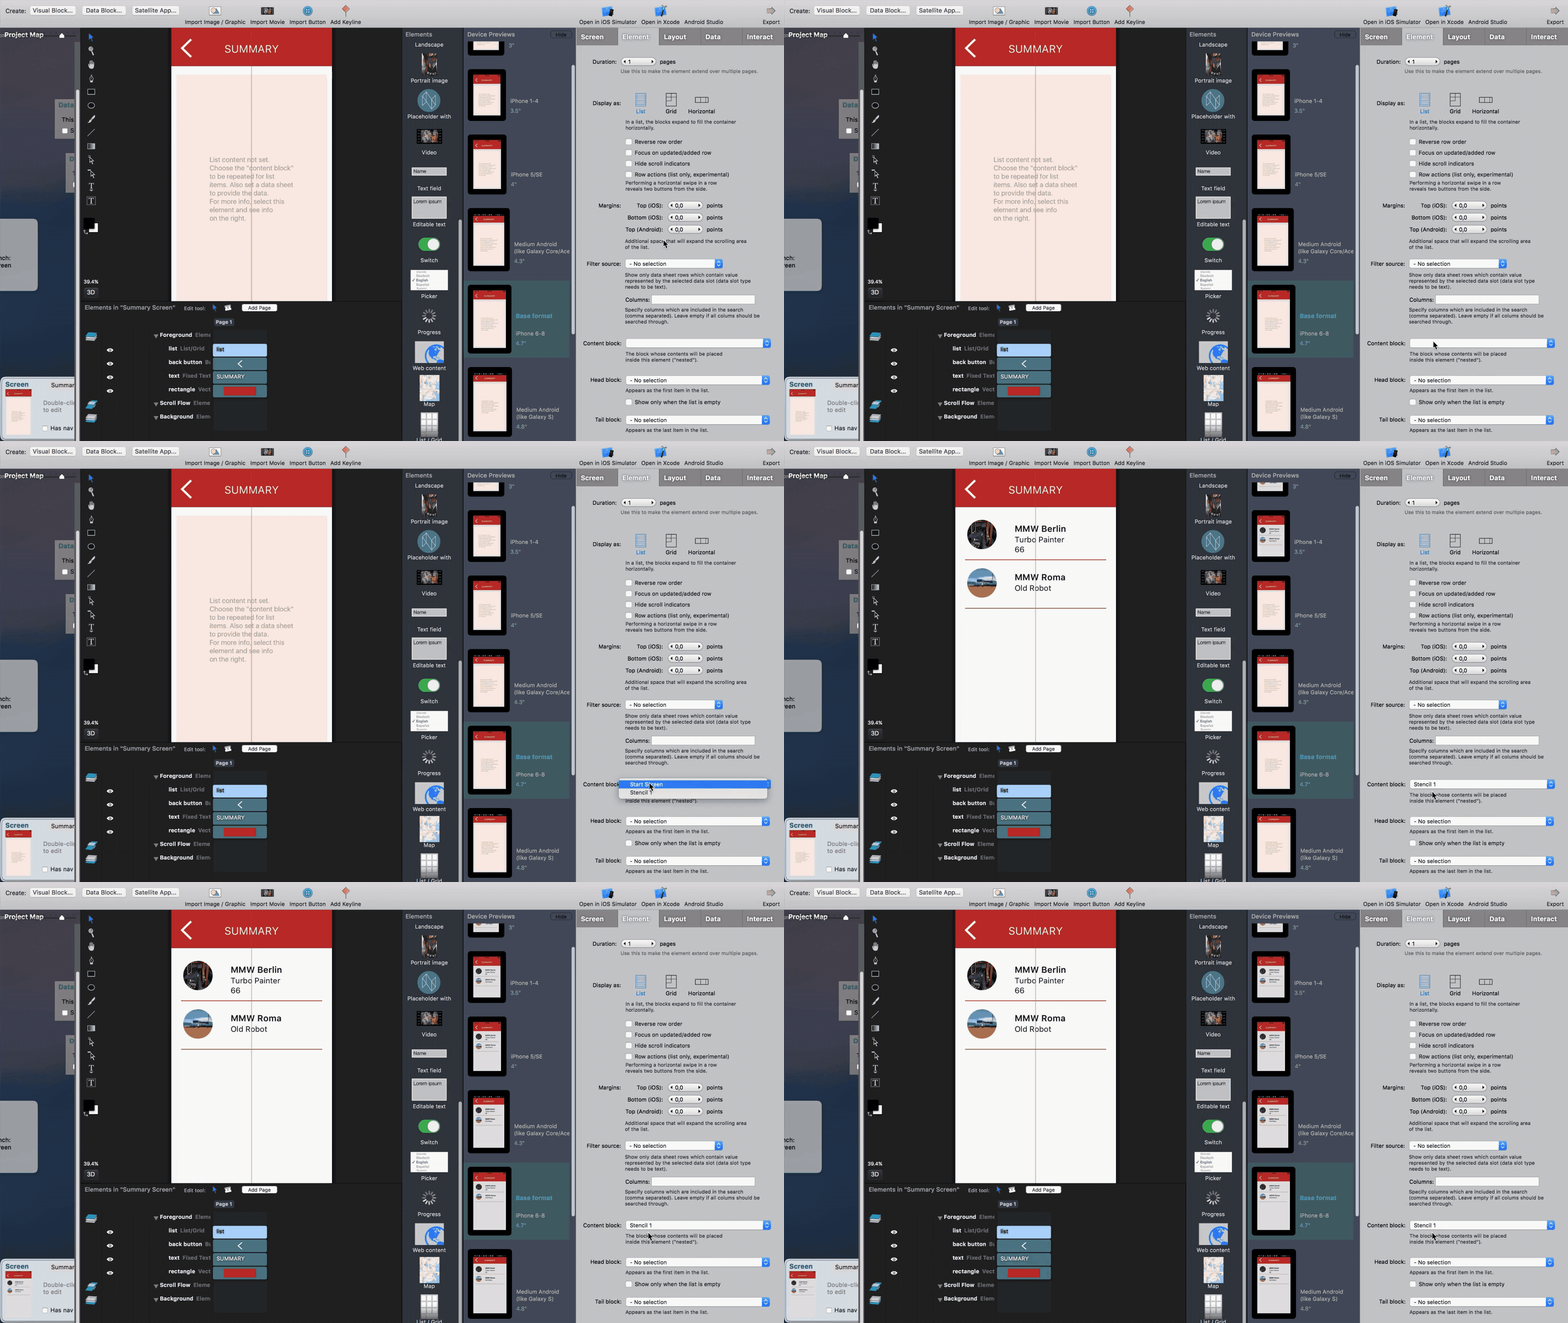
On the summary screen, add the List element and drag it across the space across the nav bar. Once you have created the list, navigate to the data tab on the right-hand side of the screen. Check the box "Take contents from data sheet" and then use the drop down menu to select the data sheet that will be used to populate the list. In this tutorial, we will use the summary data sheet.
Then under the list's element tab, navigate to the content block drop down and select the stencil we created as shown in the GIF below. If you've properly configured your data sheets and stencils, the list should update immediately on the screen editor as in the GIF.

Next Step
Next we have to set up the button interaction to let users save data. We'll cover how to do so in Saving data with button interactions.