Saving data with button interactions
On the start screen that we created in Building the Start Screen, we will access a list of factories and machines from the ApiOmat backend. The user will then be able to create a summary by selecting a factory and a machine from the ApiOmat backend and enter an amount. In this section we will set up the pickers for Choose Factory and Choose Machine and set up the Save button to save the summary to the ApiOmat backend.
Adding pickers
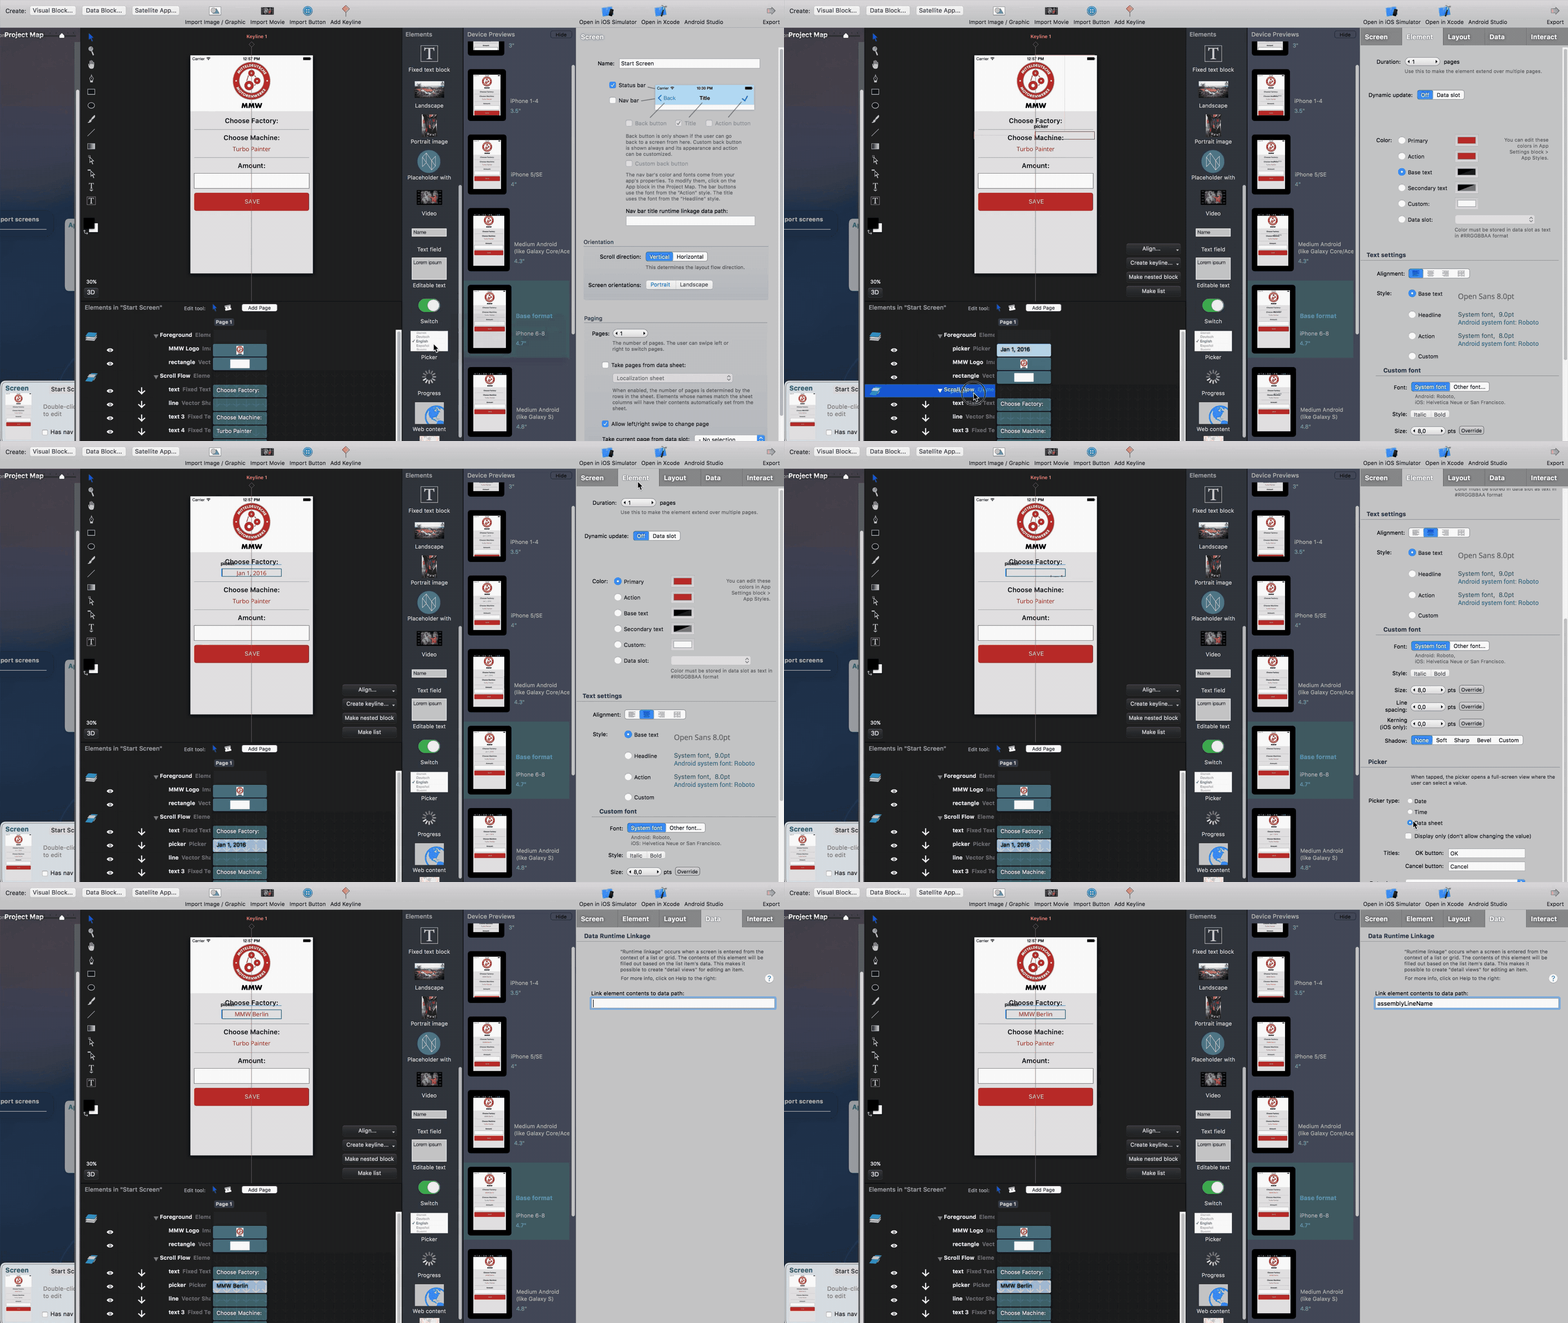
When we first built this screen, we put place holder text below Choose Factory and Choose Machine. Now we will replace the text fields with a picker from the elements tray. Drag a picker onto the screen editor. Once you've styled it and aligned it to the middle keyline, navigate to the picker's element tab and scroll to the bottom. Select "Data Sheet" under "Picker Type" and use the data sheet drop down to select AssemblyLines for the Factory picker.
Then navigate to the data tab and enter the name of the attribute that the picker should display. We want to use the "assemblyLineName" to show the name of the factories.
Do this again for the Machines picker. As shown in the GIF below, make sure to add the pickers to the scroll flow.

Button interactions
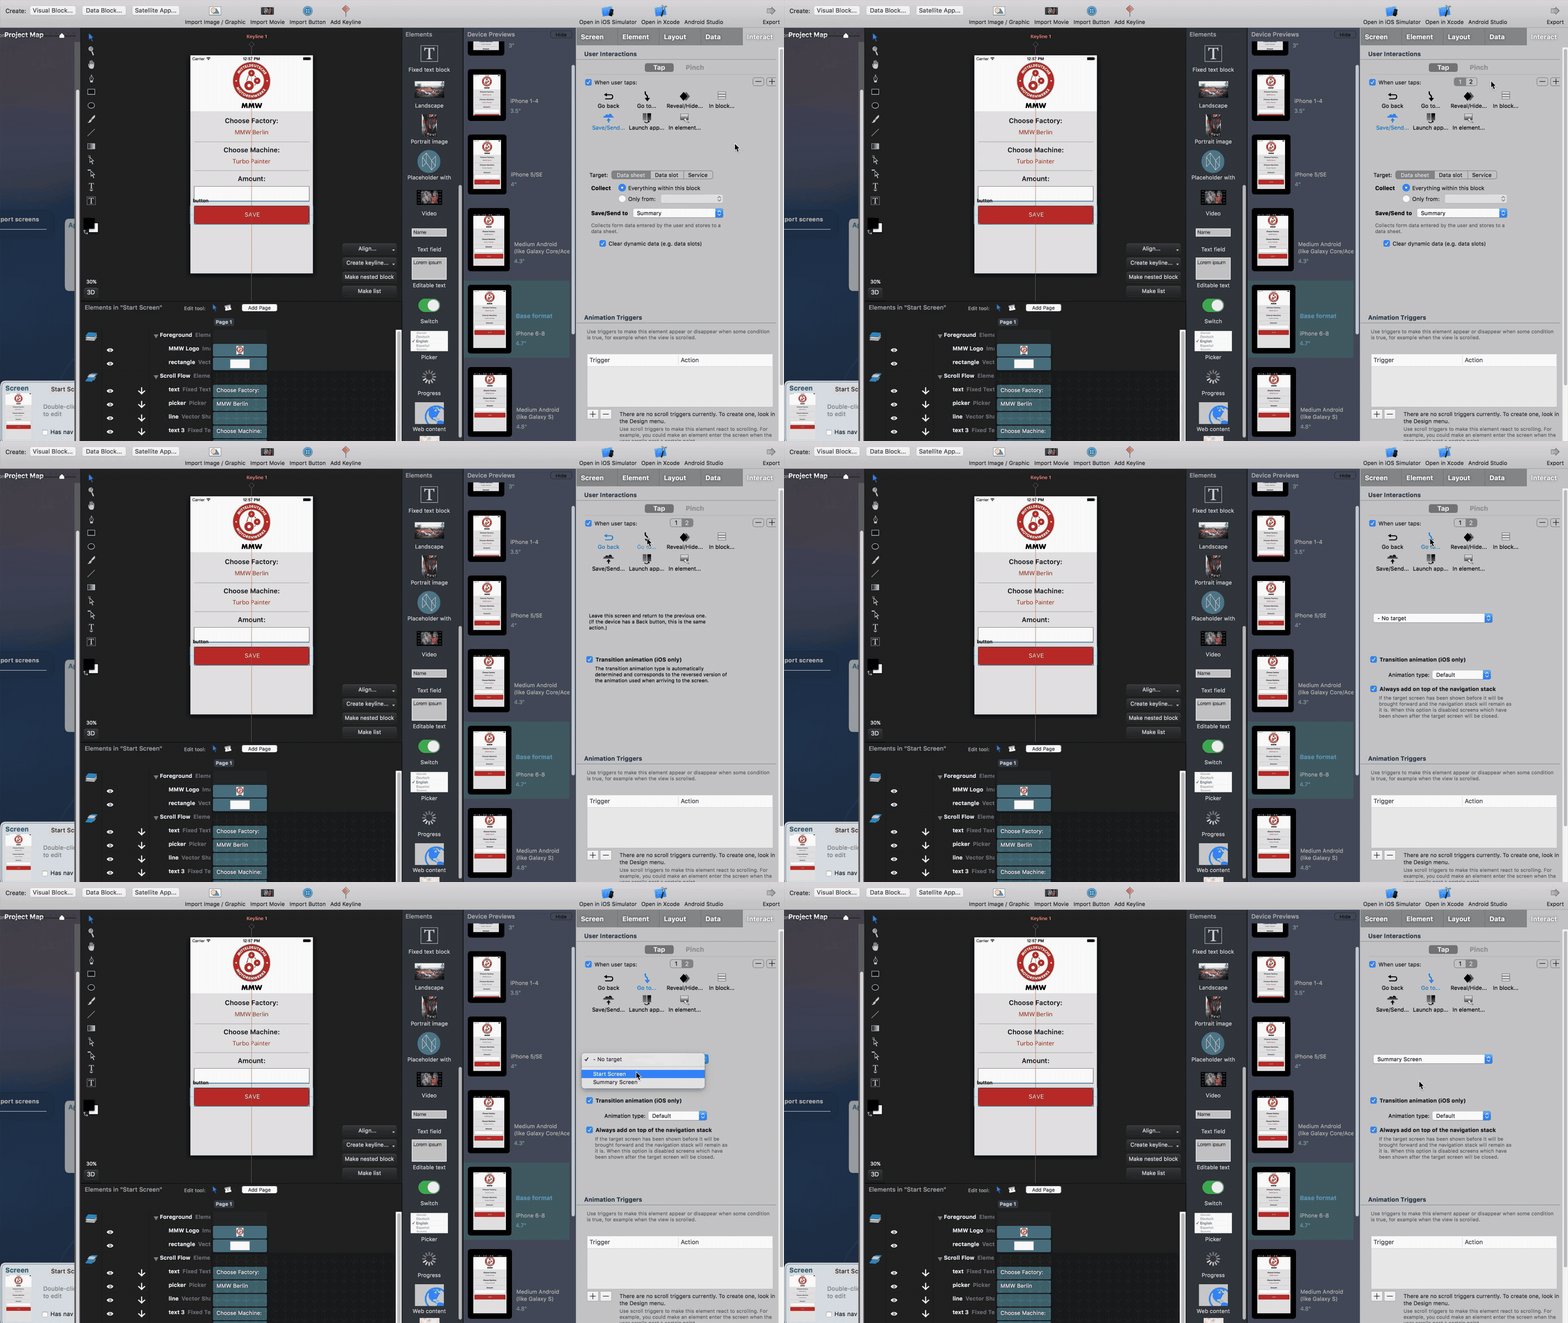
Next we have to set up the button interactions. By clicking on the button, we can add interactions to it by clicking on the interact tab on the right-hand side of ApiOmat Studio.
Select the check box, "When user taps" and click on Save/Send. Make sure the Target is the Data Sheet and select Everything within this block under Collect.
Use the Save/Send drop down menu to select the data sheet we want to save to, which is Summary in this app.
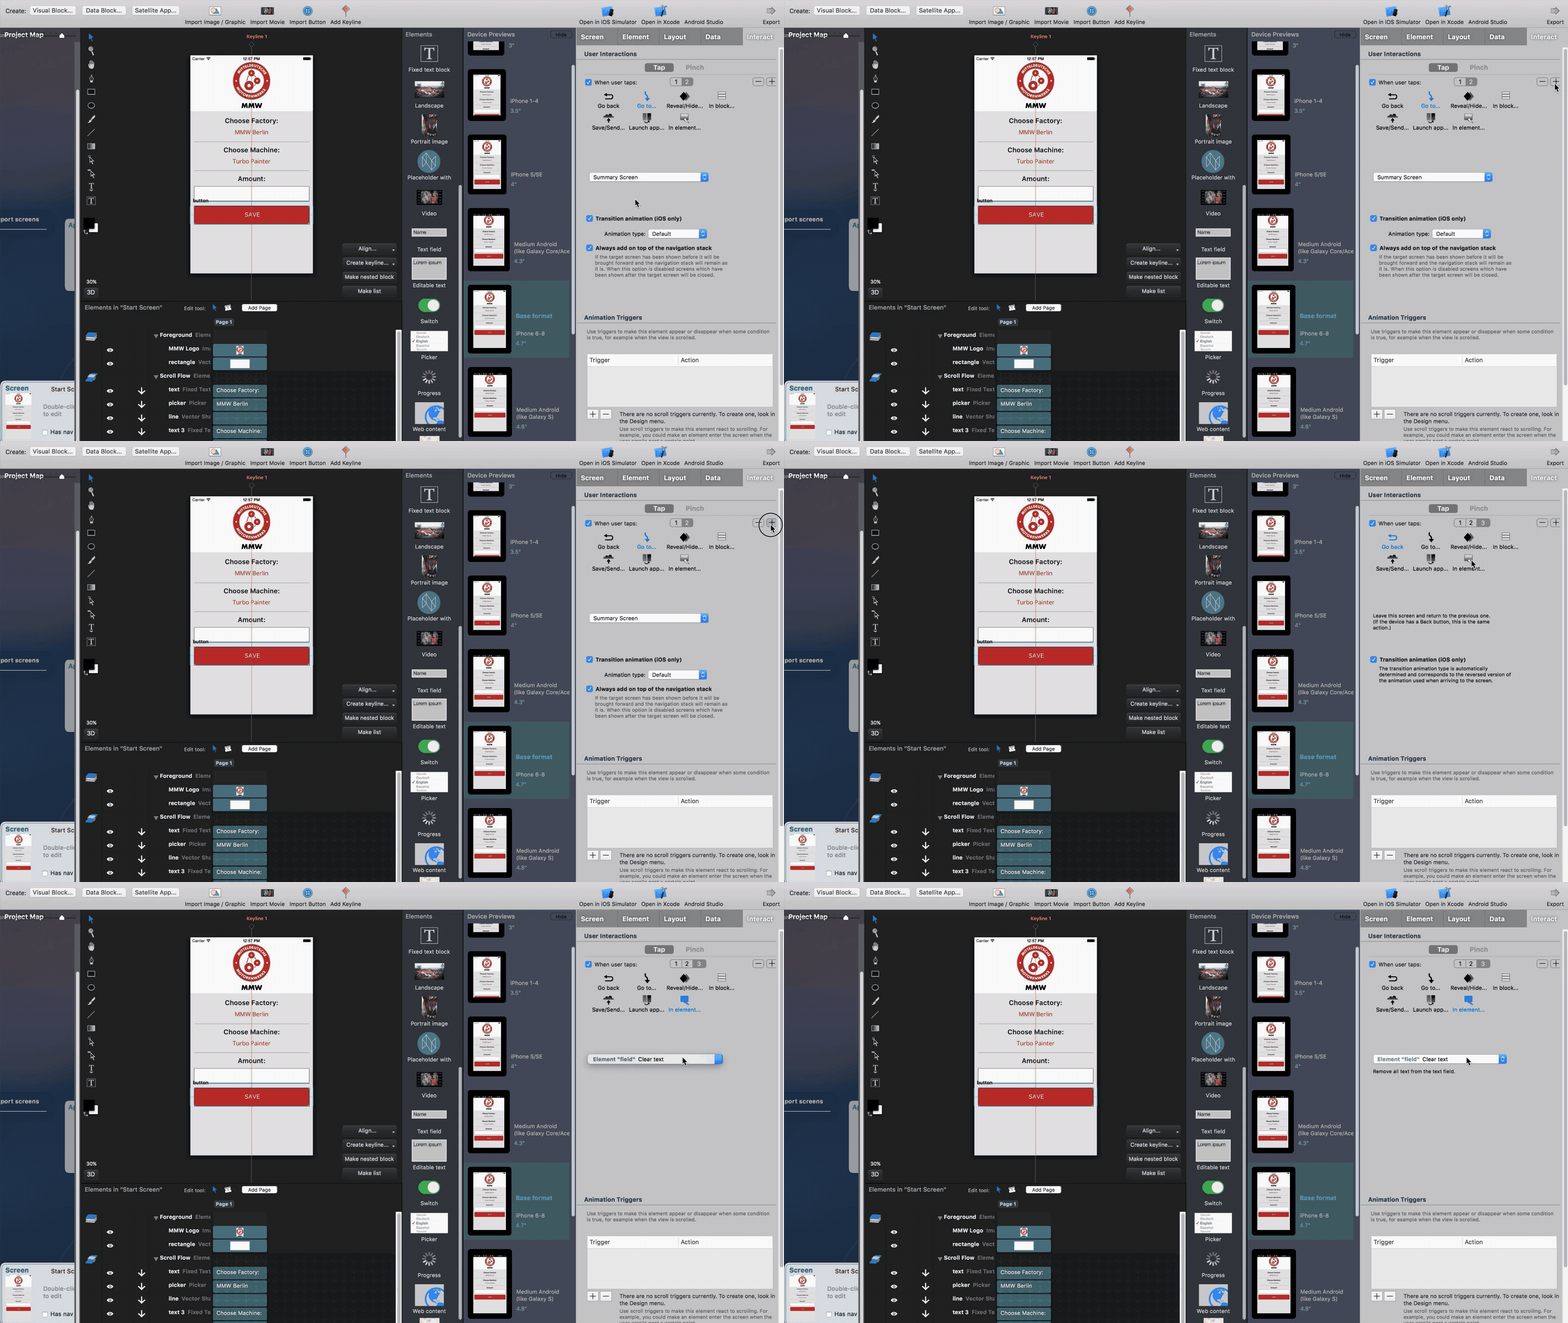
After the data has been saved we want to send the user to the list screen we created, so that the user can see a list of the summaries created. Click on the plus button on the right-hand of the user interactions section to add a new interaction. Select "Go to" and change the drop down menu from "no target" to the summary screen.

Cleaning up data fields
After the user has submitted the data, the data will remain there by default. If we want to have the data deleted and the form to be empty when the user returns to this screen, then we have to use additional button interactions.
Click the plus again to add a new interaction, then click on the 3 to view the new interaction.
Select "In element" and then use the drop down menu to select the Element field - clear text as shown in the GIF below.

Next Step
Next we'll show you how to Add a Log-in Screen.
If you don't want to add a log-in screen, you can test your app with the iOS Simulator. Currently, we recommend opening the project in XCode with the button in the upper right-hand corner and running the app from there.