Building the List Screen
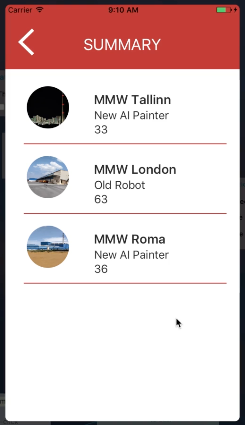
Our second screen will display a list of the summaries that users create. In the end it will look like the image below, but right now we are going to focus on the navigation bar and creating a stencil for list items.
Adding a new screen
We'll get started by adding a new screen. We do so by clicking on visual block and then the screen as shown in the GIF below.
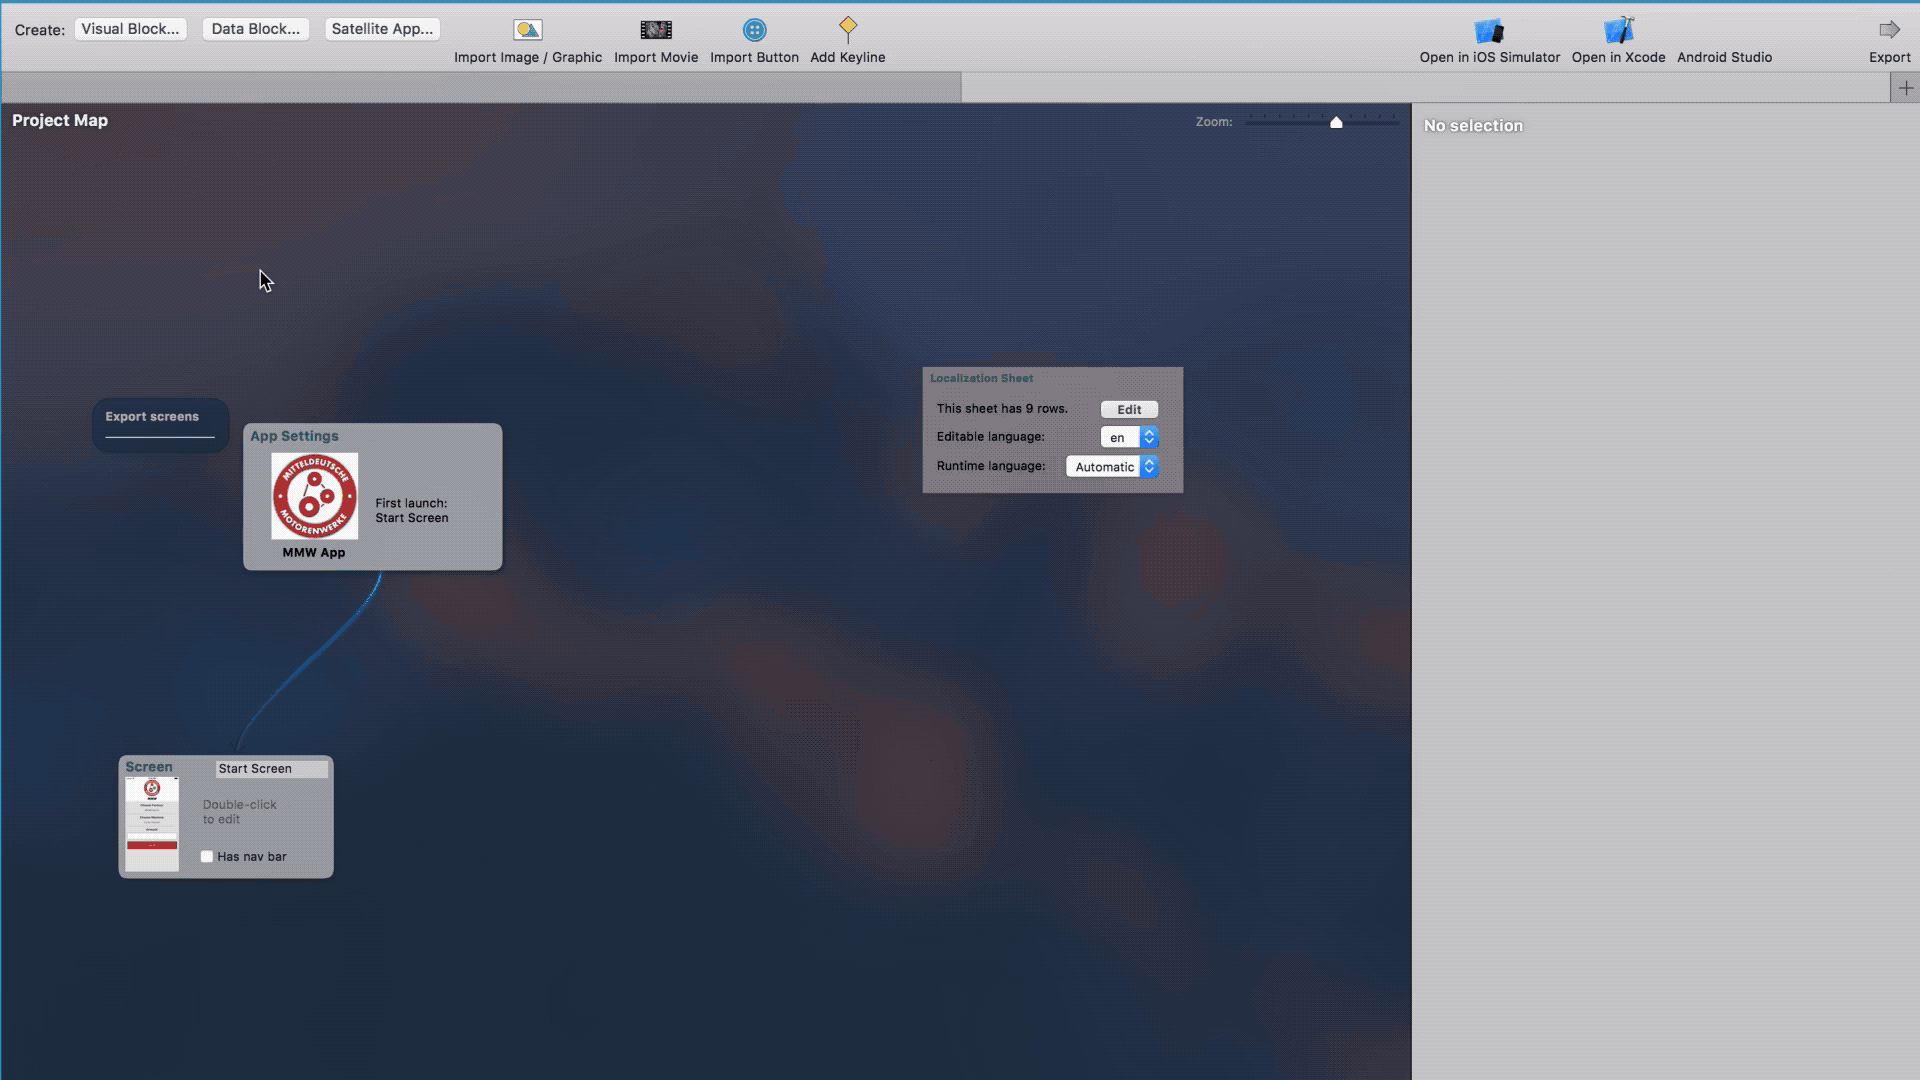
Adding the nav bar and back button
First we will create a navigation bar with a back button. Use the rectangle tool to draw the nav bar and place a text box with the word "Summary". Use a keyline to center the text. Add a back button as shown below in the GIF. You can also choose which icon you would like to use if you do not want to use the default back icon.
Creating a stencil
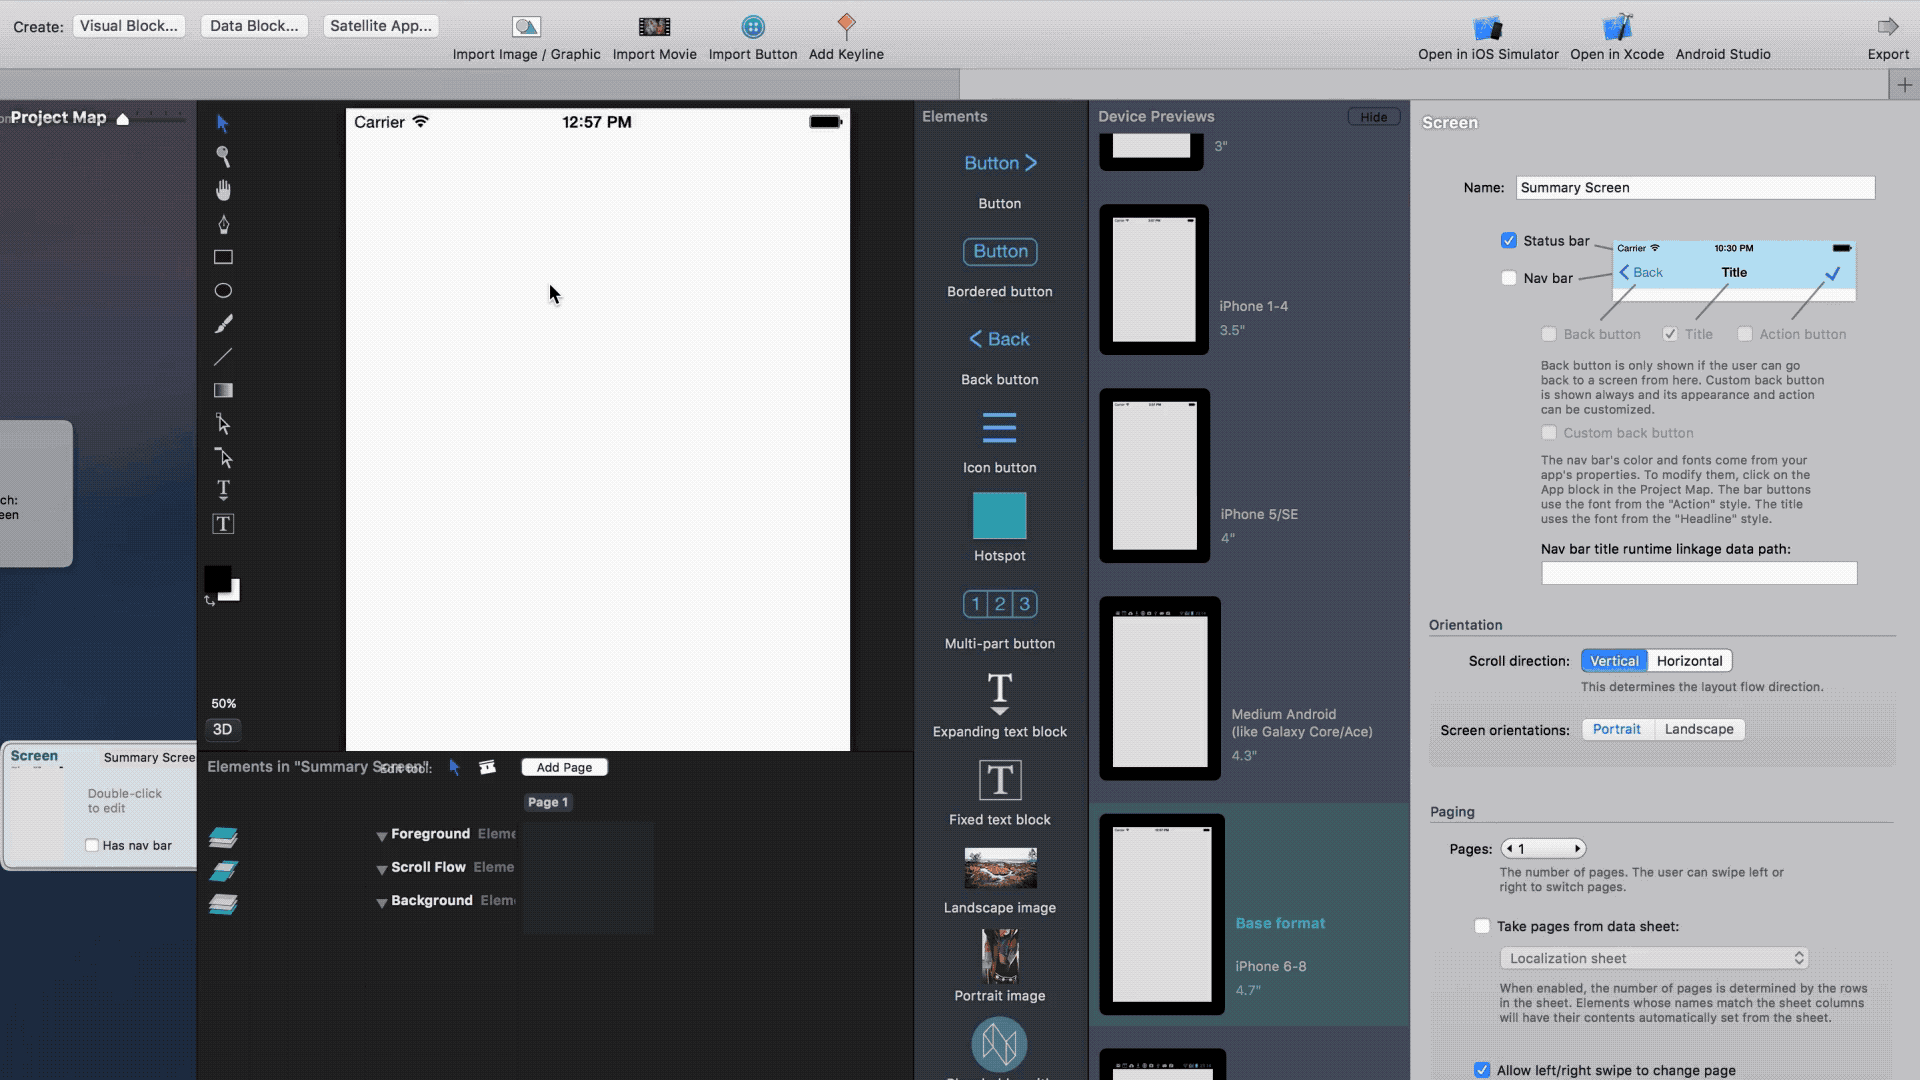
When we want to create a list in ApiOmat Studio, we have to create a stencil first. Stencils are the format or design for each item that will appear on the list. To create a stencil, click on the add visual button and select stencil. Double click on the stencil to open the stencil editor.

Connecting the stencil to data attributes
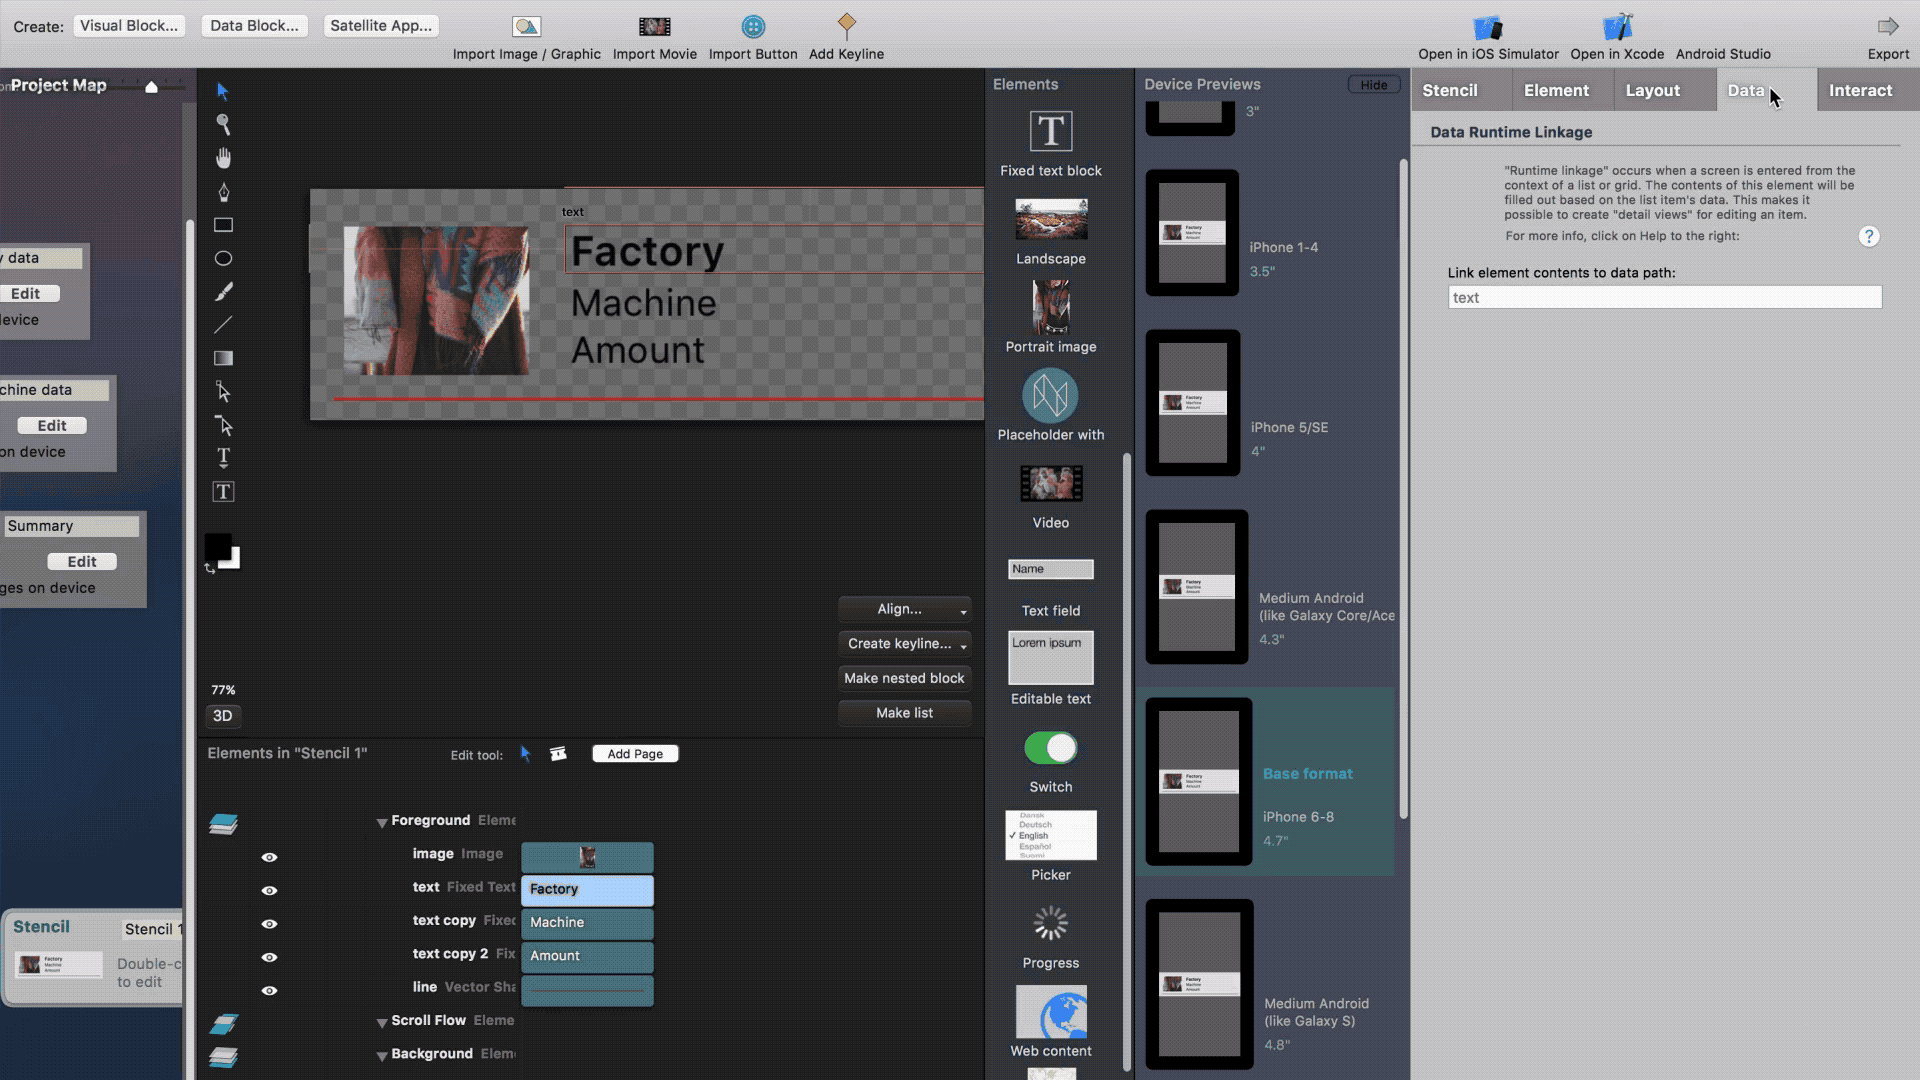
Inside the stencil, we want to display an image as well as information about the entry. Add an image, and three text boxes to the stencil and enter the kind of data you want to appear into the stencil. In this app, it will be factory, machine and amount as well as an image. We also have to tell the stencil where the data comes from. We do so by clicking on the element in the stencil and navigating to the data tab, as shown in the GIF below. Since the stencil will be using the data model "Summary" that we created in the ApiOmat backend, we have to fill the stencil with the attribute names of the "Summary" data model as they are displayed in ApiOmat. (e.g. assemblyLineId).
Next Step
Now that we created a screen for our list and a stencil to determine the design of the list, we can start Connecting our App to the Backend.