Data Modeling with the Dashboard
The dashboard class editor makes it possible to create your own data models for your App-Backend. This guide helps you to understand the basics of the data modelling features.
Entry point is the class editor of your App-Backend accessible through the uppermost selection bar.
The class editor consists of three parts: the navigation bar on the left, the class view in the middle of the screen and the main menu above the class view. Those three sections are described in detail below.
1. Navigation Bar
The navigation bar on the left shows your classes as well as the readonly classes contained in other module versions. You can expand classes from other module versions by clicking on the arrow next to the version. An example of those classes is e.g. the user class, every App-Backend has included automatically, which is contained in the Basics module. The user represents a single App-Backend user.
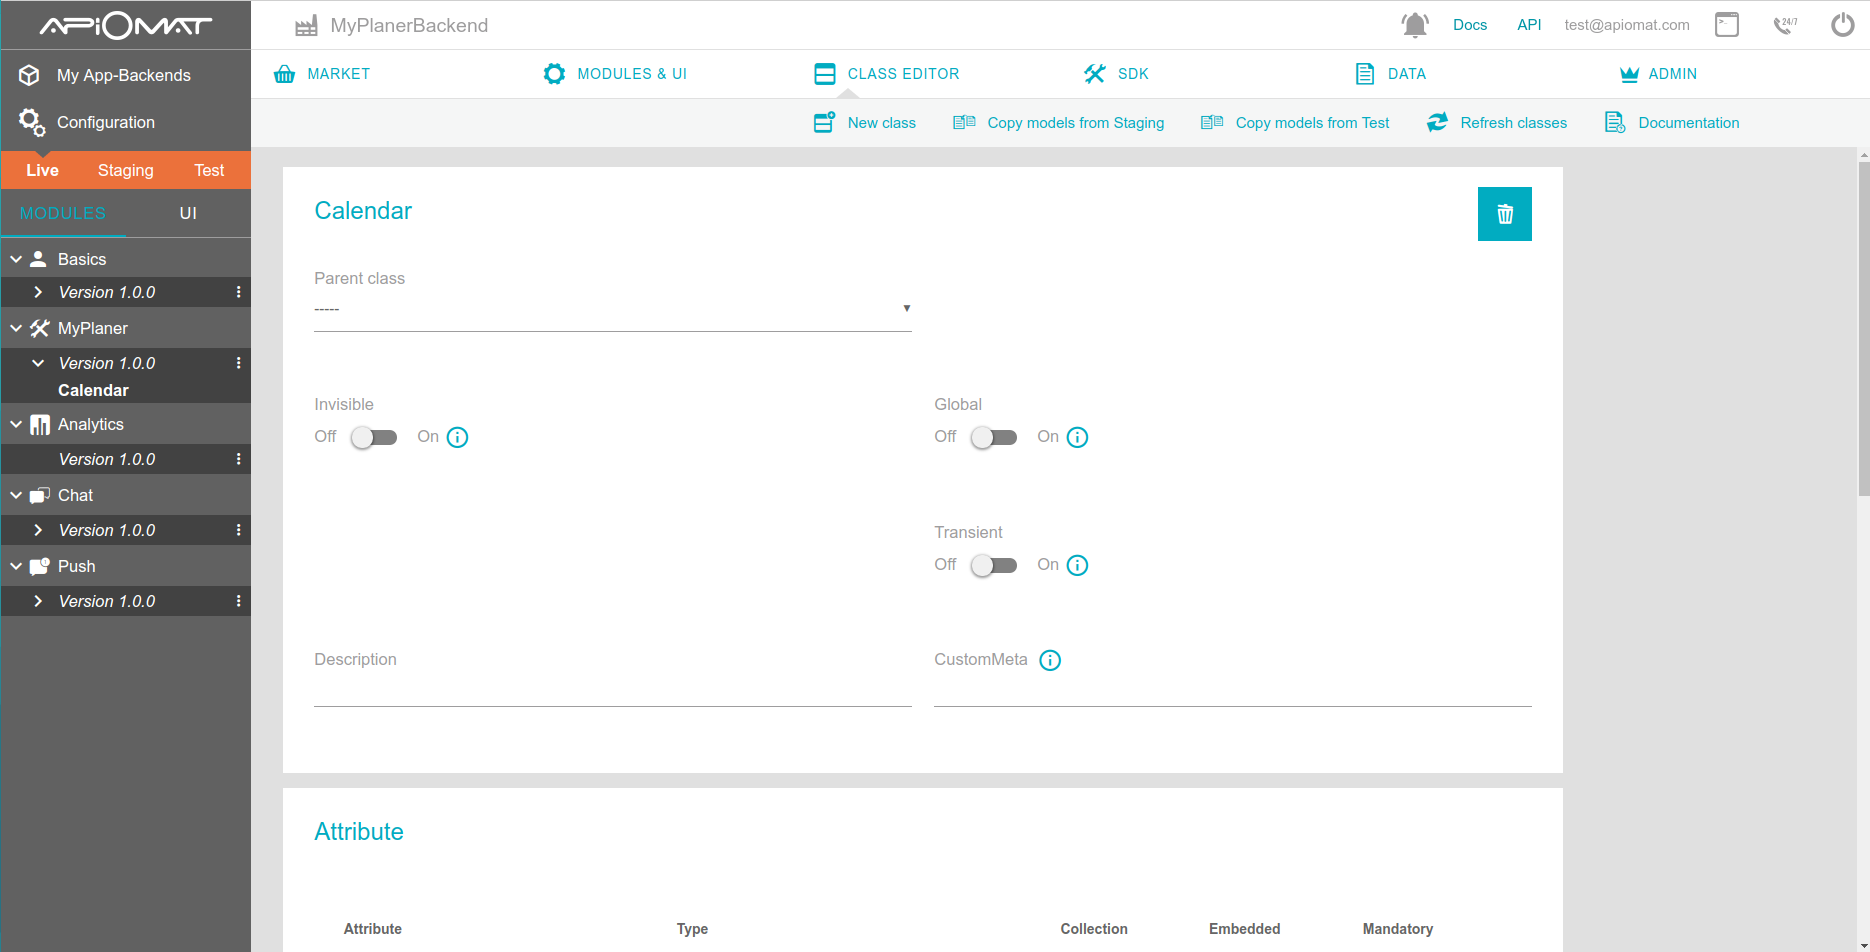
2. Class View
The class view shows the currently selected class within the navigation bar. If you have the permission it's possible to add, change and remove attributes of the selected class.
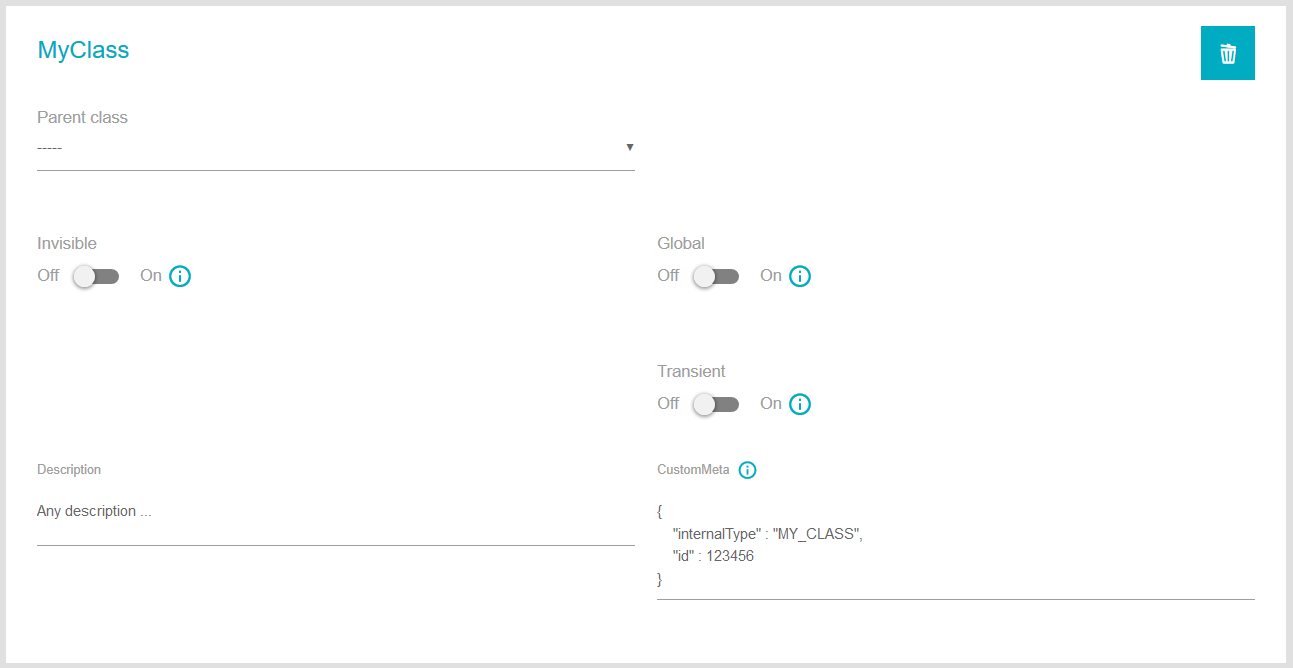
Inheritance
You can also specify from which other class (either one of your own or one of a module) your class should inherit. Your class will then get all attributes the parent has.
In addition to the attributes, the security settings (required roles, allowed roles, restrict resource access - see security paragraph below), isGlobal and isTransient get inherited as well.
Transient
You can set a class as transient, which will prevent storing data for it in database. This is only needed when creating Native Modules.
Global
You can set a class as global, which means that the data of this class will be stored in a global, App-Backend-independent, but system-dependent, database. Note that you should use this feature carefully, because global data will be visible to all customers by default (even if they don't have READ permissions for the module), unless you use custom role checks to change that.
Description and CustomMeta
Attributes
In the attributes panel below the inheritance settings you can finally add the attributes of the class. For each attribute, you can click on the checkbox to set the attribute as a collection (only possible for some types), select the type of the attribute and give it a name.
Navigate through the columns of the current attribute row with RETURN / TAB or mouse click. Hit the '+' button to create a new row for adding the next attribute.
Hint for power users: You can TAB through the fields and control the whole attribute adding process via keyboard!
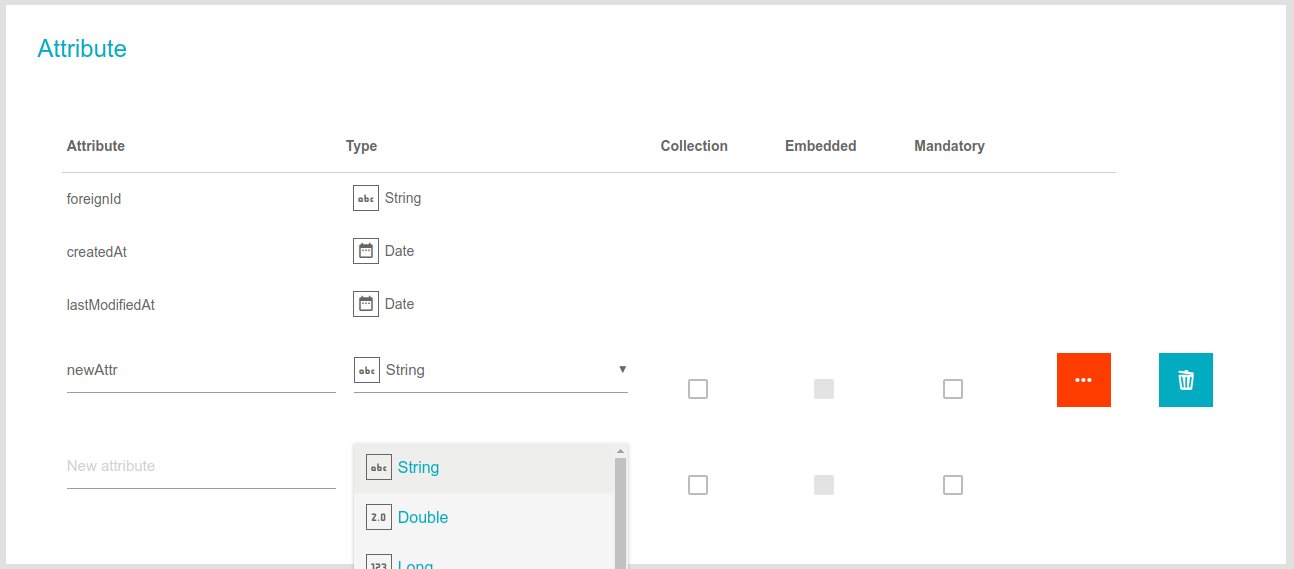
It is also possible to set additional options for an attribute by clicking the details button: description, example, regular expression, minimum, maximum length and encrypt.
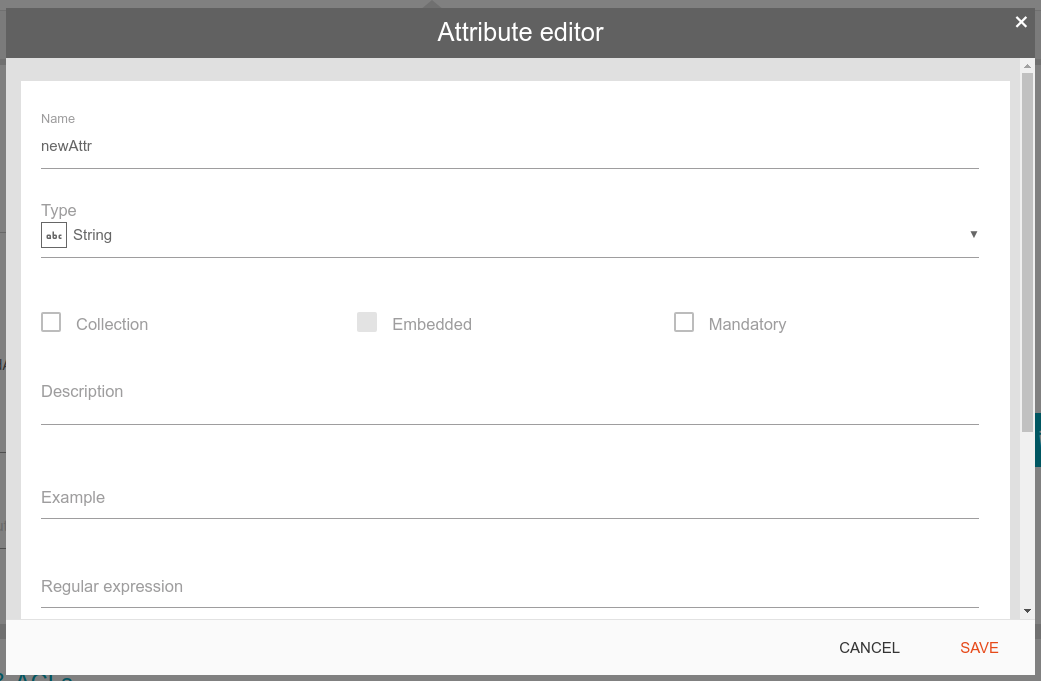
For example you could set attribute validation by the following regular expressions:
-
E-Mail (RFC 5322): ^[a-zA-Z0-9_!#$%&'*+/=?`{|}~^.-]+@[a-zA-Z0-9.-]+$
-
Phone number (international): ^\\+(?:[0-9] ?){6,14}[0-9]$
-
Alphanumeric: ^[a-zA-Z0-9]+$
-
Date format dd/mm/yyyy with leading zero: ^(3[01]|[12][0-9]|0[1-9])/(1[0-2]|0[1-9])/[0-9]{4}$
-
... see https://howtodoinjava.com/regex
Security
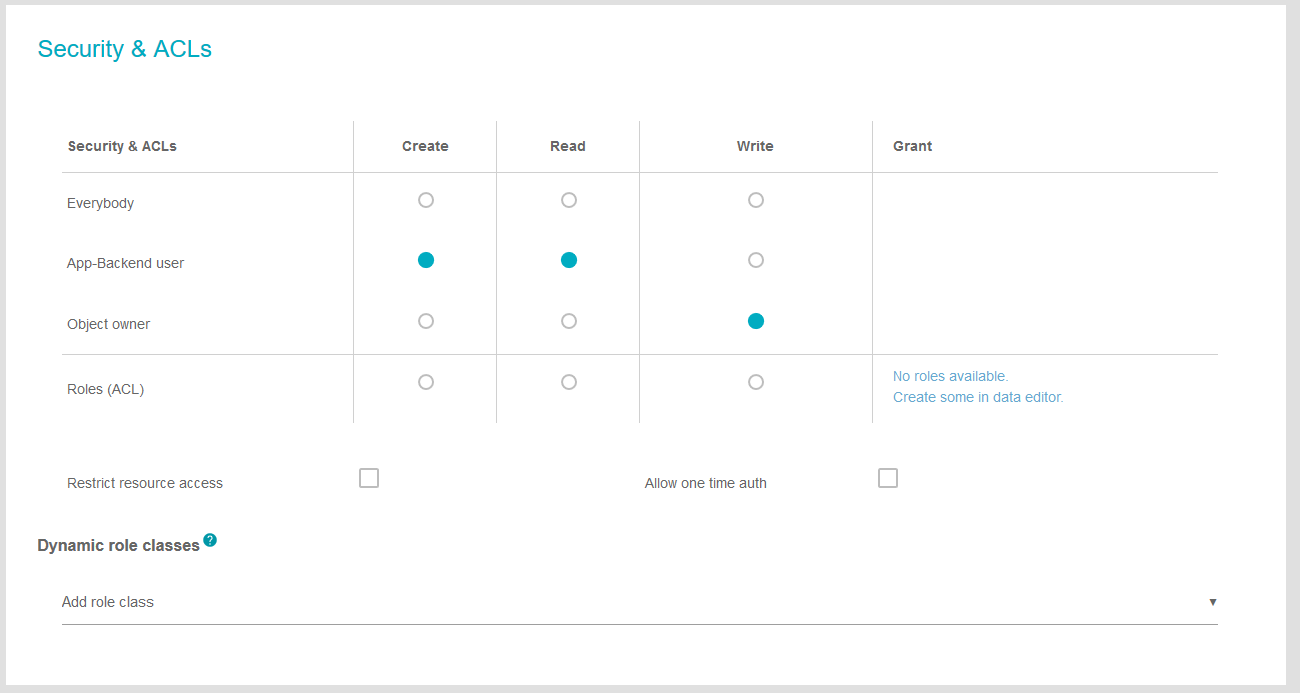
Security settings set up the necessary role of users for accessing objects of the class.
We have three roles in ApiOmat:
-
Guest, which means client accessing ApiOmat without a username/password but with the api key.
-
Users, which are the representation of User instances; they have a username/password per definition.
-
Owners, which is a specialization of users; if an object was created by a user, he is the owner of that object. For instance, if a user created a new tweet, he is the owner of that tweet. All other users in the app are users, but not owners of it.
For all methods manipulating an object (create, read, update, or delete) you can specify the role which is necessary to execute the method. By default, all methods can only be accessed by the owner. If you select Guest as the necessary access role, all users and the owner have access, too. Also, if you select User as the role, the owner will have access.
For further information on this topic, see Data access security.
3. Main Menu
Using the ribbons within the main menu, you can add more classes or, if you use a higher plan than Basic, you can copy data from the other systems (live / staging / test).

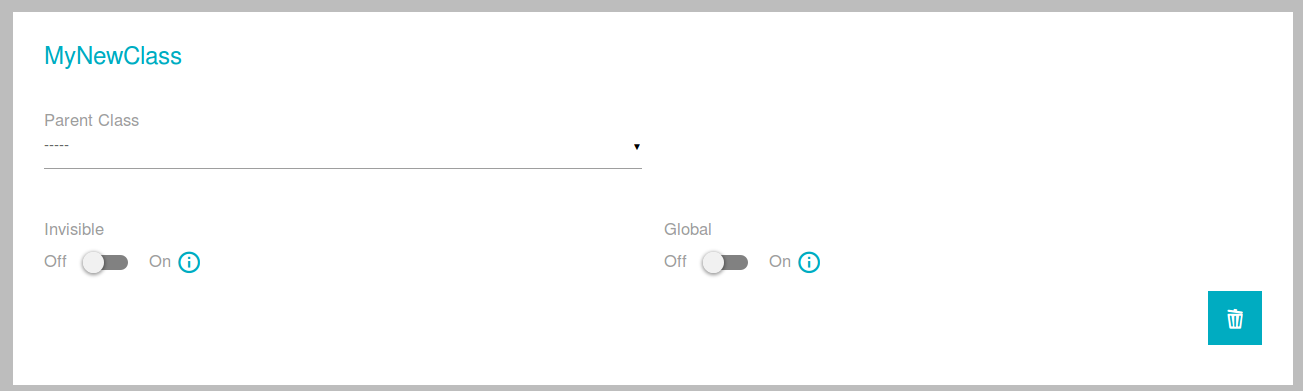
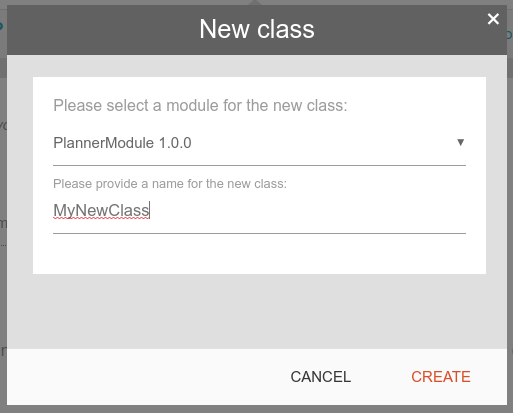
New Class
Create a new class in a chosen module version, name it and create its attributes. You can also alter the security configuration. ApiOmat automatically saves the changes.
Copy Classes
Copies all modules, data models and code from the selected system to the current one.
Data is not copied. Existing modules and existing data will be overwritten.
Refresh Classes
Refresh the class view to get the current state of your data model classes. Sometimes it is necessary to refresh your classes to synchronize your data with the caching system of the dashboard.