How to Create and Use Classes
This tutorial is part of the Introduction to Native Modules - series. This tutorial will guide you through the basic concepts on how to create and use classes. As this is just an introduction, links to the in-depth-articles will be given at the appropriate places.
Let's say you want to build an application to organize your groceries. Just as you would in object oriented programming, you need to first create a class.
-
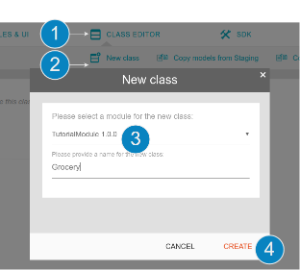
Create a class named "Grocery", as indicated by the picture below.
-
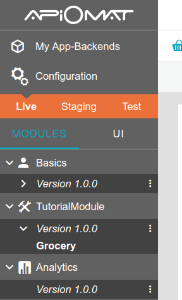
Your new class now appears below the Module it belongs to like this
-
Now you can access the class-editor by clicking on the class. There you can set all the properties of your class, such as...
-
"Parent Class": There you can choose a class to inherit from, just like in object oriented programming.
-
"Transient": If the class is set to "Not Transient", instances of this class will be saved permanently into the database. Instances of "Transient"-classes are volatile and cannot be saved (at least not directly)
-
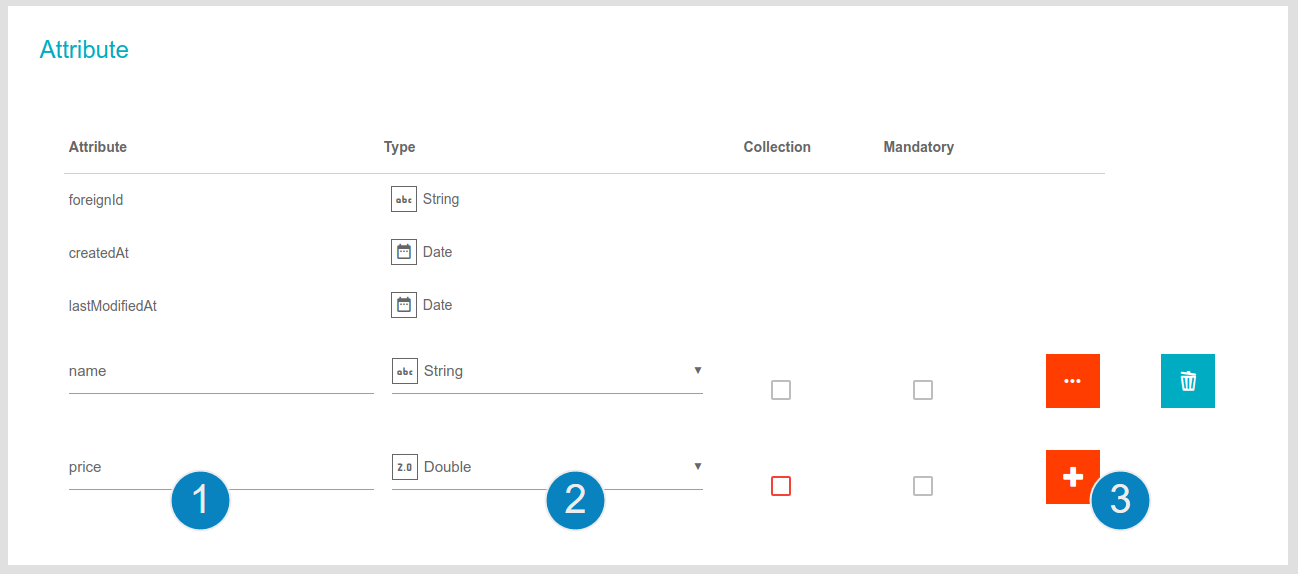
"Attributes" of the class, just as in object oriented programming.
-
"Security": Here you can set features concerning authorization: Who can create, read and write instances of this class? Everybody, just the user of the app or the object owner.
--> For a more detailed explication of classes, look at the Class Editor Guide.
-
-
The "Grocery"-Class should not be transient, because we want to save the instances into the database. The class should have the attributes "name" as string, and "price" as double.
-
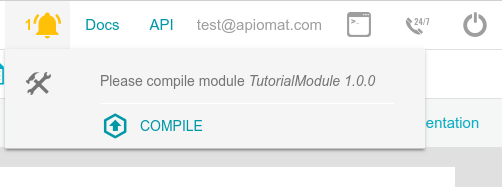
Compile the module by clicking on the notification bell and then "compile".
-
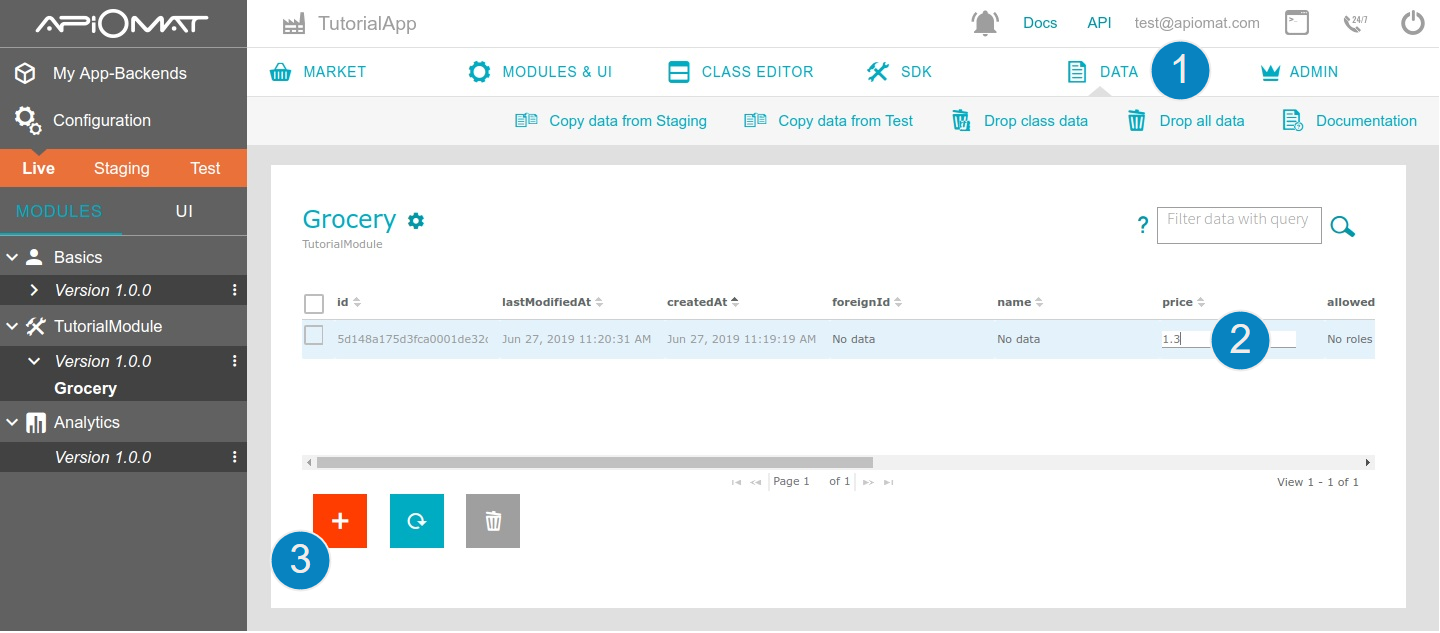
Now that your class is created, you can create instances of it and save them to the database (as long as the class is not transient, that is). Go to the data-editor and create a new grocery-instance. The name should be "Milk", and the price "1.30". Play around with it and add more groceries as you like! You can also try to erase a grocery by using the trash-can-button.
-
Let's suppose you created a lot of grocery-instances and it's getting hard to see them all. That's what the query-field is for! For example, if you want to search for all groceries with a price greater than 1, you can do so by entering the query:
price >1ApiOmat uses its own query language. For more details on the query-language, look here.
Now you know how to 1.) create modules, 2.) create classes inside modules and 3.) how to create, edit and erase data. But now, suppose you want to do something more advanced, like set a default price for your groceries or block two groceries from having the same name. For that, you need to download the Module-Code and manipulate the actual code of the module. The next tutorial shows you how to do that.