XML Module
Using the XML module you can import or export your data using XML file(s). These file(s) may be imported directly or via an URL on another web server periodically.
Configuration
|
Configuration |
Description |
|
XML URL |
When importing XML from an URL, the resource where the XML data can be found must be specified here. |
|
XSLT URL |
When importing XML from an URL, you can provide an URL to a XSLT stylesheet which will convert your XML to the format ApiOmat requires. |
|
Import period |
Interval in minutes to trigger the import; you have to provide a complete path to the XML file to import as callback URL. |
|
List separator character |
Character used to separate entries in lists. This is used if one of the im- or exported fields contains a collection as value. |
|
Charset |
Charset of your data. Hint: MS Excel in a western country will use Windows-1252 |
To use the XML Module you need to attach it to your application. You can find the XML Module in the Module Market within your Dashboard.
Usage via Dashboard
After setting the configuration parameters, you will be able to export or import data in the dashboard data screen.
The XML Module comes with a tool which allows you to export and import XML files containing data in an easy dialog.
Export via Dashboard
To export your data via ApiOmat Dashboard simply go to Modules & UI and open the sub menu XML.
Before starting the export of your data you are also able to adjust some filter options:
-
use the query to specifiy your export data selection (see Query for more details)
-
select the needed classes from selection table at the bottom
-
if several module versions contain the same class then you need to select only one of them to reduce redundancy
Reason: the data objects aren't versioned in order to be able to load old data objects in new module versions.
The actual exported data object will be the same independent of the module version, so it makes sense to define only one of the same classes to be exported.
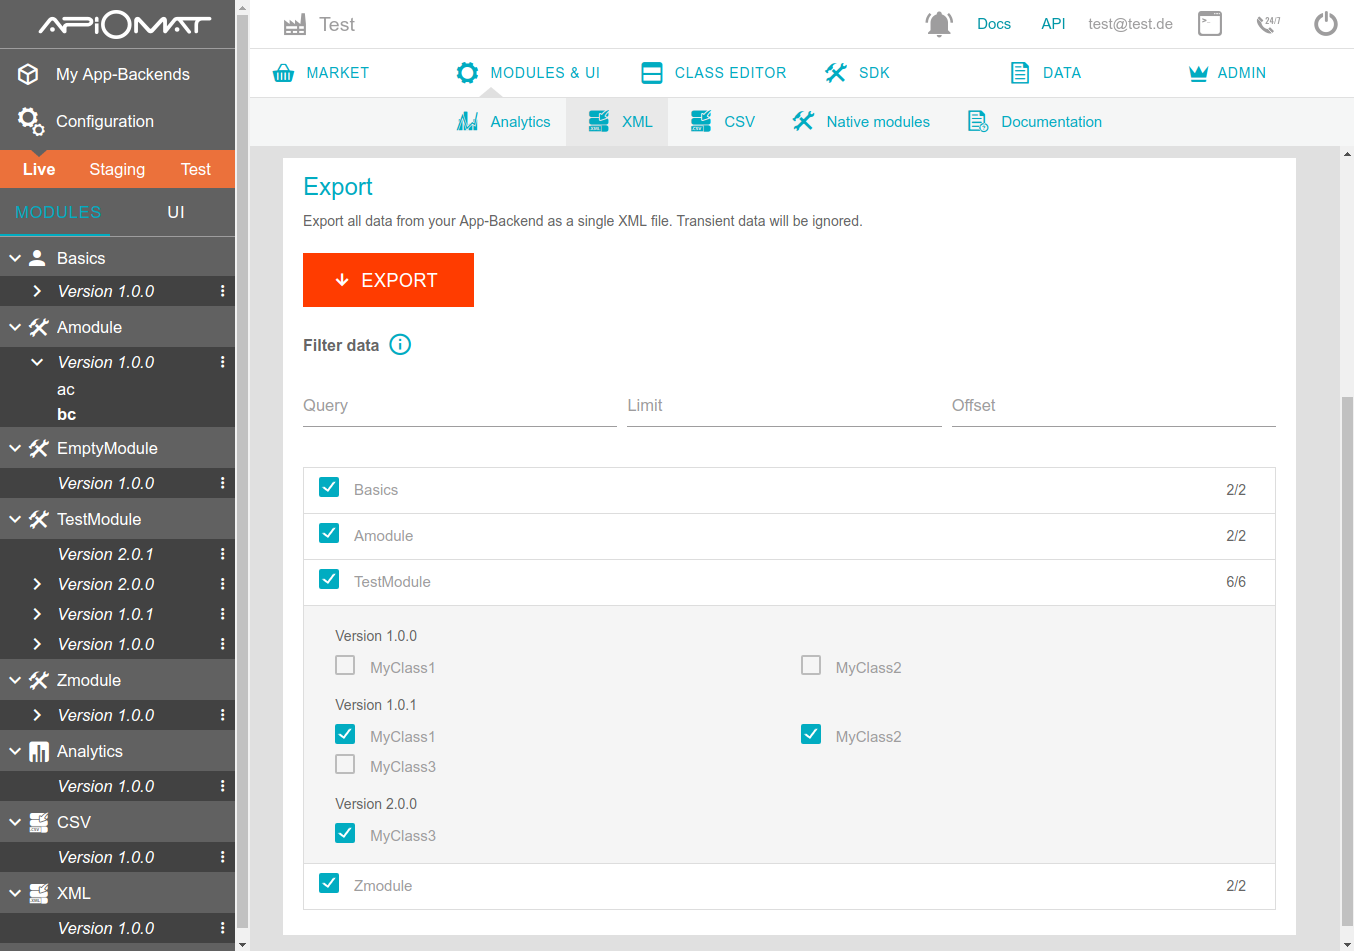
After pressing the export button a XML file will be received that contains the data for each selected class.
Import via Dashboard
To import data into your ApiOmat instance you need to create a XML file containing the data for each class you want to import.
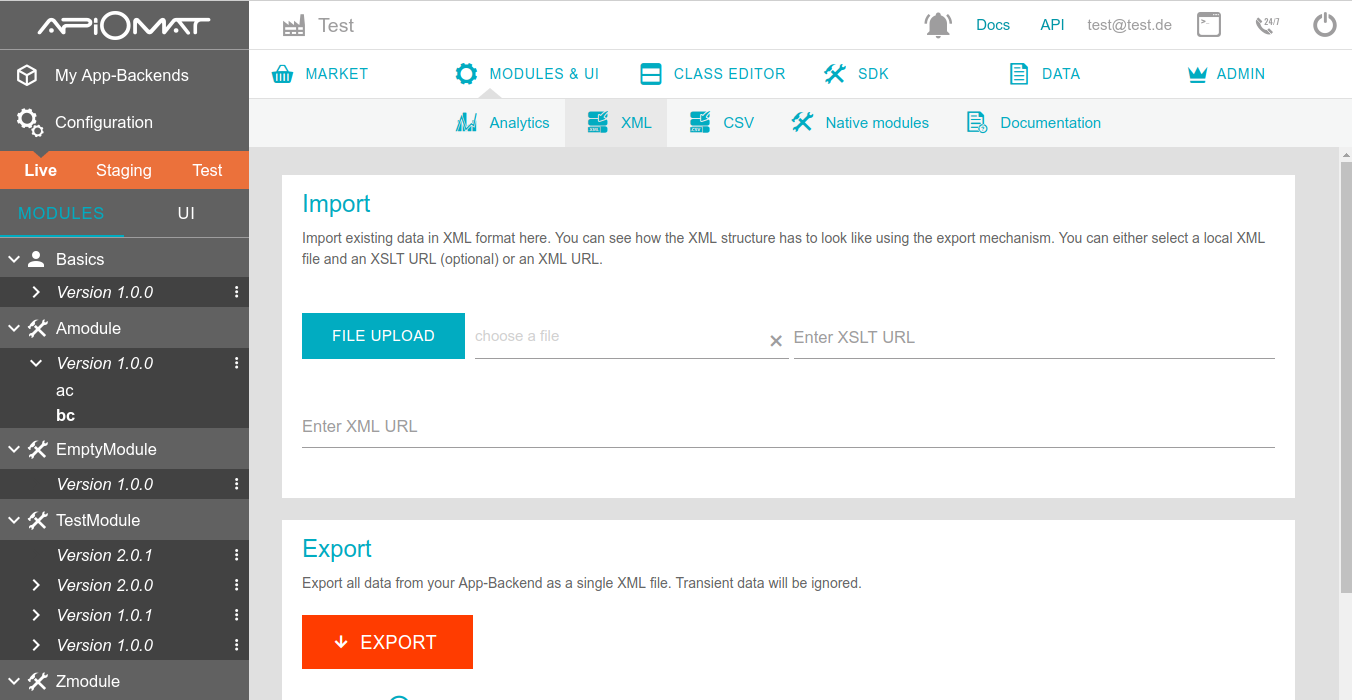
A message should appear to confirm the import.
Usage via REST
Additionally, you may use the REST interface to import or export data.
Export via REST
To support the export of very large data entries, each field value of one data entry is limited to a size of 100.000 characters. This value can be globally increased in the yambas properties file.
In that case, please configure the value for yambas.limits.maxStringSizeOnExport.
The usual limitation of a maximum result set size is not taken into account when exporting data. Therefore, an export of a large dataset could last several minutes. You can limit the result set with the limit/order query operator (see example below).
cURL
# exporting all data of the specified applicationcurl http://apiomat.org/yambas/rest/modules/xml/spec/YOUR_APPLICATION_NAME \-u YOUR_EMAIL:YOUR_PASSWORD > export.xml
You may also filter classes to export using the ‘classesToExport’ query parameter and a comma separated list of classes which you want to be exported:cURL
# exporting data of specific non-module classescurl "http://apiomat.org/yambas/rest/modules/xml/spec/YOUR_APPLICATION_NAME?classesToExport=car,tire" \-u YOUR_EMAIL:YOUR_PASSWORD > export.xml
If you have multiple modules with classes that have the same name, you need to prepend the classnames with the module name and module version separated by a dollar sign:cURL
# exporting data of specific module classescurl "https://apiomat.org/yambas/rest/modules/xml/spec/YOUR_APPLICATION_NAME?classesToExport=MyModule$1.0.0$car,MyModule$2.0.0$tire" \-u YOUR_EMAIL:YOUR_PASSWORD > export.xml
You can also filter exported data using a query:cURL
# exporting data that match a specific querycurl "https://apiomat.org/yambas/rest/modules/xml/spec/YOUR_APPLICATION_NAME?q=lastModifiedAt>date(1413842400000)" \-u YOUR_EMAIL:YOUR_PASSWORD > export.xml
Or limit the resultset:cURL
# exporting data limited to the amount of returned entries and specified by an offsetcurl https://apiomat.org/yambas/rest/modules/xml/spec/YOUR_APPLICATION_NAME?q=limit%20100&offset%2010 \-u YOUR_EMAIL:YOUR_PASSWORD > export.xml
Import via REST
Assuming import.xml containing all classes as XML data, the import command would look like:cURL
# importing data to a specified applicationcurl -X POST http://apiomat.com/yambas/rest/modules/xml/spec/YOUR_APPLICATION_NAME \-u YOUR_EMAIL:YOUR_PASSWORD --data-binary @import.xml -H "Content-type:application/octet-stream"The next section contains some more detailled information about the import and export contents.
Detailled Import and Export contents
Each exported dataset of your own classes contains an ID field, which is the ID from ApiOmat database. Do NOT change this field if you want to update the dataset.
If you create new entries, leave this field empty. Self-created IDs will lead to import errors.
If you want to give your new data entries an ID, you can use an arbitrary (but unique) value in the foreignId field. You can even use this foreignId if you want to set references from other classes.
Import files, images and dates
If you want to import images, you can specify their URL in the import XML. They will be automatically fetched.
If you want to use dates, their format must follow the Java date format LONG or SHORT. All dates should fulfill the configured dateFormat of the CSV module.