Development Basics
This page gives you a short introduction about the basics of developing modules with ApiOmat. You'll get a simple introduction of the development workflow and a brief overview about the relevant parts of the Native Module Assets. Links to further topics contained in this page will help you to dive deeper into module development.
Contents :
Workflow
In general, you may introduce a new Native Module in five basic steps:
-
Download the Native Module Assets or check out the Native Module code from the Git repository (depending on how you created the module)
-
Import the Assets into your development environment
-
Insert the logic to be executed in the backend by using hook classes.
-
Upload the modified module / push the changes to the Git repository (depending on how you created the module)
About the Native Module Assets
As the list above guides you to a working Native Module, there are some further technical aspects that you should know about.
Package structure
The package com.apiomat.nativemodules includes all necessary Java classes. You can find interfaces, annotations and utility classes that are needed for execution at this package level .
The package
com.apiomat.nativemodule.basics
contains the classes User and Role, which do exist in every module.
The
User class
represents a user of an app, which can be used for authorization. The
Role class
describes a role that a user of your app can take.
You can restrict the access to all objects of specific classes (class level access control) or even directly to specific objects (object level access control). Find further information about this topic on our page about data access security
.
The non-generic classes of your module can be found on the same level as the basics package. The full package name is always com.apiomat.nativemodule.<modulename> where <modulename> is always the lower-cased name of your module.
For more information about the classes contained in the package see the chapter about "user-defined classes" below.
Another important package to mention is com.apiomat.nativemodules.interfaces.dmap containing classes to handle distributed maps.
ApiOmat generates a bunch of packages and classes which can be adjusted by you. Also, it is still possible for you to benefit from common architectural patterns, as you would do in ordinary desktop development.
You can put additional packages and classes in the src folder and call them from within the hook methods. ApiOmat is able to access the functionality after uploading.
Module logo
If you take a look at the module market of the dashboard, you'll find a small identifying image for every module.
To achieve this, place an identifying image
called logo.png into the src directory of your module.
Make sure that the file contains a transparent background and measures 80px x 80px in order to be displayed correctly.
Libraries
The folder lib contains all libraries that are necessary for this project. They include libraries like "swagger-annotations" for the REST endpoints and other ApiOmat modules, as well as other modules used by this module (e.g. the SAML module for SSO authentication).
You may add other libraries that are neccessary for the module here as well. You should note that libraries already included in YAMBAS (e.g. Apache HTTP Client) are restricted to the exact version number used by YAMBAS!
To retrieve a list of all libraries used by YAMBAS, call <BaseURL>/yambas/rest with authentication credentials of the Super Admin, for example:
Java
curl http://localhost:8080/yambas/rest -u apinaut@apiomat.com:secret
Module main class
First of all, there is a module main class with the same name as the module. It is always located in the package com.apiomat.nativemodule.<modulename> and has to be provided in order to upload a module.
This class provides information on the module itself (like the description), the configuration of the module, methods to handle the lifecycle of a module and contained fields through which you can invoke module-specific methods (like logging or handling of objects).
Also note that all overridden methods in this class are called internally with NEW INSTANCE OF THIS CLASS every time. That is, you cannot use instance variables these overridden methods, because they are initialized again before each call.
Module Annotation
The module main class must contain the Module annotation as class annotation. It indicates to YAMBAS (beside the mentioned naming convention) that this file is the main class of the module.
The annotation holds additional information about the module, like the description, the category of the module, the documentation URL, all modules that this module uses and the security permissions this module needs (which is only necessary if you're running a white label installation).
If you specify a module description, category and/or documentation, these information will be displayed for example in the module market of the Dashboard. If you add your module to a backend and your module uses other modules that were not already added to the backend before, ApiOmat will automatically append these modules to your backend, too.
Java
Example for a module annotation
@Module( description="Example Module", category ="Communication", documentationURL = "/docs/example-module.html", usedModules={"Basics", "SMTP"}, securityPermissions = {} )
Static helper fields
Each module main class contains two static fields by default.
The first field is of the type IStaticMethods and is named AOM. It is the main entrance point to handle objects. It provides methods to create objects, find objects by its id, foreignId, query or access token. It allows you to log information or errors, lets you throw exceptions correctly or handle distributed maps. You will use this interface very frequently.
The second field is of the type IApplicationConfigProxy which is named APP_CONFIG_PROXY and allows access to the module configuration with its methods getConfigValue and getParsedConfigValue. Read the next paragraph to get more information about the module configuration.
Module Configuration
Of course it is possible to define configuration parameters for your own module. This is done by defining a static String variable and adding the NativeModuleConfig annotation in the module main class:
Java
@NativeModuleConfig( datatype = Type.TEXT, example = "http://www.mywebsite.com/api", title = "URL", info = "URL endpoint my website", key = "url", order = 1, notifyAllNodes=false )public static String URL = "mymodule_url";
NativeModuleConfig provides several data types, an example value, a title and a description for a specific configuration parameter. You can modify display order of the several parameters in the module configuration screen, as shown below, by specifying the order field.
The field notifyAllNodes can be used to indicate that a change of this configuration value will be reflected on all nodes of your ApiOmat cluster. By default, only the node where the request for the configuration change arrives will execute the onConfigChanged hook for this value (see next part).
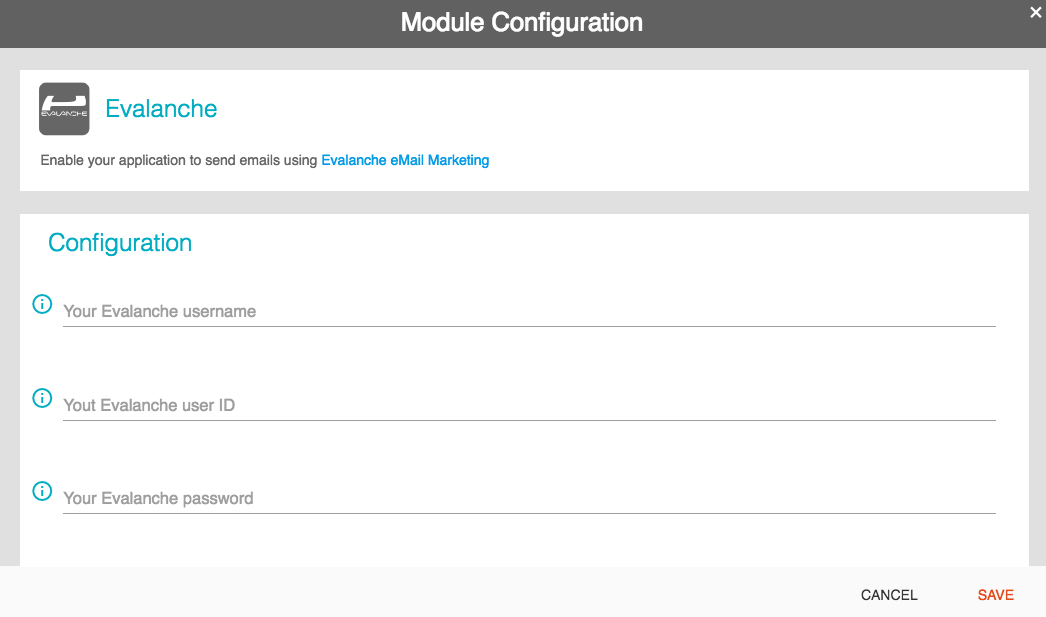
As soon as the configuration parameters are added to the module main class and the module has been uploaded, the parameters are displayed by hovering over the module name in the left bar of the Dashboard until a context menu opens. There you can choose the "Configuration" entry to open the menu. Also, m odule configurations are specified each time the module is added to a backend using the Dashboard, as shown in this example of the configuration for the Evalanche module:
You can get the current value of a configuration entry of one backend in the module code by calling the getConfigValue method of the APP_CONFIG_PROXY field in the module main class:Java
<ModuleName>.APP_CONFIG_PROXY.getConfigValue( configPropertyKey, appName, moduleName, system );The getConfigValue method will return the value in that type, the value was set in the configuration of the backend (by default, the dashboard will store the values as String). You can use the following method:Java
<ModuleName>.APP_CONFIG_PROXY.getParsedConfigValue( configPropertyKey, appName, moduleName, system );Use it in your modules' code to get the value in that type, you specified in the NativeModuleConfig annotation. If you specified the type boolean, the method will try to parse the values "true" and "1" to true and "false" and "0" to false. If the type is set to "Number", String values containing a dot are returned as double and without a dot as long values. If the value cannot be parsed, it will return the unparsed value (just like calling getConfigValue).
Since Yambas 3.4 it's also possible to retrieve values of other modules within your used module hierarchy. For example if you have a MyEvalanche module that uses the Evalanche module. From that point on, the values (saved for a specific application) of all Evalanche configuration properties are accessible from your MyEvalanche module, too.
Life cycle methods of a module
The main module initially contains the following methods which reflect hooks for events that occur during the life cycle of a module:
Java
public void onDeploy( )public void onUndeploy( )public void onDeployForAppBackend( final String appName, final com.apiomat.nativemodule.Request request )public void onUndeployForAppBackend( final String appName, final com.apiomat.nativemodule.Request request )public void onConfigChanged( String appName, String configKey , String system)public void onModuleAttach( final String appName, final com.apiomat.nativemodule.Request request )public void onModuleDetach( final String appName, final com.apiomat.nativemodule.Request request ) public int checkHealth( final String appName, final String system )public AbstractRestResource getSpecificRestResource( UriInfo uriInfo, HttpServletRequest servletRequest,SecurityContext securityContext, Request wsRequest )Below explains each method and its purpose.
OnDeploy and onUndeploy
The onDeploy and onUndeploy methods are hooks which are called each time a module is deployed or undeployed. The
onDeploy
is called each time the module is uploaded using the upload or if its moduleStatus is manually changed to
DEPLOYED
. The corresponding
onUndeploy
will be executed if the status of the module is set to
UNDEPLOYED
. This method is also called if a redeploy (upload of a module again, as the old version of the module will be undeployed and the newly uploaded version is deployed ) is performed and is executed before the
onDeploy
takes place.
If your module contains some used modules the hook methods of the used modules will also be called hierarchically in the following manner:
-
The onDeploy hook methods of the used modules from lowest hierarchy level will be called before the hook methods of the modules on higher hierarchy levels.
-
The onUndeploy hook methods of the used modules from lowest hierarchy level will be called after the hook methods of the module on higher hierarchy level s.
Additionally, we recommend to
clean your static fields
within your deployment hook methods
to avoid long living objects
and memory leaks
. See next subsection '
Notes about statics in module main
' for further details.
OnDeployForAppBackend and onUndeployForAppBackend
The hook methods onDeployForAppBackend and onUndeployForAppBackend are called for every backend that contains the module which gets deployed or undeployed. For instance: if your module is attached to ten backends and gets deployed, the onDeployForAppBackend will be called ten times for each backend.
If ApiOmat runs within a cluster installation with multiple nodes, you also may define that those backend specific hook methods are invoked on every node. By default the hook methods
onDeployForAppBackend and onUndeployForAppBackend are
invoked on only one cluster node. Your implemented
application specific
hook methods are invoked in order on every cluster node. Update the Module attribute
callAppBackendSpecificHooksOnAllNodes
to true (default = false).
If your module contains some used modules the hook methods of the used modules will also be called hierarchically in the following manner:
-
The onDeployForAppBackend hook methods of the used modules from lowest hierarchy level will be called before the hook methods of the modules on higher hierarchy levels.
-
The onUndeployForAppBackend hook methods of the used modules from lowest hierarchy level will be called after the hook methods of the module on higher hierarchy level s.
Again, we recommend to
clean your static fields
within your deployment hook methods to avoid long living objects and memory leaks. See next subsection '
Notes about statics in module main
' for further details.
OnConfigChanged
The onConfigChanged hook informs the module about changed configuration values in a backend. Depending on the
notifyAllNodes
flag in the
NativeModuleConfig
annotation (see the paragraph above) of the specific configuration value, this hook is either executed only on one or on all nodes of your
ApiOmat
cluster. This method is called on any change to the current configuration and receives the app name as well as the changed key through its parameter list. This means that
onConfigChanged
is called once for
every
changed configuration parameter.
OnModuleAttach and OnModuleDetach
There is also an onModuleAttach hook which simply gets invoked, if your module is attached to a backend. The hook method
onModuleDetach
is invoked when your module is detached from any backend.
CheckHealth
You can implement
health checks
for your module, which can be called via REST; see more here.
GetSpecificRestResource
You can specify a class that should receive custom REST requests in the method getSpecificRestResource. An example class for that is contained in every module with the name RestClass.java. Thus, it is possible to provide an entirely custom-tailored REST interface to implement OAuth callbacks for example. Please see this separate article to get more information.
Notes about statics in module main
Since the module main class can internally be instantiated multiple times, it should be noted that when using the key word "static". Static variables will share their values with every backend that uses the respective module. If a backend "A" changes a static variable of a module class, this new value will be visible and editable from backend "B", too.
This behaviour is not intended in most cases and can be avoided by storing values inside a map with the respective app names as keys. Instead of
Java
static Connection con;
you could use
Java
static Map<String, Connection> con;
User-defined classes
Any class that you define for your module through the Dashboard will generate a new corresponding Java class that you can receive when you download the latest version of the native module SDK. The class will contain any attributes that you defined in the Dashboard. As mentioned above, these classes will be placed into the package com.apiomat.nativemodule.<modulename>.
Class Annotations
With class annotations you can specify different behaviour and define additional information.
Each of these model classes will have a Model annotation to indicate that the given class is an ApiOmat based model class. The model annotation holds information about the related hook-classes, the transient, global and invisible state of the class and it's allowed and required roles. Additionally you are able to define a role classes map for dynamic role checks.
It is also possible to add
user defined interfaces
to your model classes. Therefore simply add the Java files containing the interface(s) and add them to the implemented interfaces of
your
class.
Java
Example for a Model annotation
@Model( moduleName = "TestModule", hooksClassNameTransient = "com.apiomat.nativemodule.test23.TestClassHooksTransient", hooksClassNameNonTransient = "com.apiomat.nativemodule.testmodule.TestClassHooksNonTransient", isTransient = false, isGlobal = false, isInvisible = false, requiredUserRoleCreate=UserRole.User, requiredUserRoleRead=UserRole.User, requiredUserRoleWrite=UserRole.Owner, restrictResourceAccess=false, allowedRolesCreate={"Role1","Role2"}, allowedRolesRead={"Role1","Role3"}, allowedRolesWrite={"Role3"}, allowedRolesGrant={}, roleClassesMap={"1=MyModule$RoleChecker","2=Basics$Role"})Java
Since Yambas 3.3.0 it is also possible to add a description or some additional custom information like a class-specifc JSON string to your class. For this purpose use the class annotations Description and CustomMeta.
Example for a Model annotation:
@com.apiomat.nativemodule.Description( value = "My Class description" )@com.apiomat.nativemodule.CustomMeta( value = "{ \"name\" : \"SimpleJson\" }" )
This generated class cannot be changed. Although changes to the data model can be made through the Dashboard and downloaded afterwards using the native module download. Unchanged files will be overwritten while doing so.
However, it is possible to add new attributes directly in the source code of a user-defined class. They will be added in
ApiOmat
automatically as soon as the updated source code is uploaded.
The SDK can be downloaded afterwards if it isn't required to define getters and setters oneself since existing classes will be replaced by generated ones.
In order for changes in these classes to take effect after uploading, the update flag in the sdk.properties file must be set with true. If existing attributes need to be deleted or modified as well, the flag has to be set to overwrite. If you don't want any of this, set it to false or comment it out.
Attribute Annotations
With attribute annotations you are able to specify different type of attributes such aus additional attribute-specific information.
Java
References can be annotated with the EmbeddedObject annotation to mark them as Embedded Object .
Example for embedded object:
@com.apiomat.nativemodule.EmbeddedObject private Address address = null;Java
Attributes of type Long, Double, String, and Date can also be annotated with a validation pattern. If you define a regular expression (regexp), any value for this particular attribute will be matched against this expression. In case the matching fails, saving the object will be rejected. Next to this you can define a min and max length for an attribute.
Example for pattern annotation:
@javax.validation.constraints.Pattern ( regexp = "[0-9]*" )private String phoneNumber = null;@javax.validation.constraints.Size( min = 6, max = 99 )private String password = null;When using collection attributes, the regex and min and max length are checked for each element.
Java
In addition, you can include more detailed information about the attributes usage by setting the description and example annotation. Since Yambas 3.3.0 you also have the possibility to define any attribute-specific custom meta information you like.
Example for description and example annotation:
@com.apiomat.nativemodule.Description ( value = "this field is used for the phone number of a user")@com.apiomat.nativemodule.Example( value = "034126422235")@com.apiomat.nativemodule.CustomMeta( value = "{ \"externalType\" : \"PHONE\" }" )private String phoneNumber = null;Java
To avoid that the data of a specific MetaModelAttribute is logged to the OpLog (aka AuditLog) because it contains sensible data, you can use the annotation @SensibleData .
Keep in mind, that the data of attributes mark with this annotation will not be encrypted but obscured to the AuditLog. For more information see the section about the Audit Log.
Example to mark an attribute's data as sensible:
@com.apiomat.nativemodule.SensibleDataprivate String mySensibleData;Java
A new feature of Yambas 3.4.0 is the possibility to mark a MetaModelAttribute as encrypted attribute to define that the data to this attribute should be encrypted on SDK side.
Or in other words this annotation enables the possiblity to encrypt a specific String attribute of a class by SDK. The encryption has to be implemented and enabled in the SDK.
Check the SDK Reference page and search for "Encrypting an attribute" to see the current SDK implementations.
This is useful if you want to encrypt plaintext on client side which shouldn't be readable by YAMBAS.
Example to mark attribute as encrypted:
@com.apiomat.nativemodule.EncryptAttributeprivate String mySecret;