Getting Started
If you’ve received your ApiOmat credentials from your ApiOmat Admin, click here to skip to the next section. If you are the Super Admin, visit your ApiOmat Dashboard and log in.
When you log in as the Super Admin, you start on the Organizations screen where you can create a group of customers (or developers in ApiOmat). Like the Super Admin, an organization has its own account and can manage their own customers. The Super Admin can assign organizations or customers contracts, which they must agree to before gaining access to ApiOmat. Contracts can be anything from NDAs, Style Guides or Standards. You can read more about contracts here.
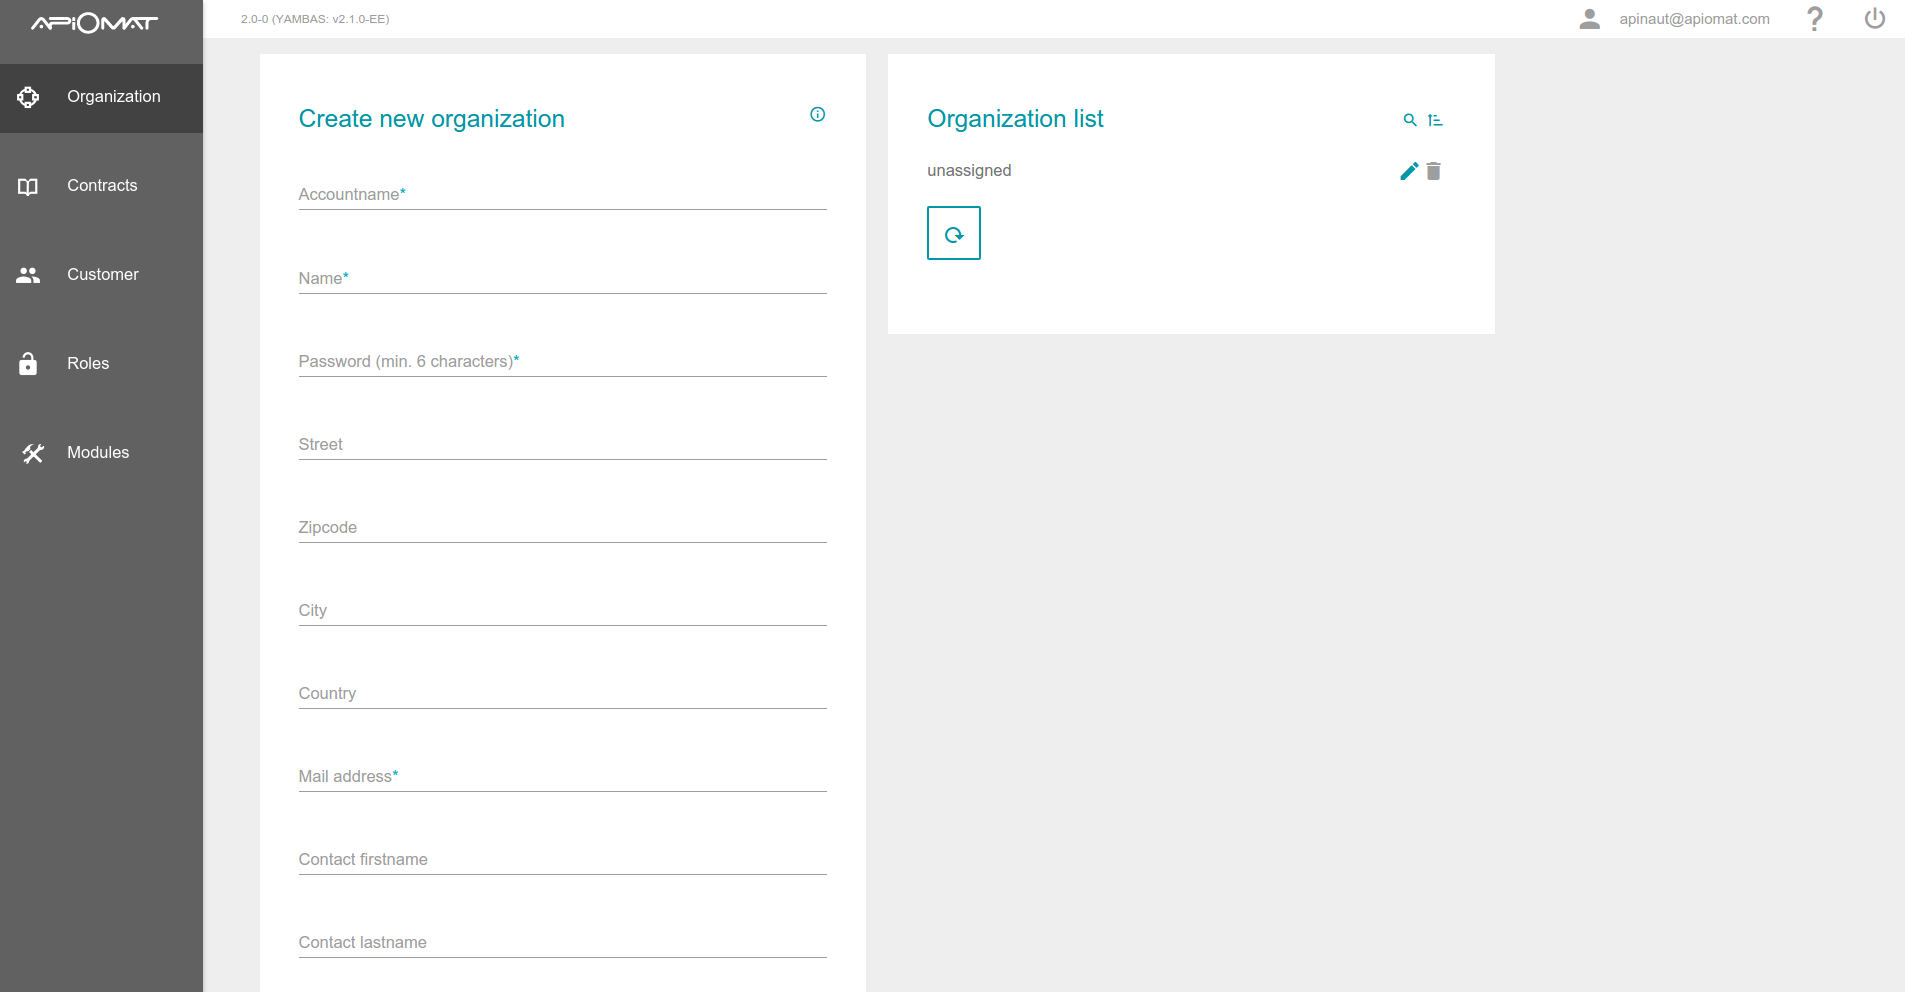
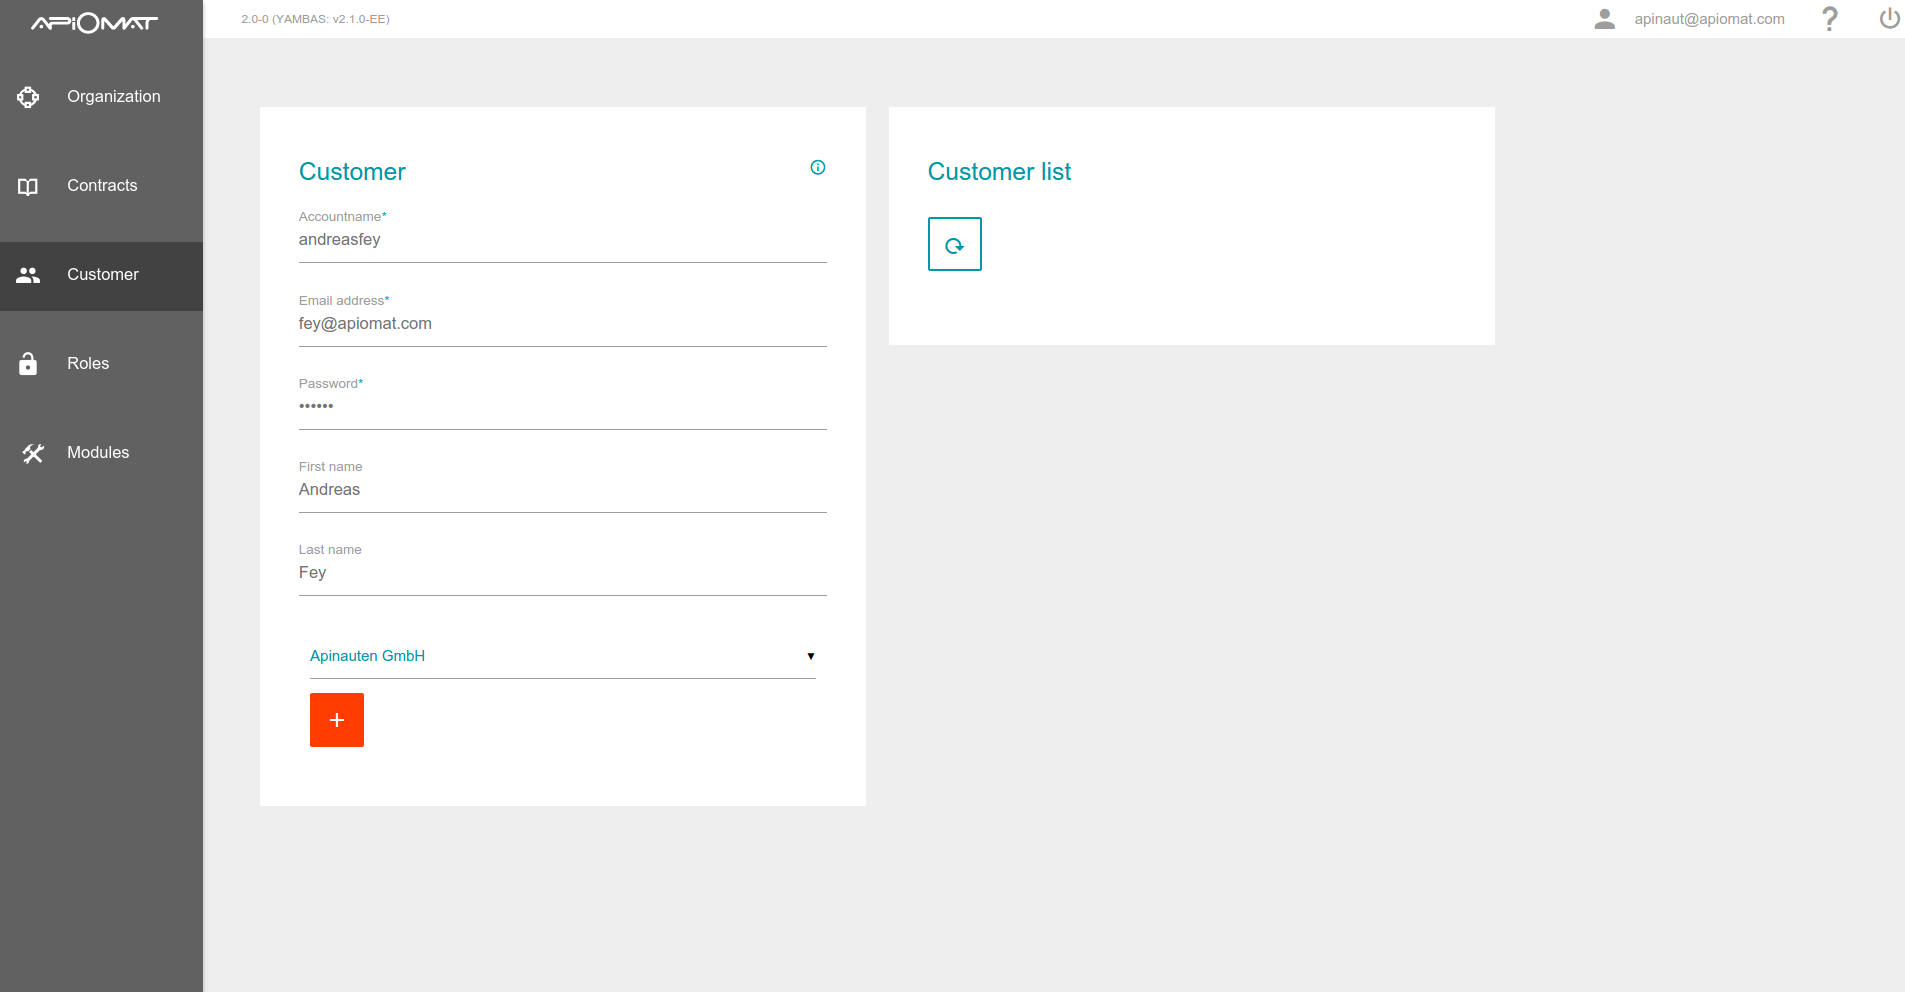
By clicking “Customer” on the side menu, the Super Admin or Organizations can create individual customer or developer accounts. If an organization creates a customer account, they will be assigned to that organization. Once the account is created, the user can access the ApiOmat Developer Dashboard.
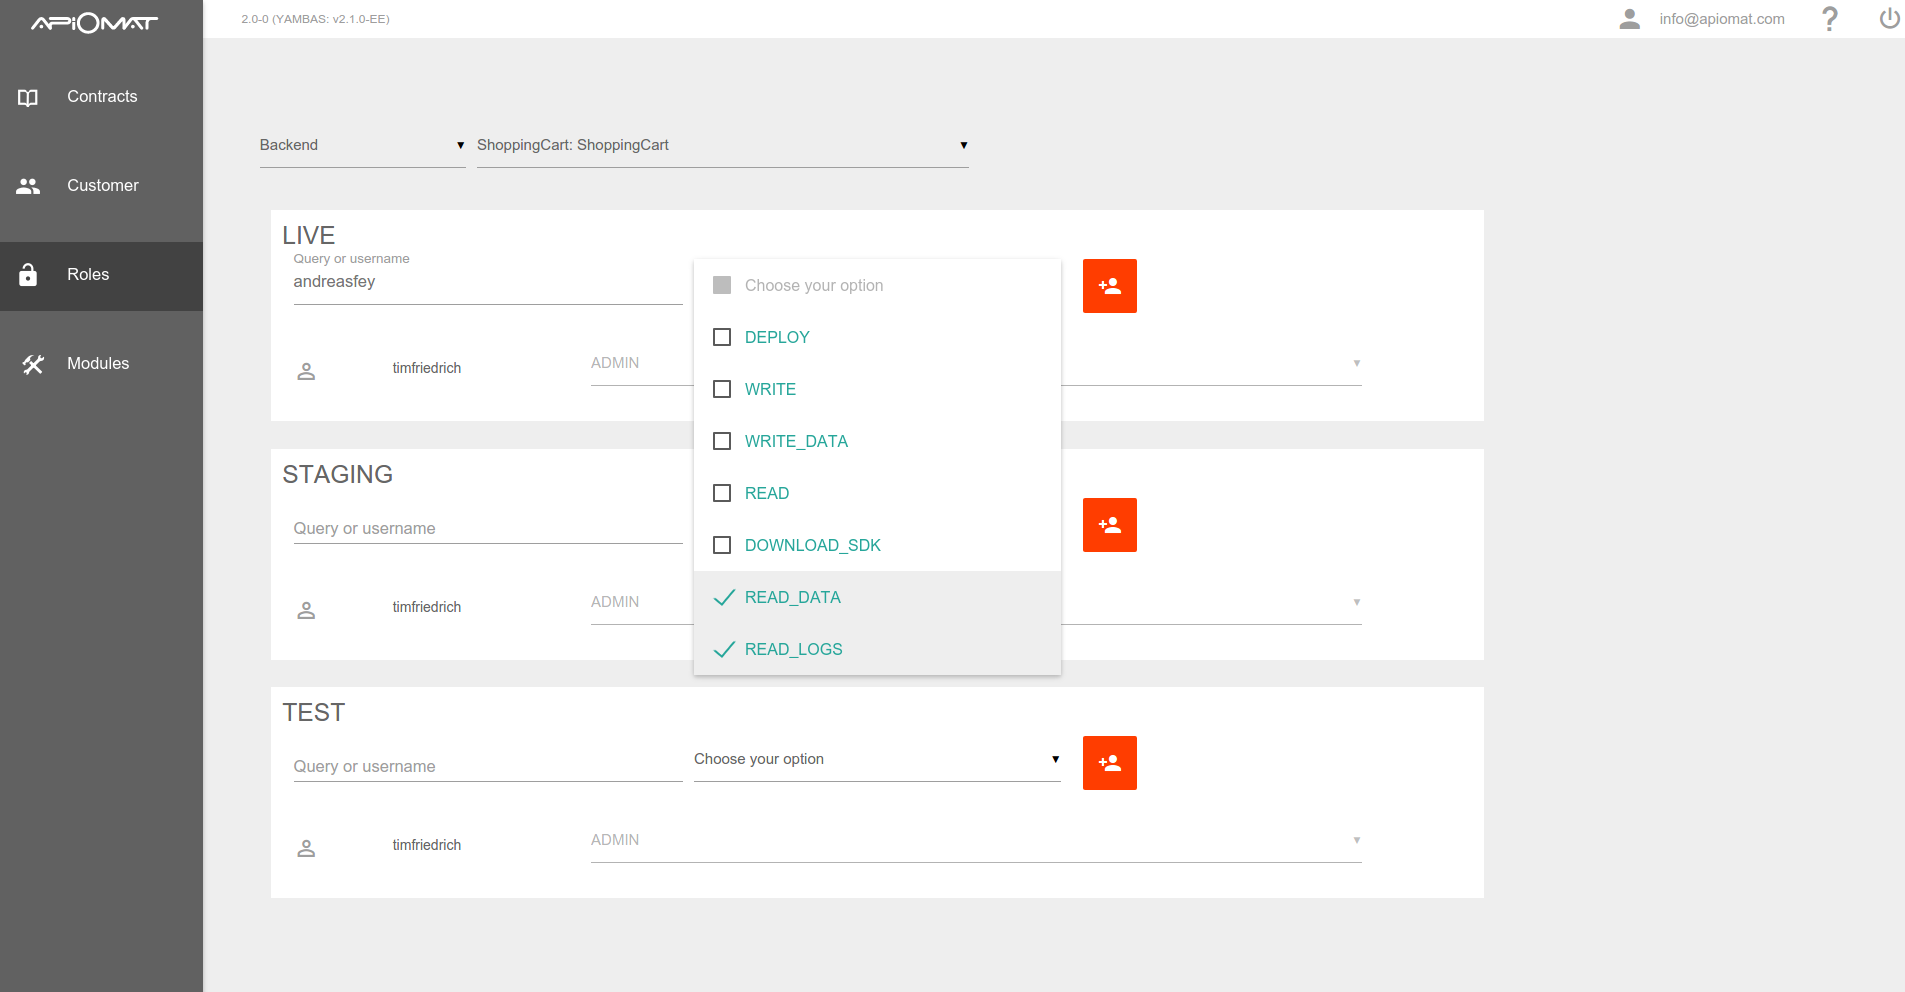
The Super Admin can also set roles for organizations and individual developers, and organizations can set access rights for their customers as well. The roles can be defined on any development environment, and can also be set individually per application and per ApiOmat module.
After creating a customer account, you can log out as the Super Admin and log back in as a customer (or developer). Once you log in again, you'll see the developer dashboard shown below. Let's take a closer look at the pages inside the ApiOmat Dashboard.
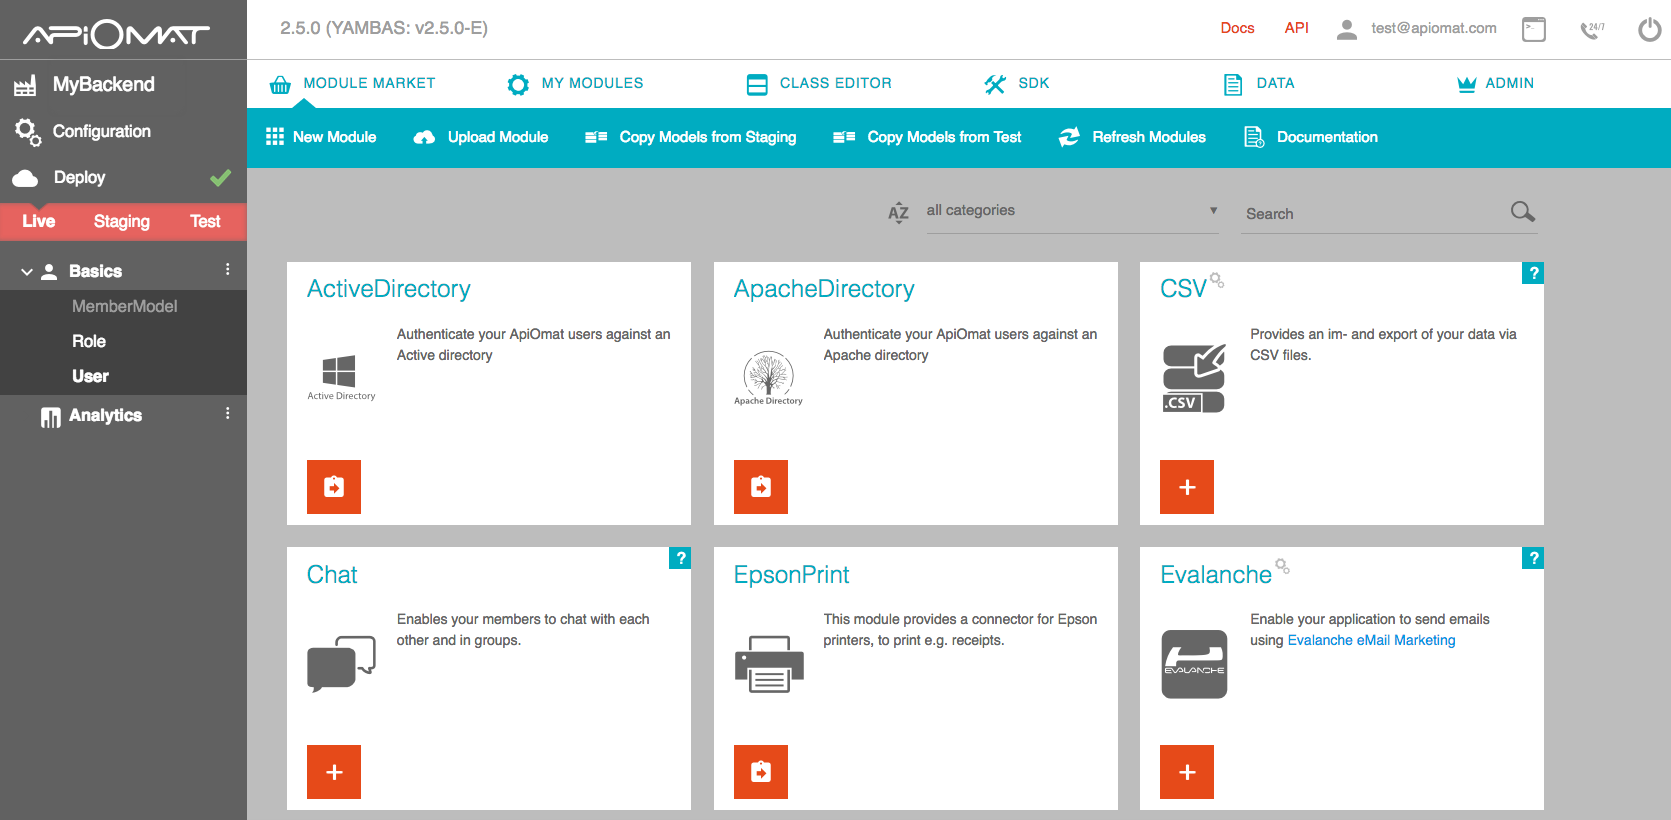
On the first page you see your created app and a bunch of modules like Facebook, Mandrill or Restore. Modules are encapsulated and ready-to-use functionality for your app; for example if you want to send e-mails from your app – add the Mandrill module. If you want to access a facebook timeline – add the Facebook module. If you need to write some server side business logic – add the Server Code module.
Take a look at the left menu; you will see your added modules and all classes contained in them. So, if you previously added the Facebook module, you will now see the classes FBLike, FBComment, etc. in the menu. Additionally, there is a Basic module added to every app by default. This one contains a class for your app’s user and, if you want to use a role-based authentication, a class for roles. You can find out how the User and Role classes are working in this user management article and this one about security. Switch to Class Editor tab in the main menu to see details of generated classes or edit you own created.

You can create a new Class by clicking on the New Class icon on the upper main menu. Then set inheritance and access for this class and add all necessary attributes. All common data types are supported and of course you can create references by setting other classes as attribute type.
If your app is more complex and you need some server side business logic, just add the Server Code module on the Module Market tab. You can switch to the Server Code tab within the Class Editor screen on the right and write JavaScript functions. We provide hook methods for all requests, enabling you to read or manipulate data going in and out of ApiOmat.
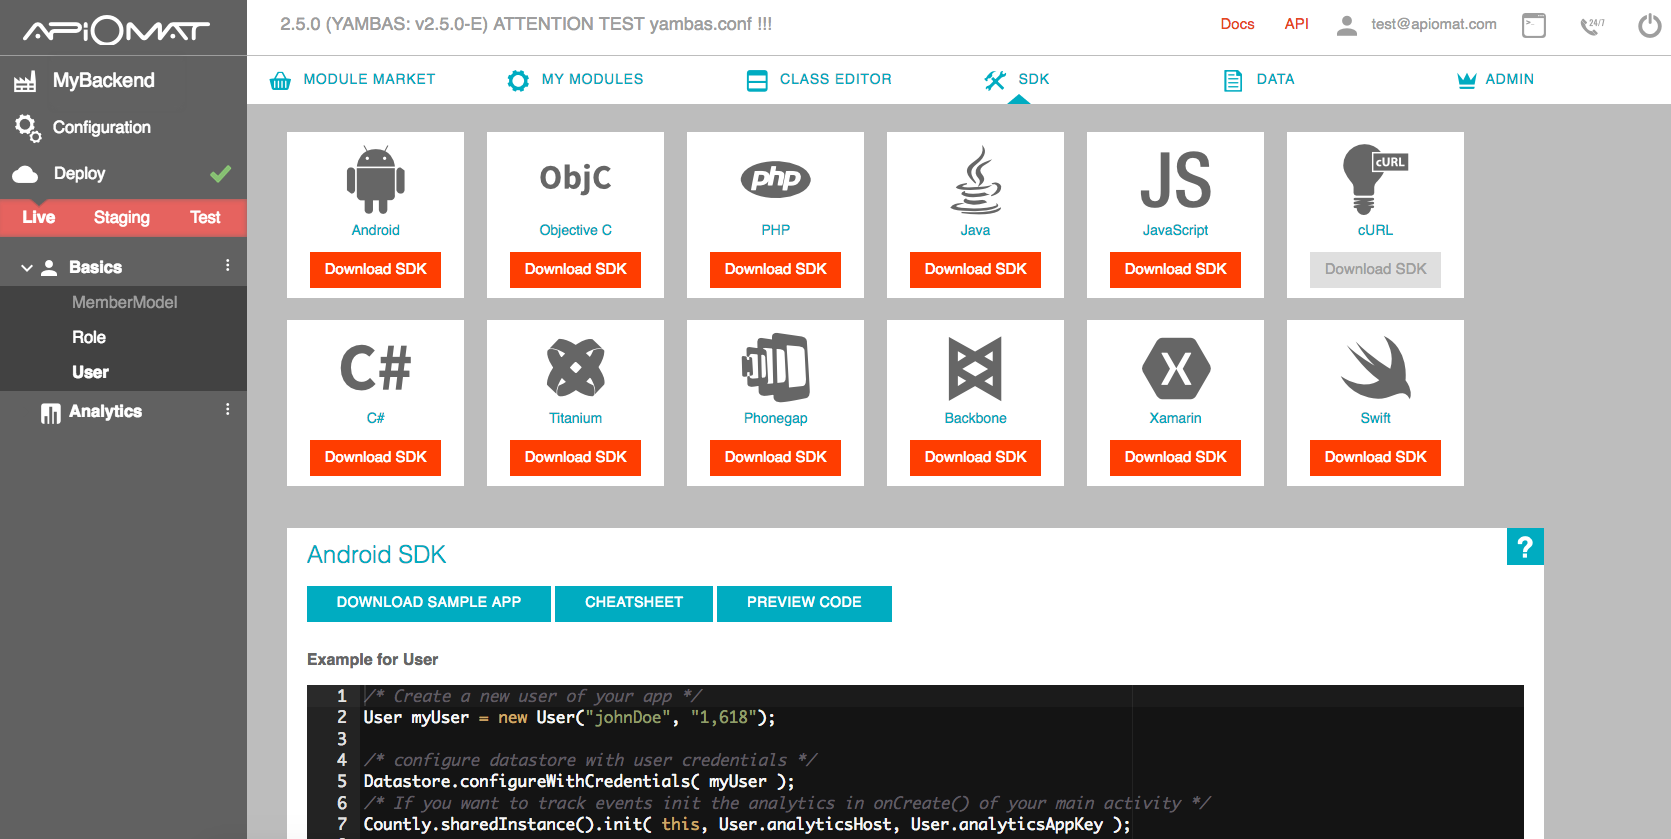
All you need to do for starting the backend is hitting the “Deploy” button on the left menu. Your backend is now up and running and accessible from your app – in theory. The connection from your app to ApiOmat is missing at this moment. You can go straight to our REST API documentation and implement the Data Access Layer for yourself, but the most common and elegant way is to use the SDK. Therefore, switch to the SDK tab and select your app’s programming language and download the SDK.
Unzip and copy it into your project, use the example code to get started and use your self-created classes with the very same attributes you created in the class editor.
You might have seen that we provide generated SDKs rather than generic ones. We believe that these generated SDKs are so much easier for you to use and a lot more more robust, that it will dramatically speed up your implementation time. You can read about the details here.
ApiOmat provides additional features as shown in this guide, like the data editor, the query language or our My Modules tab. In this documentation section you can find out more about it, and if you have questions, go to our helpdesk.