The Apidocs
In the last tutorial, we build our very own rest-endpoint. We explained two ways to execute this restendpoint: One via the dashboard, and another one by accessing the URL which adresses the resource. There is a third way: The Apidocs.
-
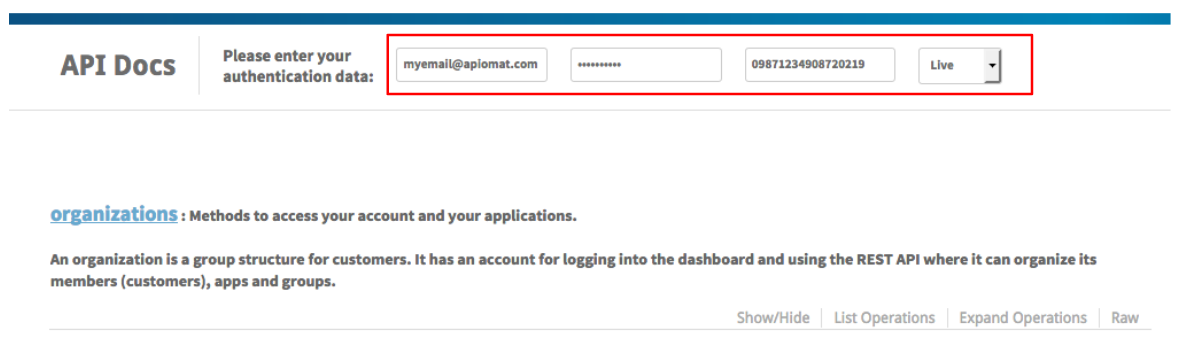
Open your browser and go the URL: [baseUrl]/apidocs . You should arrive here:

-
Before I explain to you where you just arrived and what all this is supposed to mean, enter your username, password and api Key:
-
In case you ask yourself where to find the api-key of your app, you can do it like this:
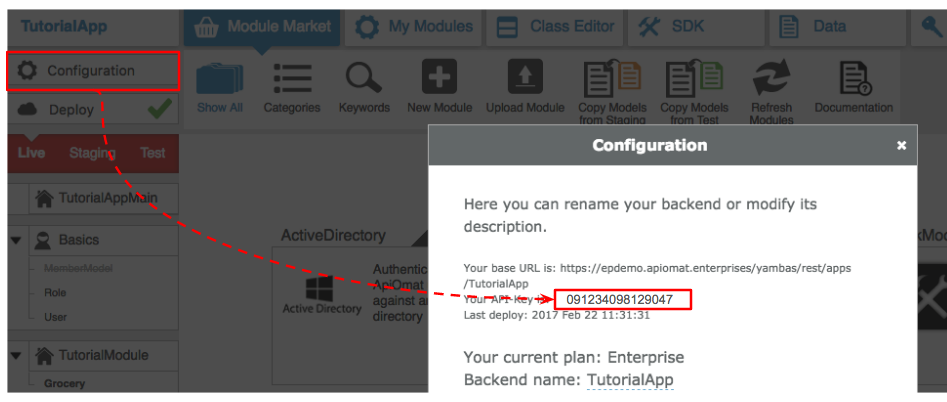
-
-
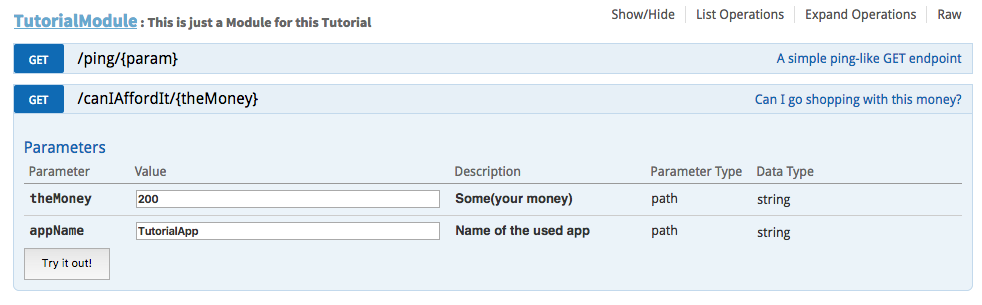
Now, scroll through the Apidocs until you find the name of your module. Using the example we've been workin through all this time, this is the "TutorialModule". Click on it to open a list of all rest-methods this module offers. There you should be able to see the method you already created "canIAffordIt". There, you can enter all informations just as you would when accessing the method through the dashboard. Hit execute and see if it works!
This should already give you a hint about what the apidocs are: This site offers you an overview over all the rest-endpoints offered by the ApiOmat, as well as an interface to use them. In reality, almost everything you can do via the dashbord, you can also do by executing the corresponding restmethod via the apidocs. This includes: Creating new apps, creating new modules, creating new classes, CRUDing instances: basically everything we learning up until this point.
-
Just to give you one more example on how to use the apidocs, let's use the apidocs to create a new instance. Remember this tutorial where you created your first class-instance (a grocery)? We will do the same, just through the apidocs. To do that, search for the "apps"-section and click on it.
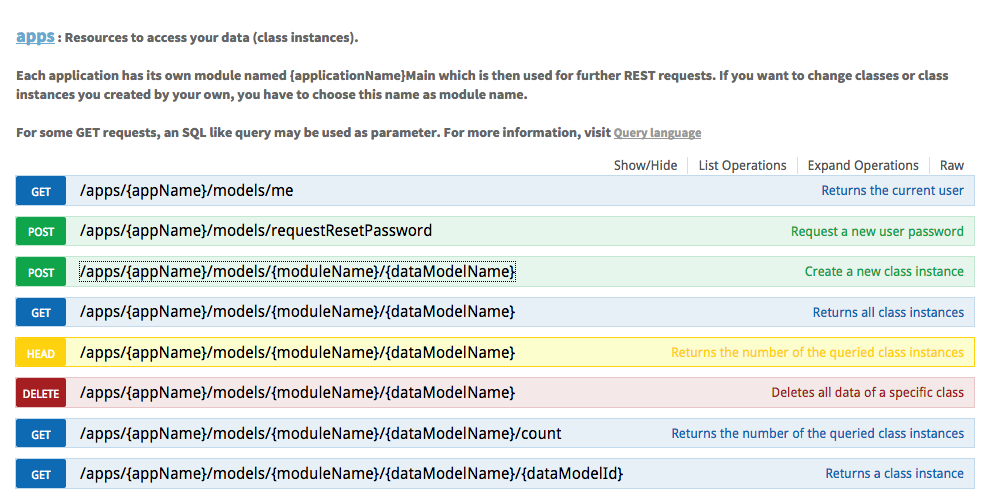
You see the colored labels on the left of every method? These indeacate if the corresponding rest-method is of type GET, POST, PUT or DELETE. This already gives you a hint about what a method is for - a GET will retrive some kind of ressource, a POST will create some kind of ressource and so on.
-
We want to create a new class instance. So you have to click on the method which says - you already guessed it - "Create a new class instance". Enter the informations as indicated below:
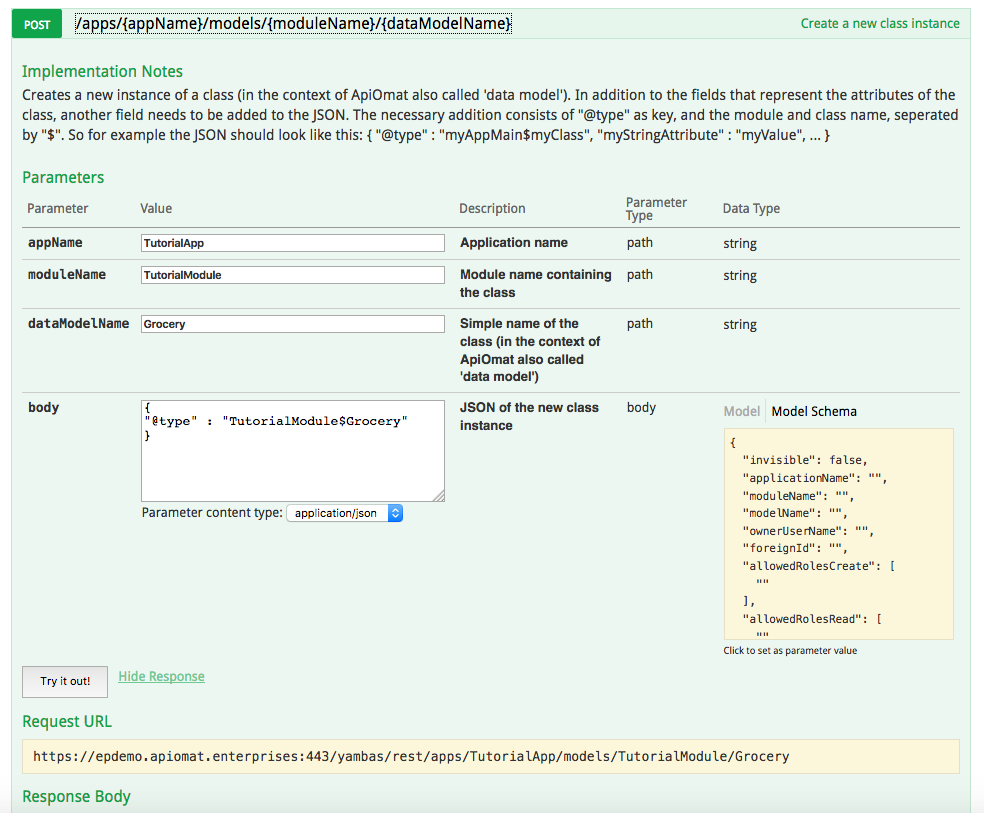
Depending on the method you want to execute, you have to provide the appropriate parameters. In this case, it is the appName, moduleName, dataModelName and a body. The information provided through the body can sometimes be a little difficul the replicate. Most of the time, there is a example provided (as indicated by the model Schema) that you can copy and paste. In this case, the body needs to provide the moduleName and the dataModelName encoded as json as shown in the picture.
-
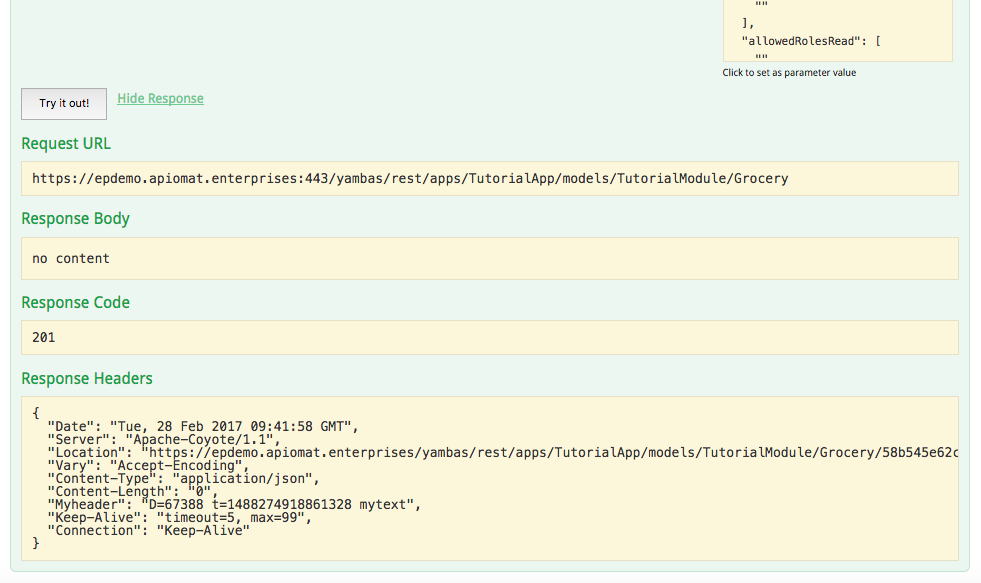
Hit Try it out! The response let's you know if everything worked as intented. A response code starting with "2" means that everything worked fine, anything else means that something went wrong. Especially the "Request-URL" is interseting: It shows you how you could have executed this method by adressing it via this URL.
-
Go to the dashbord and check if the new instance of your grocery has been added in the "Data"-View. If you forgot how to do that, check this tutorial.
Now you've gotten to know various ways to use REST-endpoints provided by the ApiOmat. Now you may ask yourself - wait, is there a way to use Rest-APIs of external webservers? There is, and in the next tutorial we show you how.