Add your own REST endpoints
In this section of the tutorial, we will show you how to define REST endpoints in your services and add your API documentation to integrate your new endpoint in your service ApiDocs. We will also give you some tips on how to use the Spring Web features.
Be aware that this version of service support does not allow you to create REST endpoints which are automatically available in the Dashboard, as you may be used to with Native Modules. See Service Limitations.
Create a REST endpoint
We will create an endpoint which takes an amount of money as a parameter and responds with whether this amount is enough to go shopping with the current grocery list (i.e. whether the given amount of money is >= the sum of the prices of all existing groceries).
Never add custom logic to the generated API interface and implementation, they will get overwritten every time you download your service from the Dashboard or use the brewer-maven-plugin.
Instead, use your own controller classes and make sure to place them in the controller package, or else the endpoints will not show up in the API docs because Explorer will not be able to find them.
Let's create a new controller:
-
In your IDE, open your service project and create a new class in the controller package, e.g. GroceryManagementController:
GroceryManagementController.java@Controller/* FYI you could also map all methods of your controller to a global path */// @RequestMapping( "/groceries/management" )publicclassGroceryManagementController{...} -
Create a new method and map it to the desired path (e.g. /apps/{appName}/models/TutorialService/Grocery/management/{money} ), with GET as the request type and the application name and amount of money as path parameters. Don't forget to autowire the grocery service which you'll have to use to retrieve the list of groceries:
GroceryManagementController.java@Autowired@Qualifier("groceryService")privateIBaseDataModelService<Grocery> service;/*** Evaluate whether the current groceries list is affordable with the provided money.** @param appName* @param money* @return a message indicating whether the groceries are affordable*/@RequestMapping( path ="/apps/{appName}/models/TutorialService/Grocery/management/{money}",method = RequestMethod.GET )publicResponseEntity<String> afford(@PathVariable("appName")finalString appName,@PathVariable( value ="money")finalDouble money ){/* use the grocery service to retrieve the list of groceries */finalList<Grocery> groceries =this.service.loadAll( appName,"",false,false);/* accumulate the prices of all groceries */doublesum =0;for( Grocery grocery : groceries ){sum += grocery.getPrice( );}/* compare the given money to the total price and return the response accordingly */if( sum <= money ){returnnewResponseEntity<String>("You can afford it!", HttpStatus.OK );}returnnewResponseEntity<String>("The provided money is not enough!", HttpStatus.OK );}
Now that you have written your controller logic, the next step is to add documentation to make it available in the apidocs UI.
Add API documentation
In the the previous tutorial you learned how the API documentation was provided by your services endpoints. We will add Swagger annotations to your new controller and its method:
-
Annotate your controller class with the @Api annotation so it will be introspected by the Swagger OpenAPI generator, also add a description and a tag to group all operations under "GroceryManagement":
GroceryManagementController.java@Controller@Api( description ="Grocery management operations", tags = {"GroceryManagement"} )publicclassGroceryManagementController{...} -
Add a description and a tag to the endpoint:
GroceryManagementController.java@ApiOperation( value ="Check if the given amount of money is sufficient to buy the groceries.", tags = {"GroceryManagement"} )publicResponseEntity<String> afford({...} -
Provide some hints about the responses this endpoint may return:
GroceryManagementController.java@ApiResponses( value = {@ApiResponse( code =200, message ="success"),@ApiResponse( code =500, message ="an error occurred") } ) -
Finally, add a description for the method parameters:
GroceryManagementController.javapublicResponseEntity<String> afford(@ApiParam( value ="Application name", required =true)@PathVariable("appName")finalString appName,@ApiParam( value ="Money to check for", required =true)@PathVariable( value ="money")finalDouble money ) -
At this point your method definition should look something like this:
GroceryManagementController.java@ApiOperation( value ="Check if the given amount of money is sufficient to buy the groceries.", tags = {"GroceryManagement"} )@ApiResponses( value = {@ApiResponse( code =200, message ="success"),@ApiResponse( code =500, message ="an error occurred") } )@RequestMapping( path ="/apps/{appName}/models/TutorialService/Grocery/management/{money}", method = RequestMethod.GET )publicResponseEntity<String> afford(@ApiParam( value ="Application name", required =true)@PathVariable("appName")finalString appName,@ApiParam( value ="Money to check for", required =true)@PathVariable( value ="money")finalDouble money ){...} -
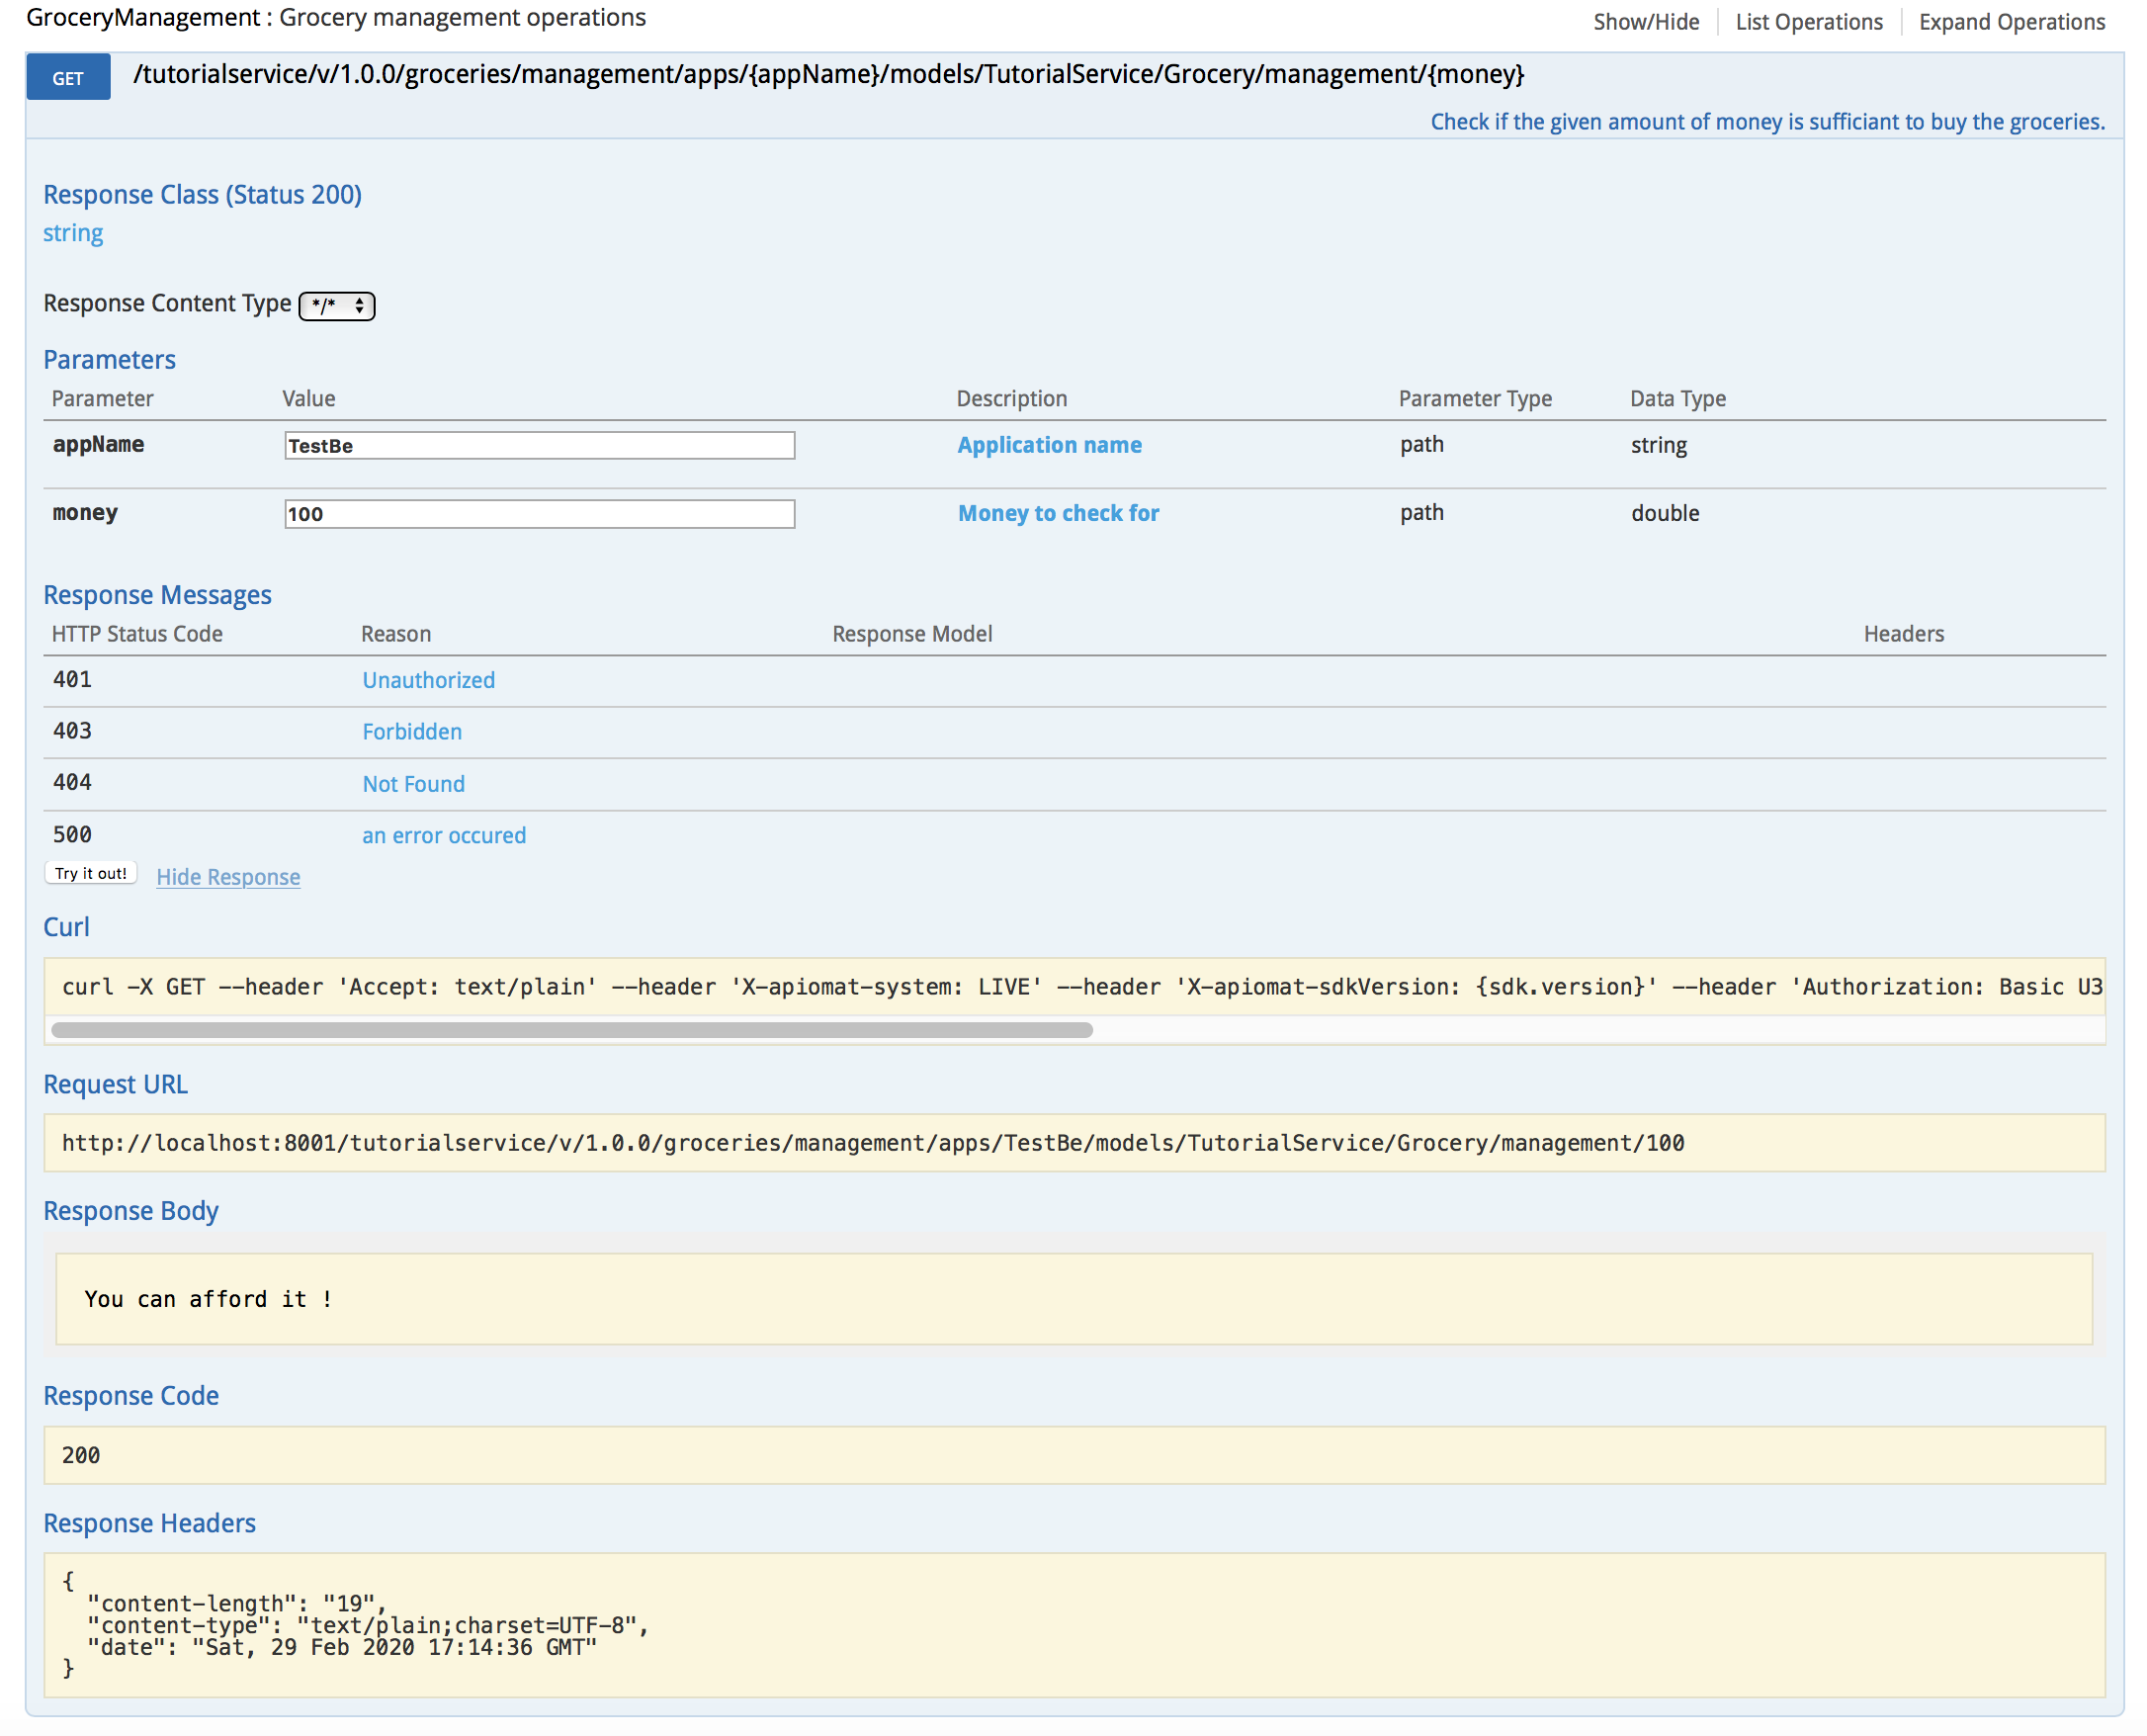
Go to the apidocs UI, your endpoint is available and can be queried from there! Make sure to provide the credentials in the credentials header of the apidocs UI. It can also be used by any third party if the service is publicly available:
Next steps
You have finished the tutorial! Well done.
-
For our in depth guides about services generated using the ApiOmat platform, please refer to the documentation pages under Create your own
-
If you think that services are not enough for your requirements, please have a look at Modules and Connectors
-
For more guides to managing your ApiOmat platform, please see Administration